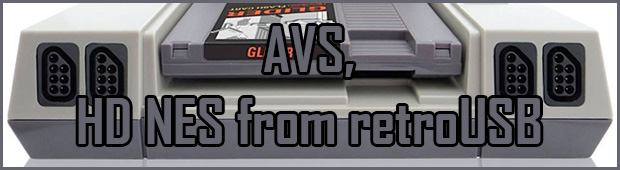
The Nintendo Entertainment System (NES) is an awesome video game console and the only place where there is any room for improvement is in longevity.
Thanks to retroUSB we’re getting exactly that and more.
If you’re a retro Nintendo enthusiast you’re likely to have seen this news all over the Internet. Despite the many third party re-invented Nintendo consoles that we’ve seen appear over the years (such as the Hyperkin Retron 5) the AVS by retroUSB has generated a lot of excitement for me for one very specific reason. It does not use software emulation. Which suggests that the AVS has the potential to perform exactly the same as our original NES consoles; without any of those varied anomalies in visuals and audio that we see with software based emulation.
So why not just stick with your classic and 100% authentic NES Console? Well, you should. Keep that gem in the nerd cave hooked up to that beautiful CRT (Tube) TV. The retroUSB AVS belongs upstairs hooked up to your HD TV via HDMI. This is where longevity kicks in. Slowly old CRT TV’s are disappearing as people continually fail to see their value! Now, thanks to retroUSB we can continue playing the NES in what I’m hoping to be a very authentic way on our modern TVs. With the one exception being vastly improved visuals that composite video used on the original hardware could never deliver.
Below you’ll see a brief list of the AVS’ features and a video demonstration.
SPECS:
Video: 720p Wide Screen HDMI output, 60Hz (NTSC) and 50Hz (PAL)
Audio: 44.1kHz HDMI output with expansion audio from carts.
Display: Variable pixel scaling including integer options (1:1, 4:3, 5:3) with optional darkness scanlines.
Carts: Front loading NES, Top loading Famicom
Ports: Built in NES Four Score Pro, Famicom Expansion Port
Ports: HDMI Type A for video and audio, USB Mini B for power and data.
Cheats: 5 cheat code slots with built in code database supporting Game Genie, Pro Action Replay, Pro Action Rocky, and raw formats
Online: NA Scoreboard online score system through USB
Updates: Upgrade FPGA configuration and menu system through USB
If you’re an Uber Nerd you know about RGB mods that can very significantly improve the video quality of your original NES.
How does the retroUSB AVS stack up against RGB mods and high quality upscalers? Have a look at this excellent video from My Life in Gaming:
For a time I did own a Retro-Bit Retro DUO but the cheap plastics and imperfect emulation compelled me to sell it and stick with my original NES and SNES. I was very tempted to buy the Retron 5 but I never did. Despite seeing it in action (thanks to Nintendo Joe for the loan!) there were enough… differences (I don’t want to say flaws) that held me back from loving it.
At the moment I am very tempted to buy retroUSB’s AVS. It’s not yet available for sale but I believe there will be more news on a release date closer to the end of June 2016. So far it’s been hinted that the cost of the AVS will be under $200 USD.
For anyone not familiar with BitBoxes they are aftermarket cases for your Nintendo Entertainment System (NES) game cartridges or for your Super Nintendo (SNES) game cartridges. If you’re not able to find or afford to collect your NES and SNES games in their original cardboard boxes then the BitBox might be for you.
When adding this second order of new BitBoxes to the previous 5 my collection of NES and SNES game cartridges have started to look pretty impressive.
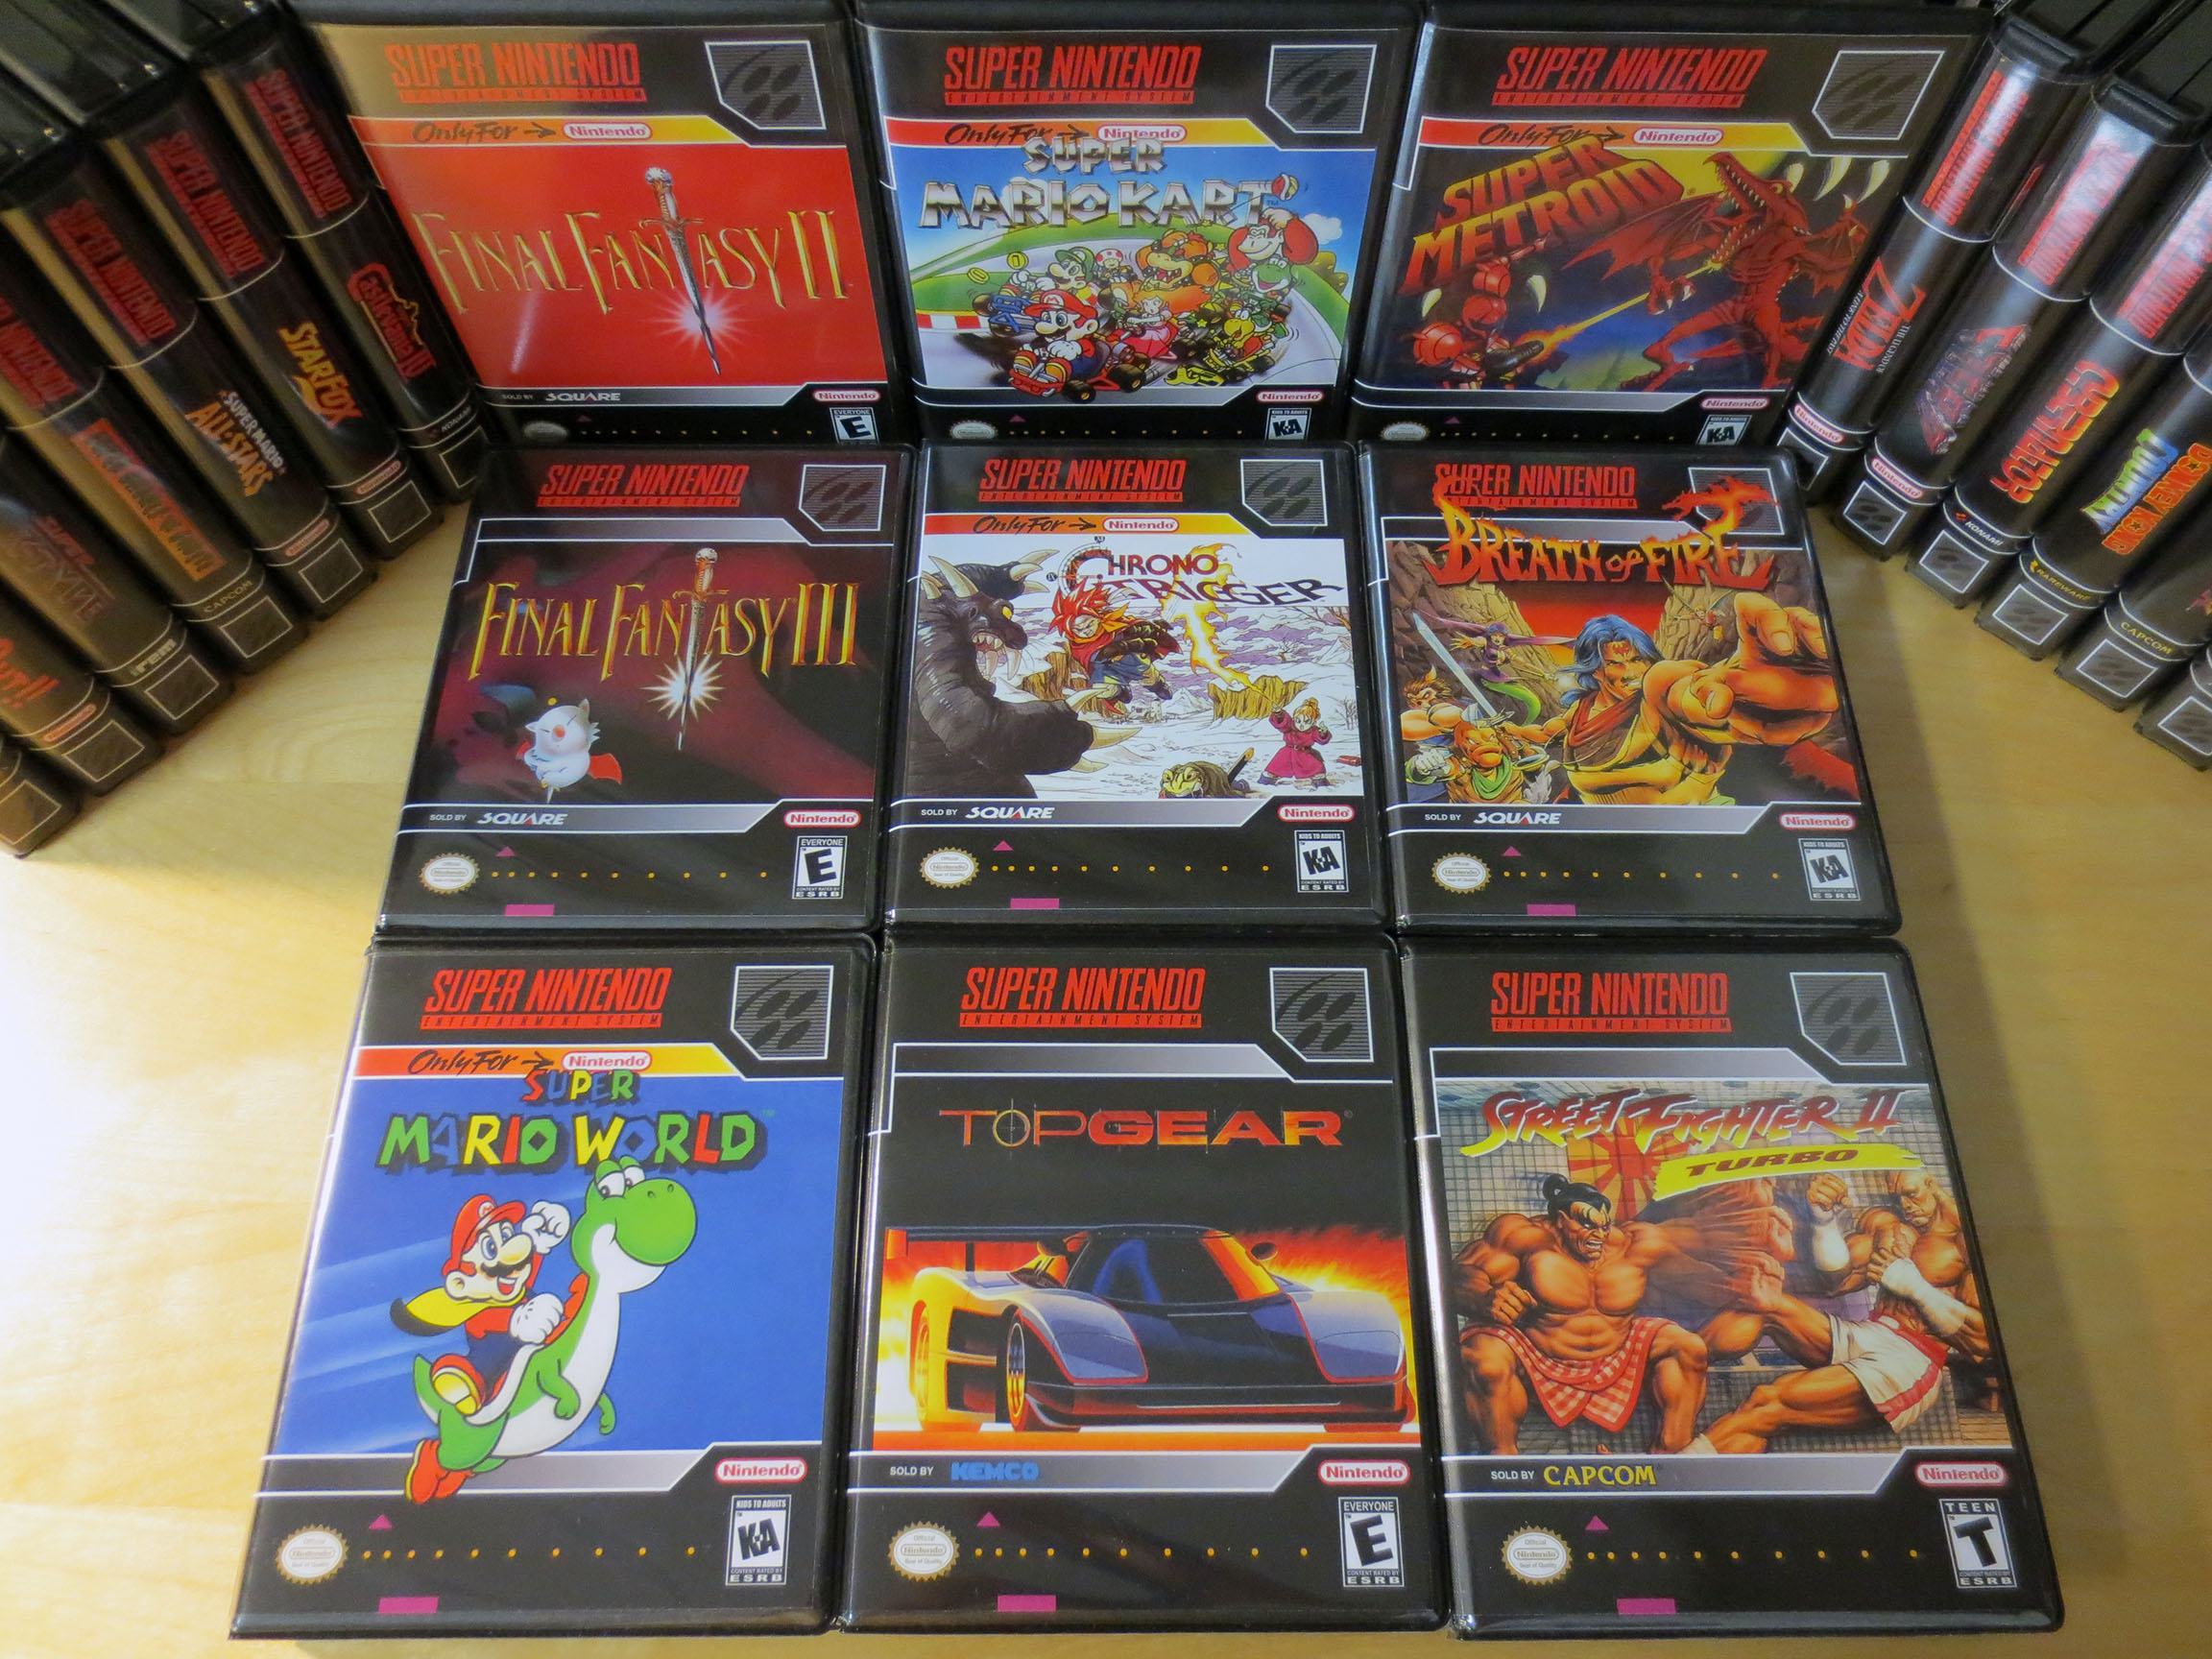
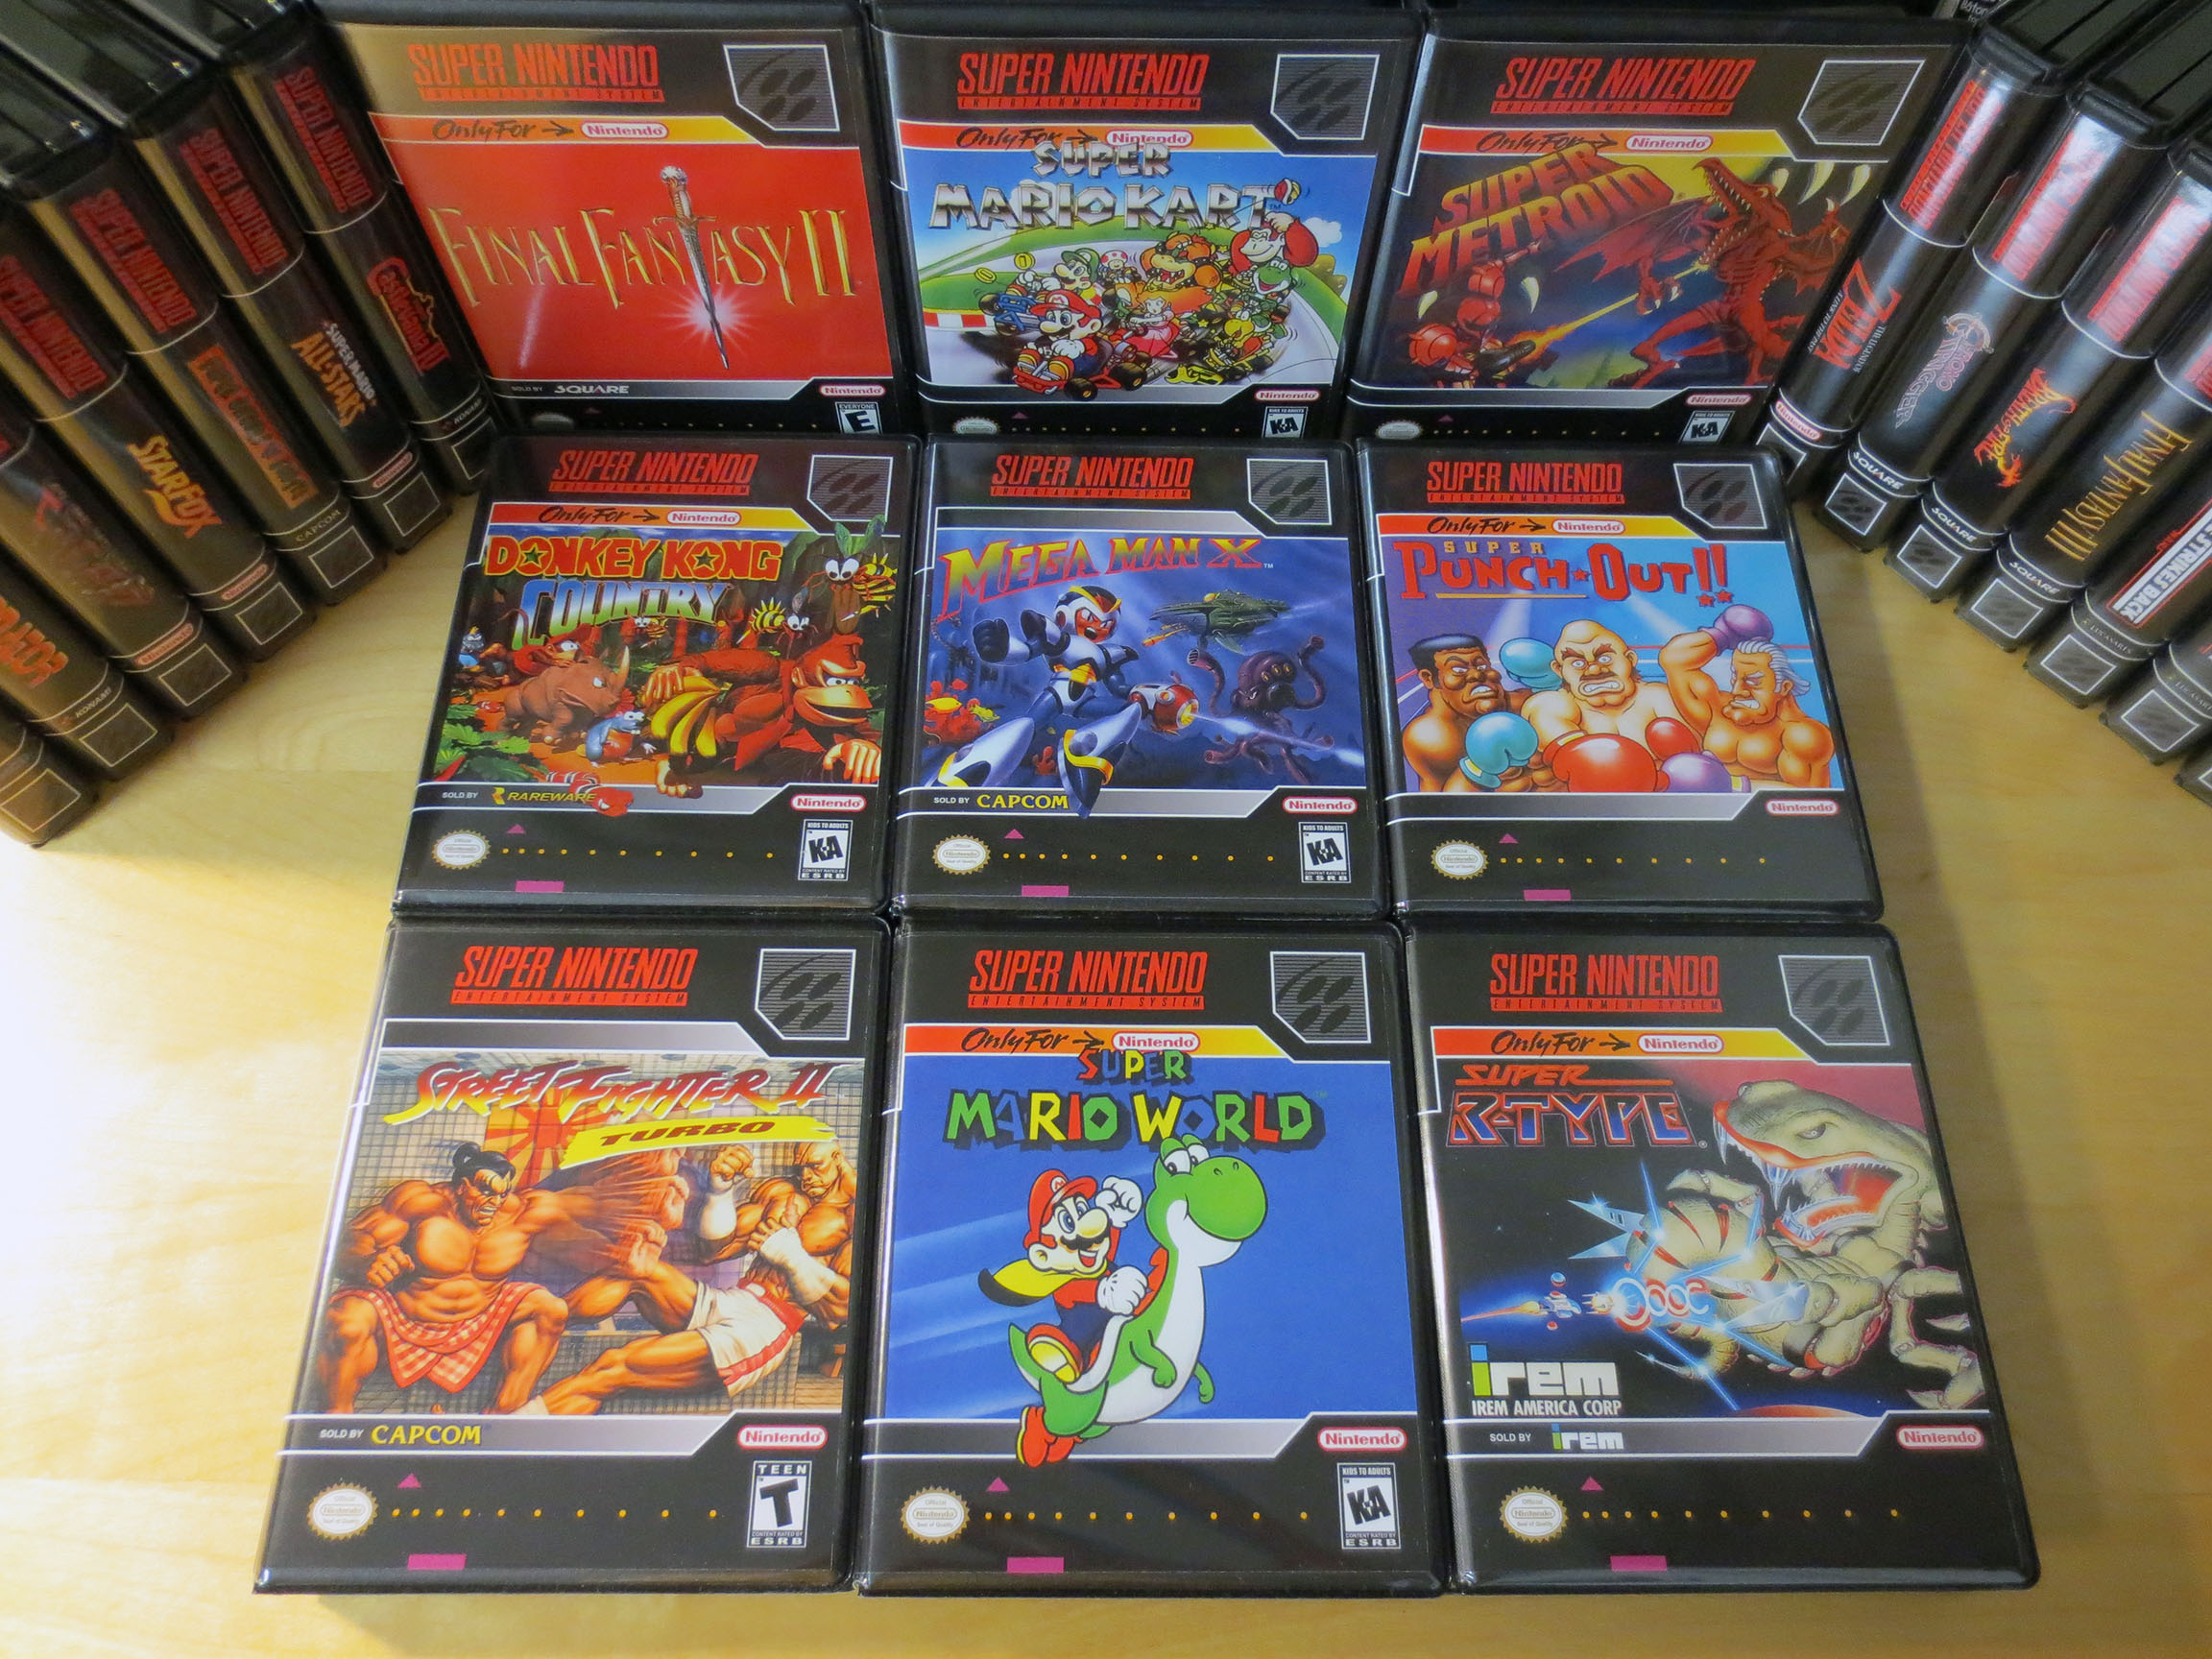
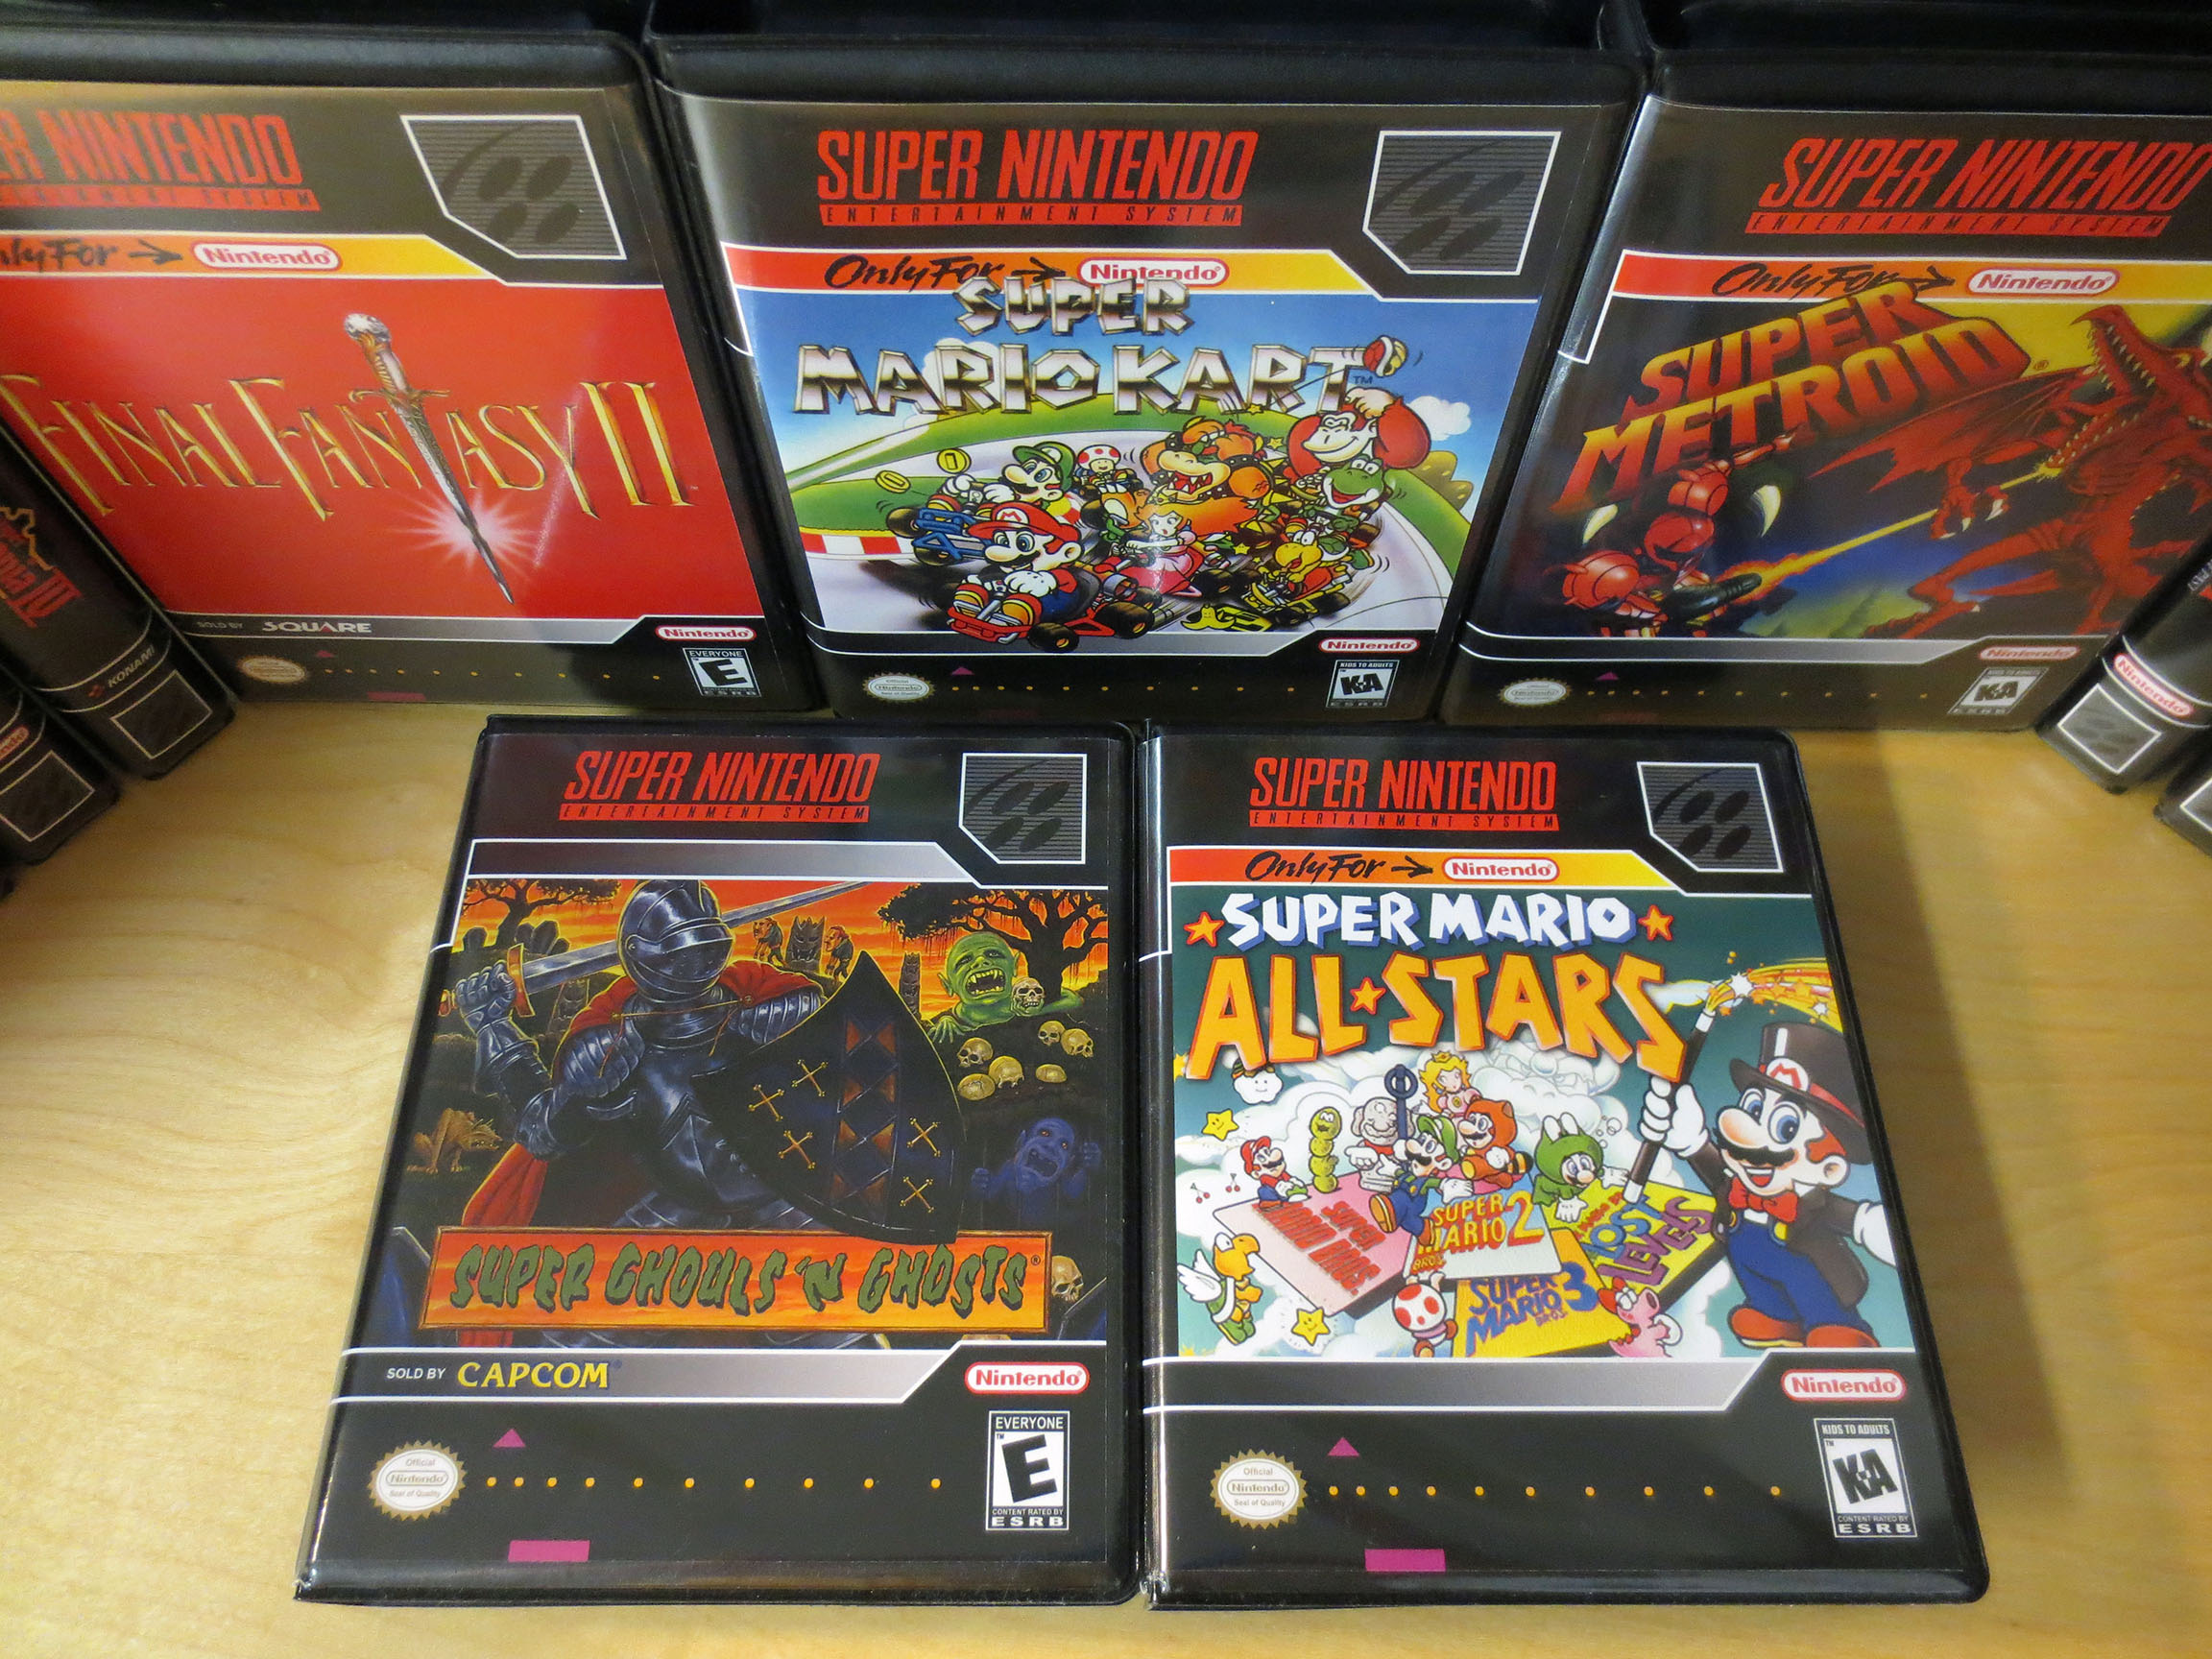
Below you’ll see my new game cases are for Final Fantasy III, Chrono Trigger, Breathe of Fire, Super Mario World, Top Gear and Street Fighter II Turbo.
My Final Fantasy III game cart I bought from a forum member at neo-geo.com for $55 USD including shipping which is about $75-$80 CAD. This is by far the most I’ve spent on any SNES game but we’re talking about Final Fantasy III so I don’t have to say it but I will, ‘totally worth it’.
Chrono Triger I traded for at Retro Game Brothers. It had a $130 CAD price tag and I had to trade in a lot of stuff for it: 2 boxed Neo Geo Pocket games, 3 Genesis games (2 were boxed), 4 NES carts, 1 SNES cart and about 5 complete PS2 games. The only rare items of the lot would be the two NGPC games and maybe Two Crude Dudes for the Genesis. The rest of the SNES games below were given to me by a good friend a year or so back.
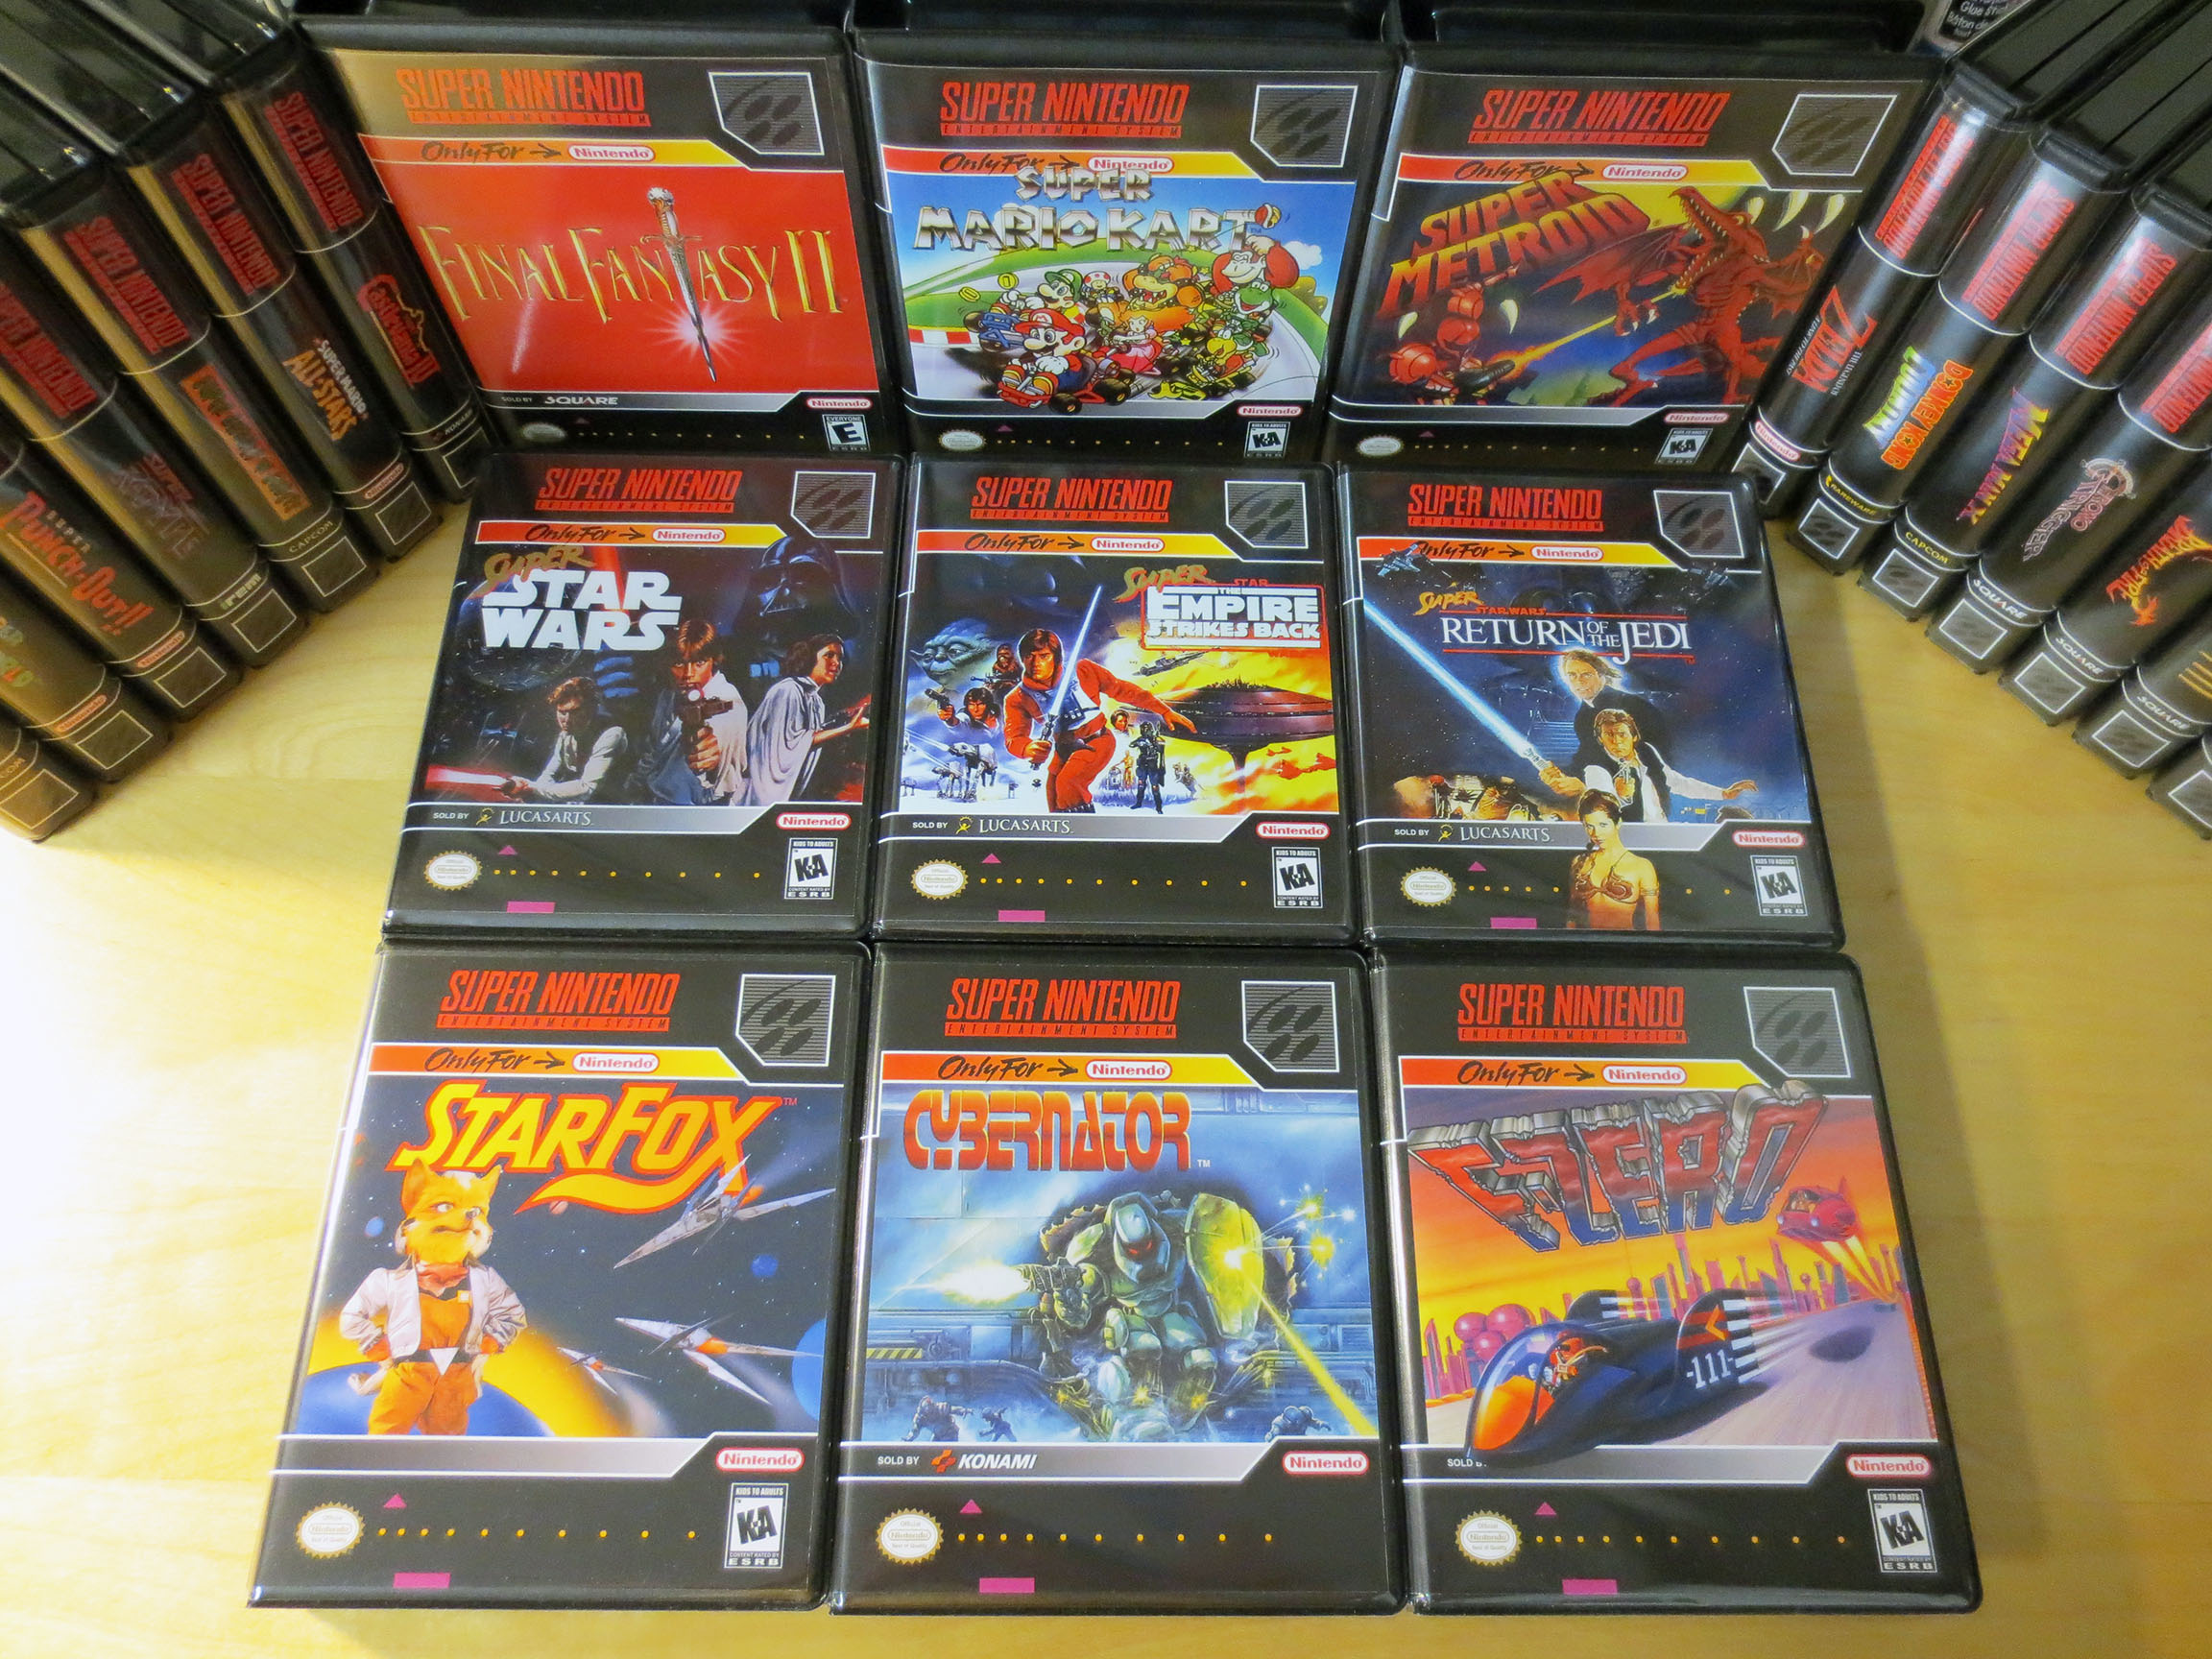
Of the Star Wars trilogy games I only ever played Super Star Wars back in the day but I wanted all three for the collection and to try out. I’ve read that Super Empire Strikes Back is very good. I forget what they cost me but they were not expensive games. All of Star Fox, Cybernator and F-Zero were given to me by the same friend that I mentioned above. In my eyes he’s a very wonderful human being 🙂
Even though my main focus has always been the Sega Genesis, Japanese Sega Mega Drive and the Sega Master System over the years I have been picking up loose SNES and NES carts. I haven’t been as diligent about recording what I’ve paid for my Nintendo games. I think I paid about $30-40 CAD for Mega Man X which was the most expensive of the 6 below. (I’m also noticing that Super Street Fighter II Turbo managed to sneak into the photo shoot a 2nd time… oops.)
Below are Donkey Kong Country, Mega Man X, Super Punch Out, Super Mario World and Super R-Type.
The last two SNES BitBox cases I got for some of my SNES carts are Super Ghouls ‘n Ghosts and Super Mario All Stars.
As good as BitBoxes are they’re not cheap considering how many you’re likely to buy if you start at all. As a result I’ve actually sold many of my NES carts because they were not games that I was really interested in and for every game cartridge I sold that would be one less BitBox I had to buy. I know, I know… I’m crazy. What am I collecting? Cool old retro video games or boxes? The up side of my new philosophy is that it really forces me to consider how much I really want a particular game. It’s because of this that I feel like I’m going to end up with a quality collection of games that are either really good or are games that I have a lot of nostalgia for.
The next collecting trap that BitBoxes landed me in is offering a convenient place to store manuals. Just great… so yeah, now I’m looking for game manuals too.
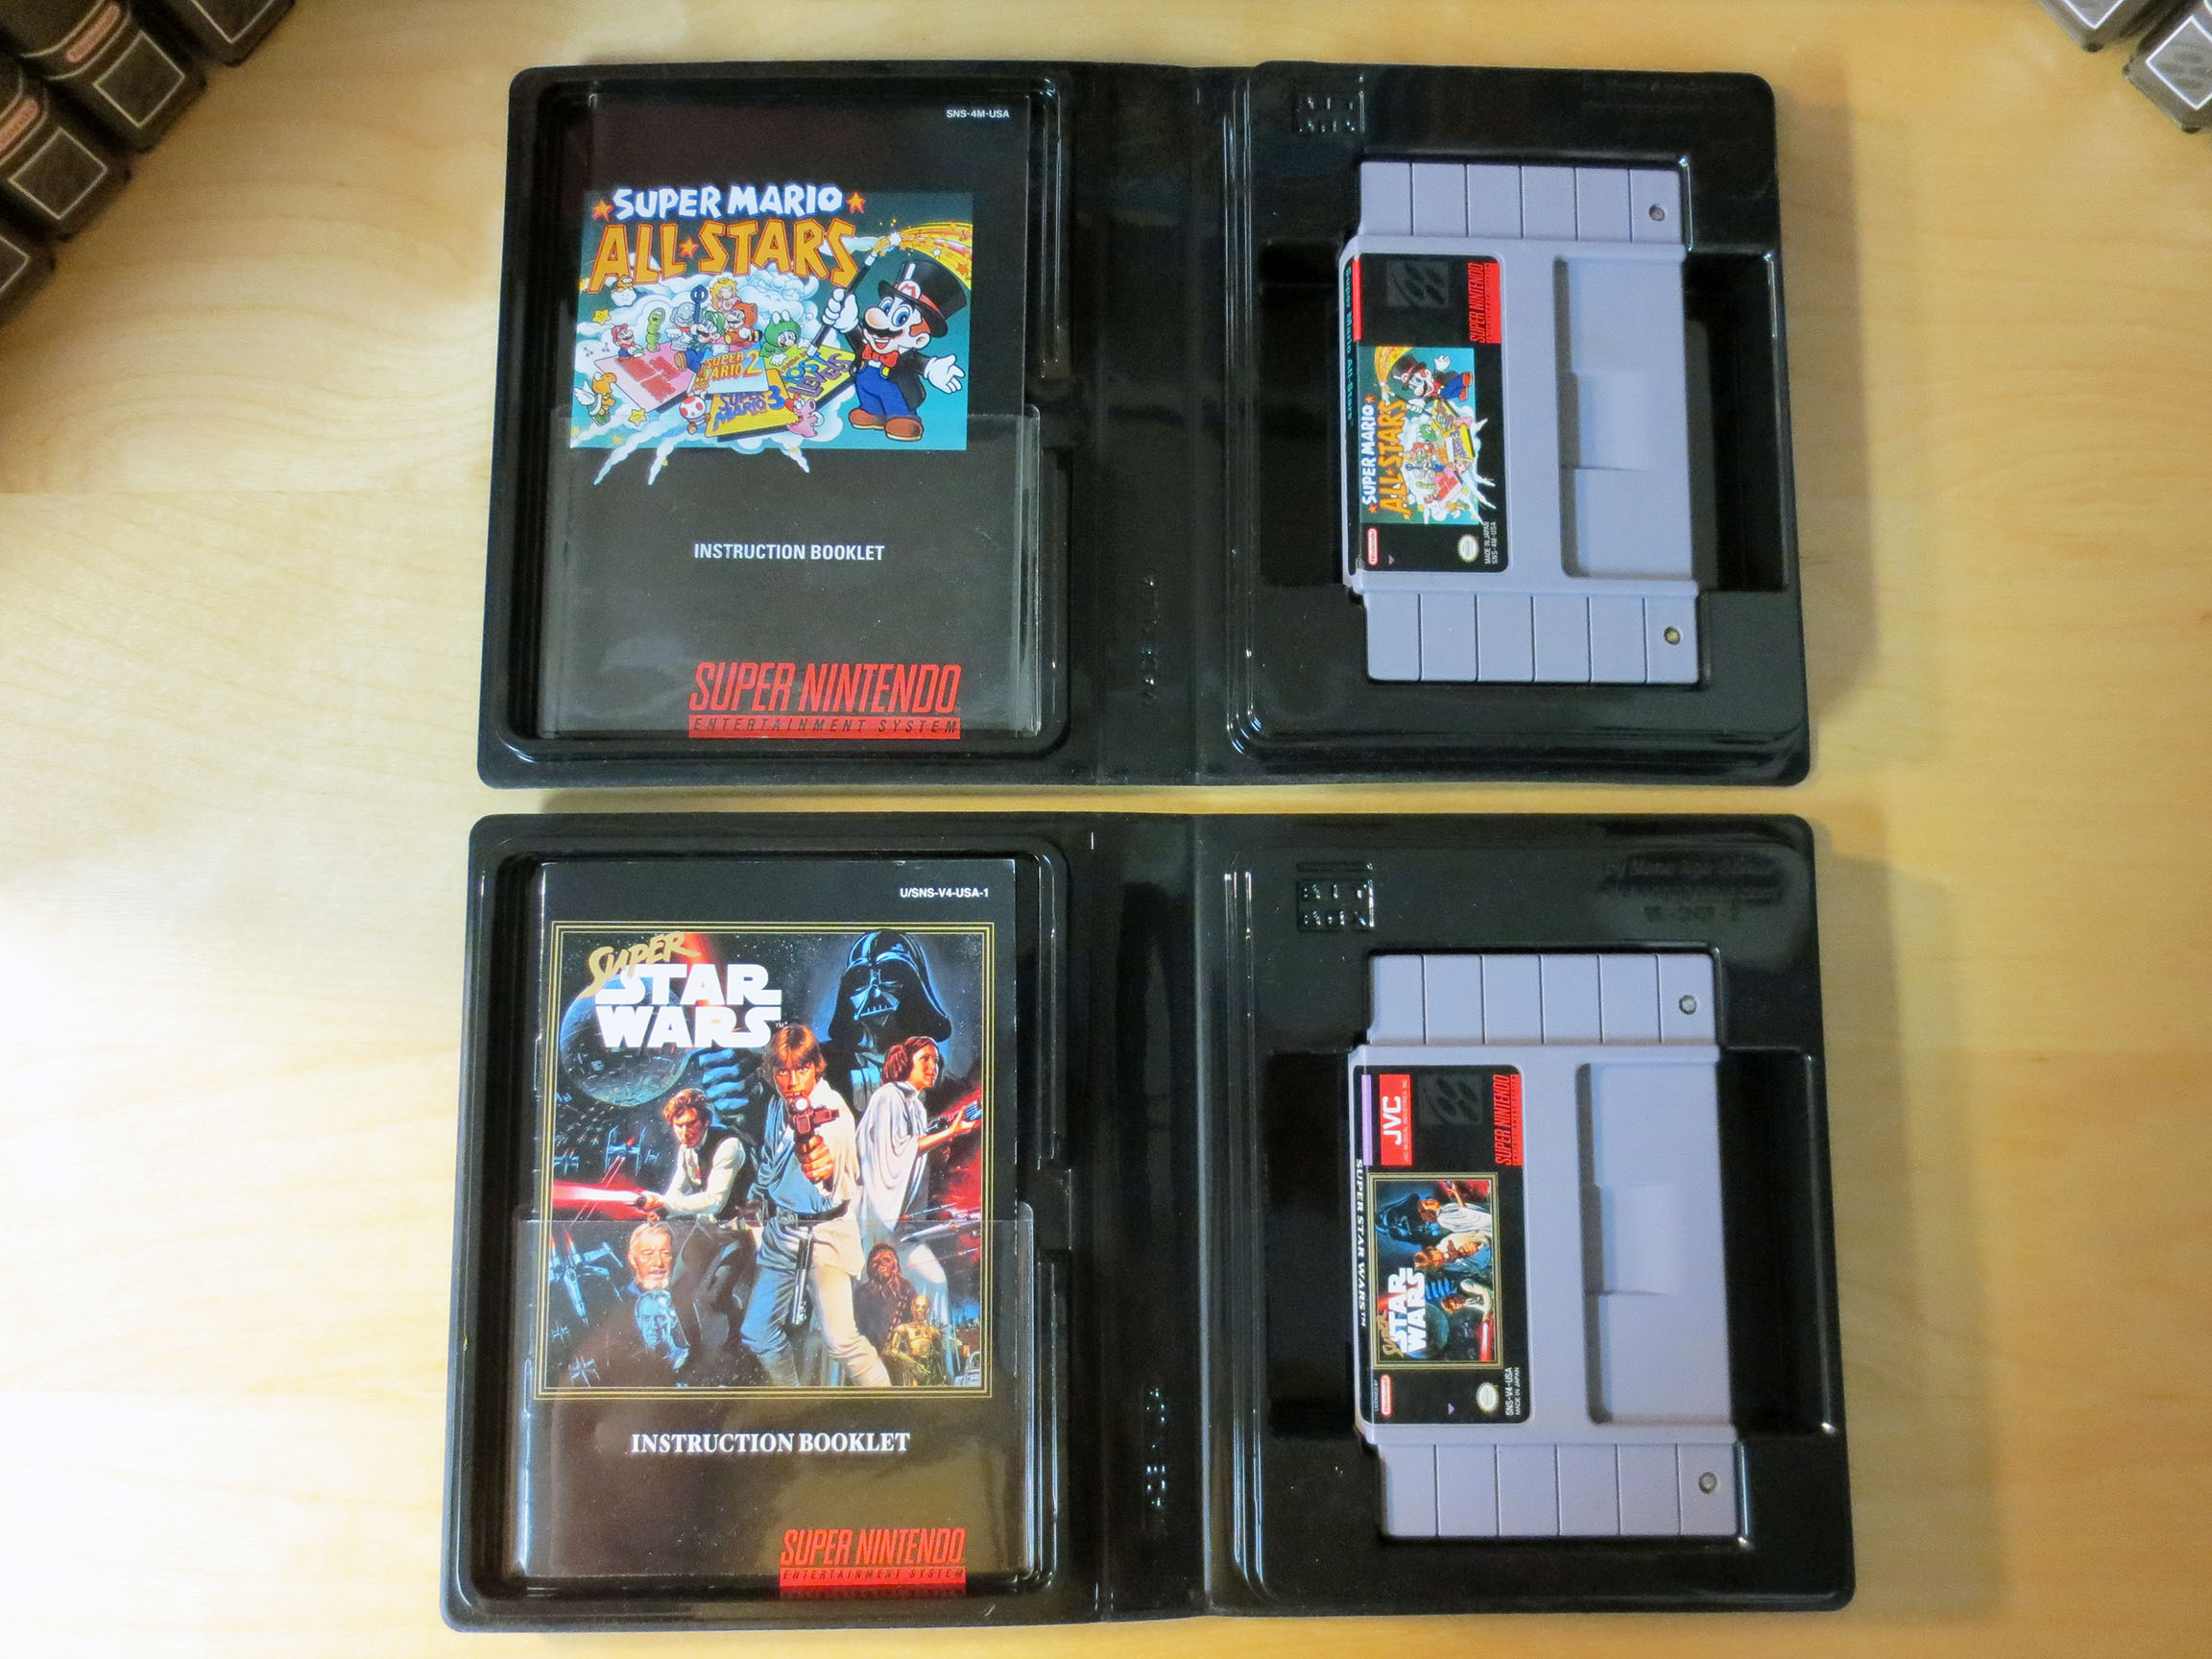
BitBox case are not identical for SNES and NES cartridges. Each are built specifically for SNES or NES and they are not interchangeable. The NES BitBoxes aren’t as deep (marginally) and are skinnier than the SNES BitBoxes (both are identical in height). Other wise the quality and function is the same. The SNES BitBoxes can also accommodate a Super Famicom cart instead of a SNES cart if you collect for both systems.
This was my first order for NES BitBoxes and I’m enjoying them just as much at the SNES BitBoxes.
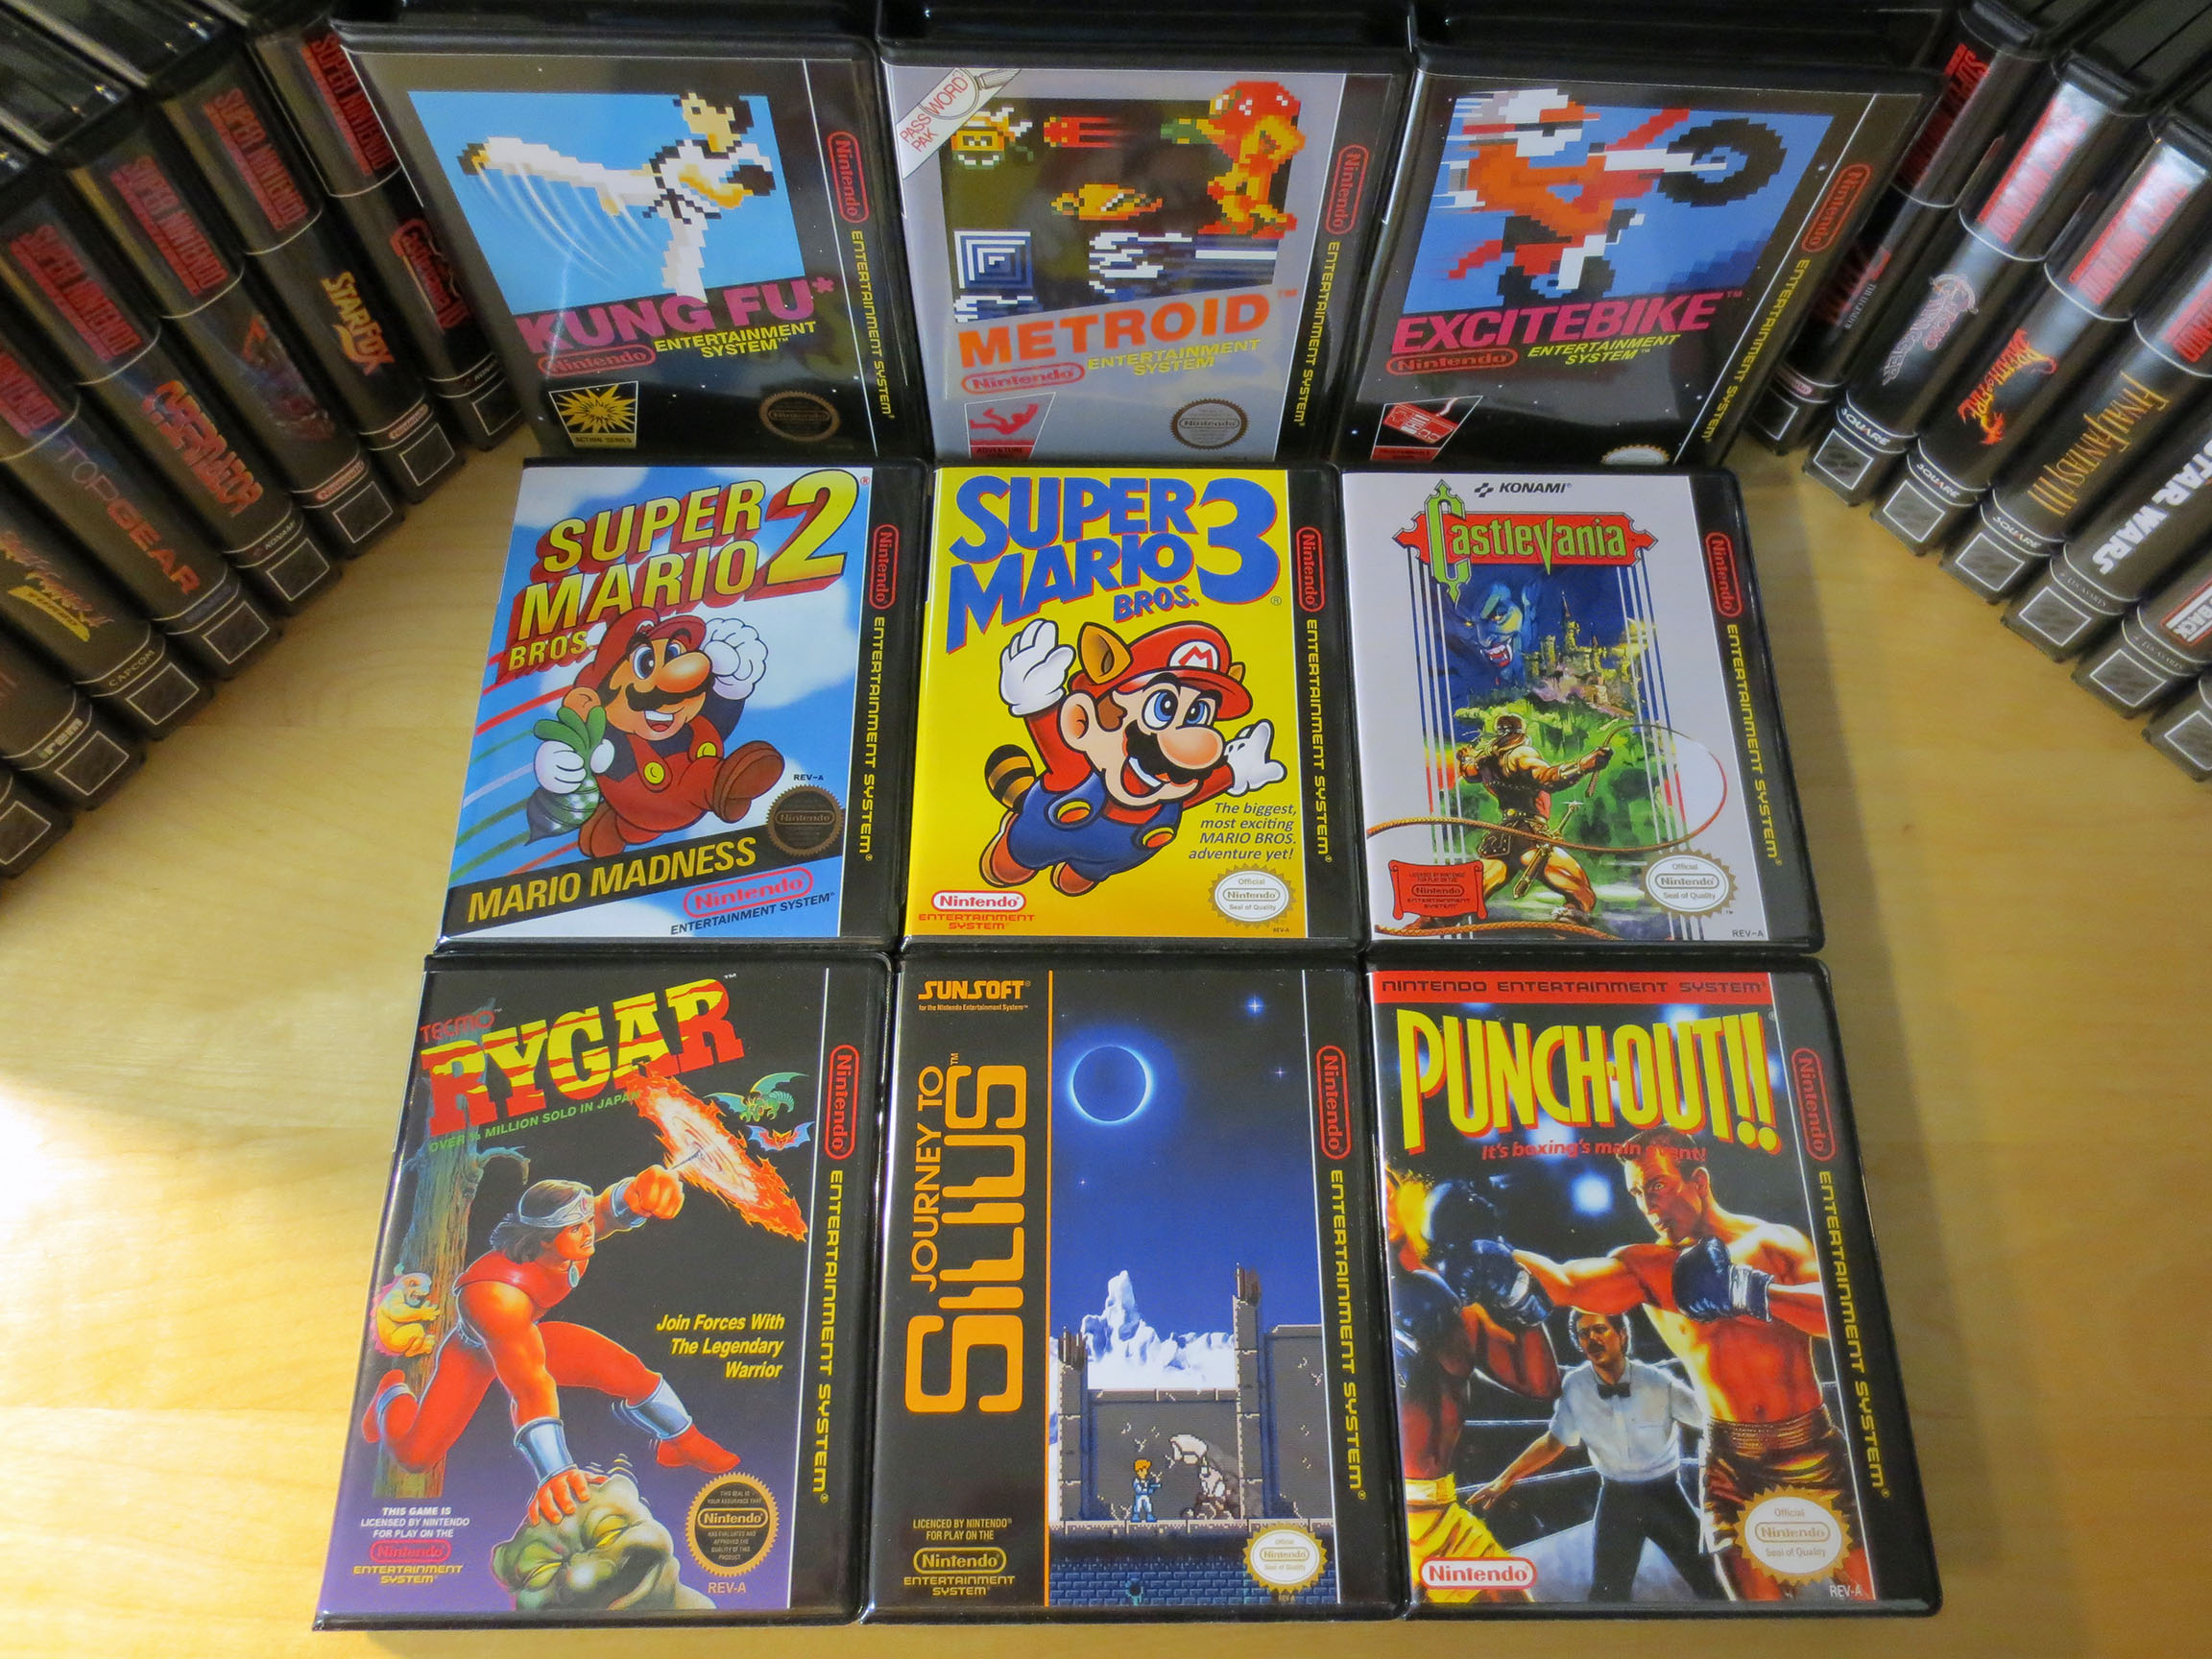
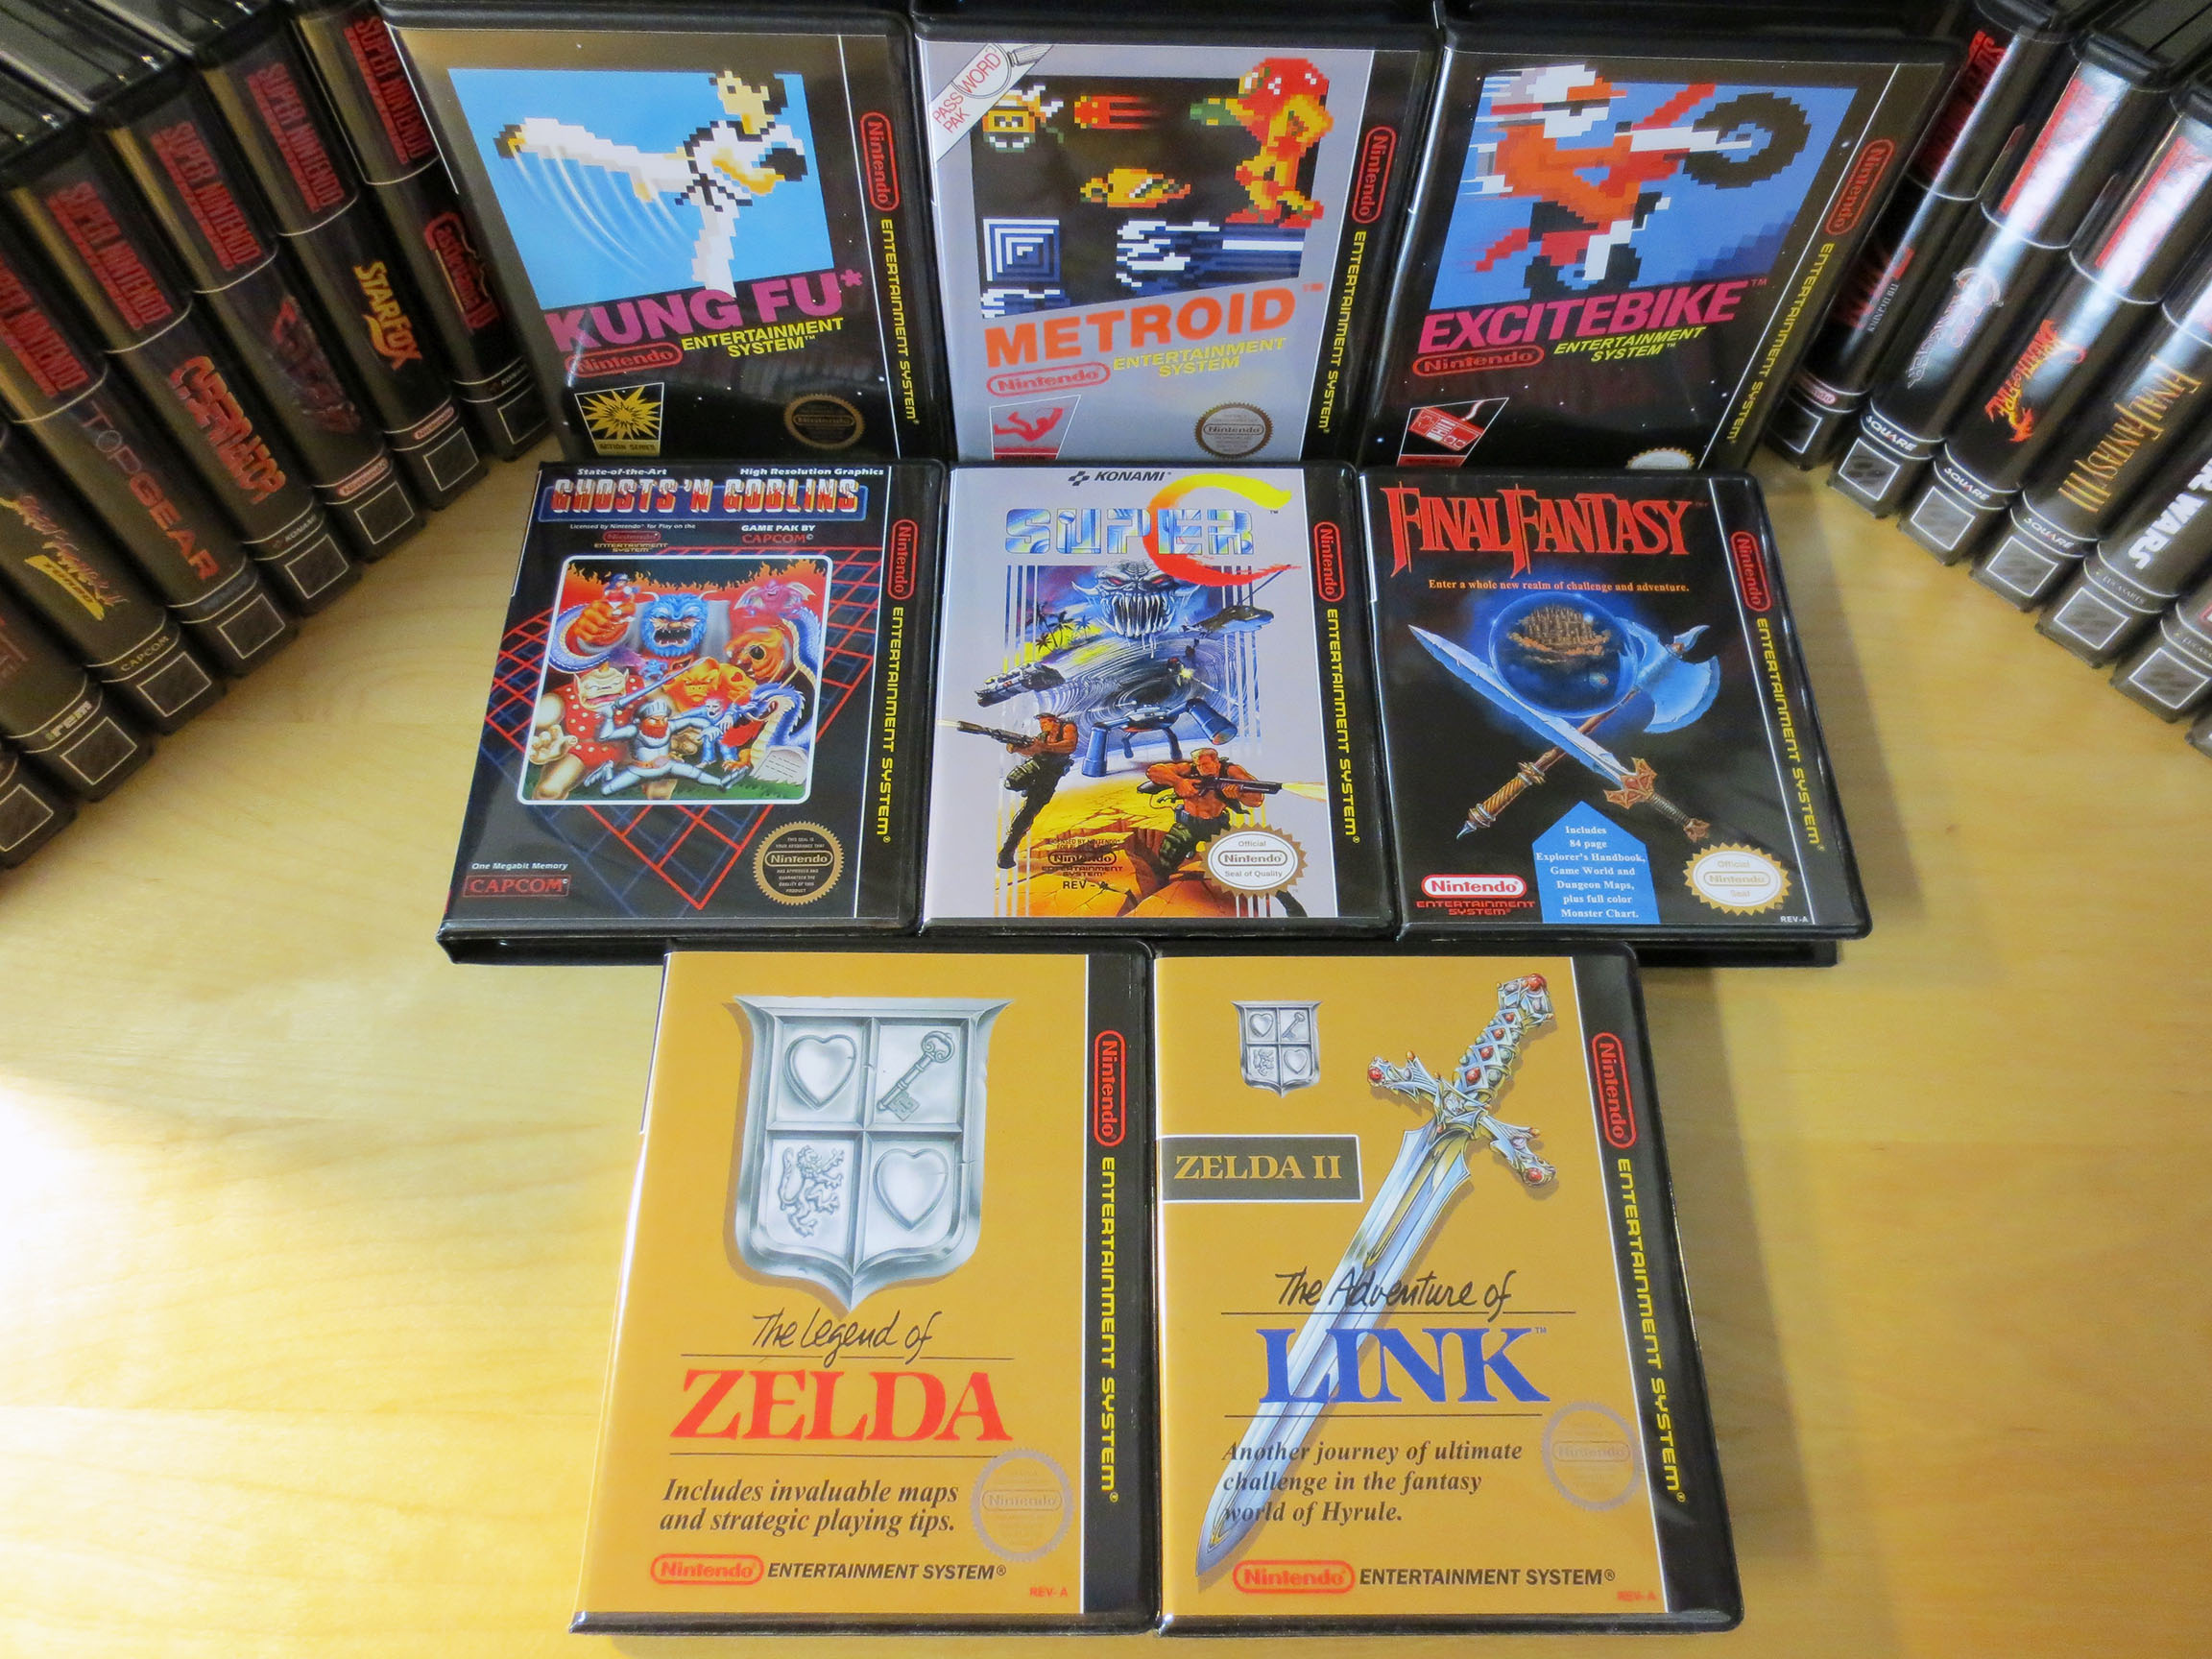
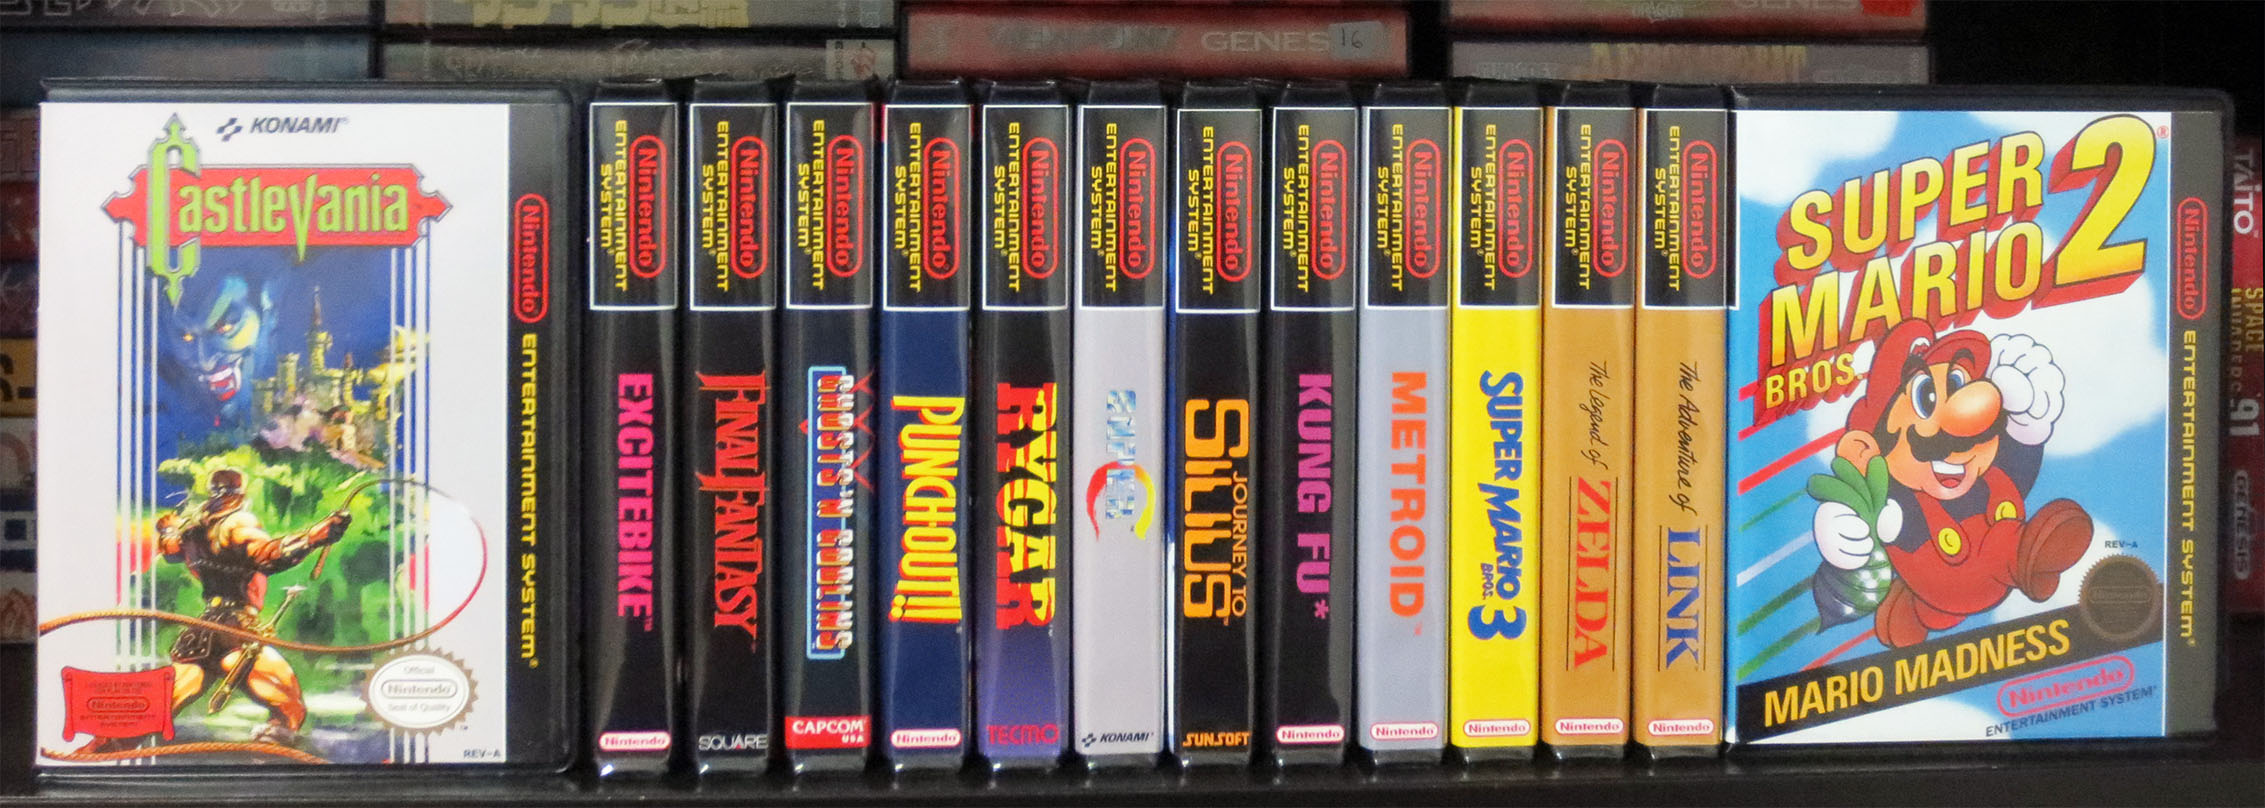
Below we have Kung Fu, Metroid, Excite Bike, Super Mario Bros. 2, Super Mario Bros. 3, Castlevania, Rygar, Journey to Silius and Punchout.
Next up are Ghost ‘n Goblins, Super C, Final Fantasy, The Legend of Zelda and The Adventure of Link.
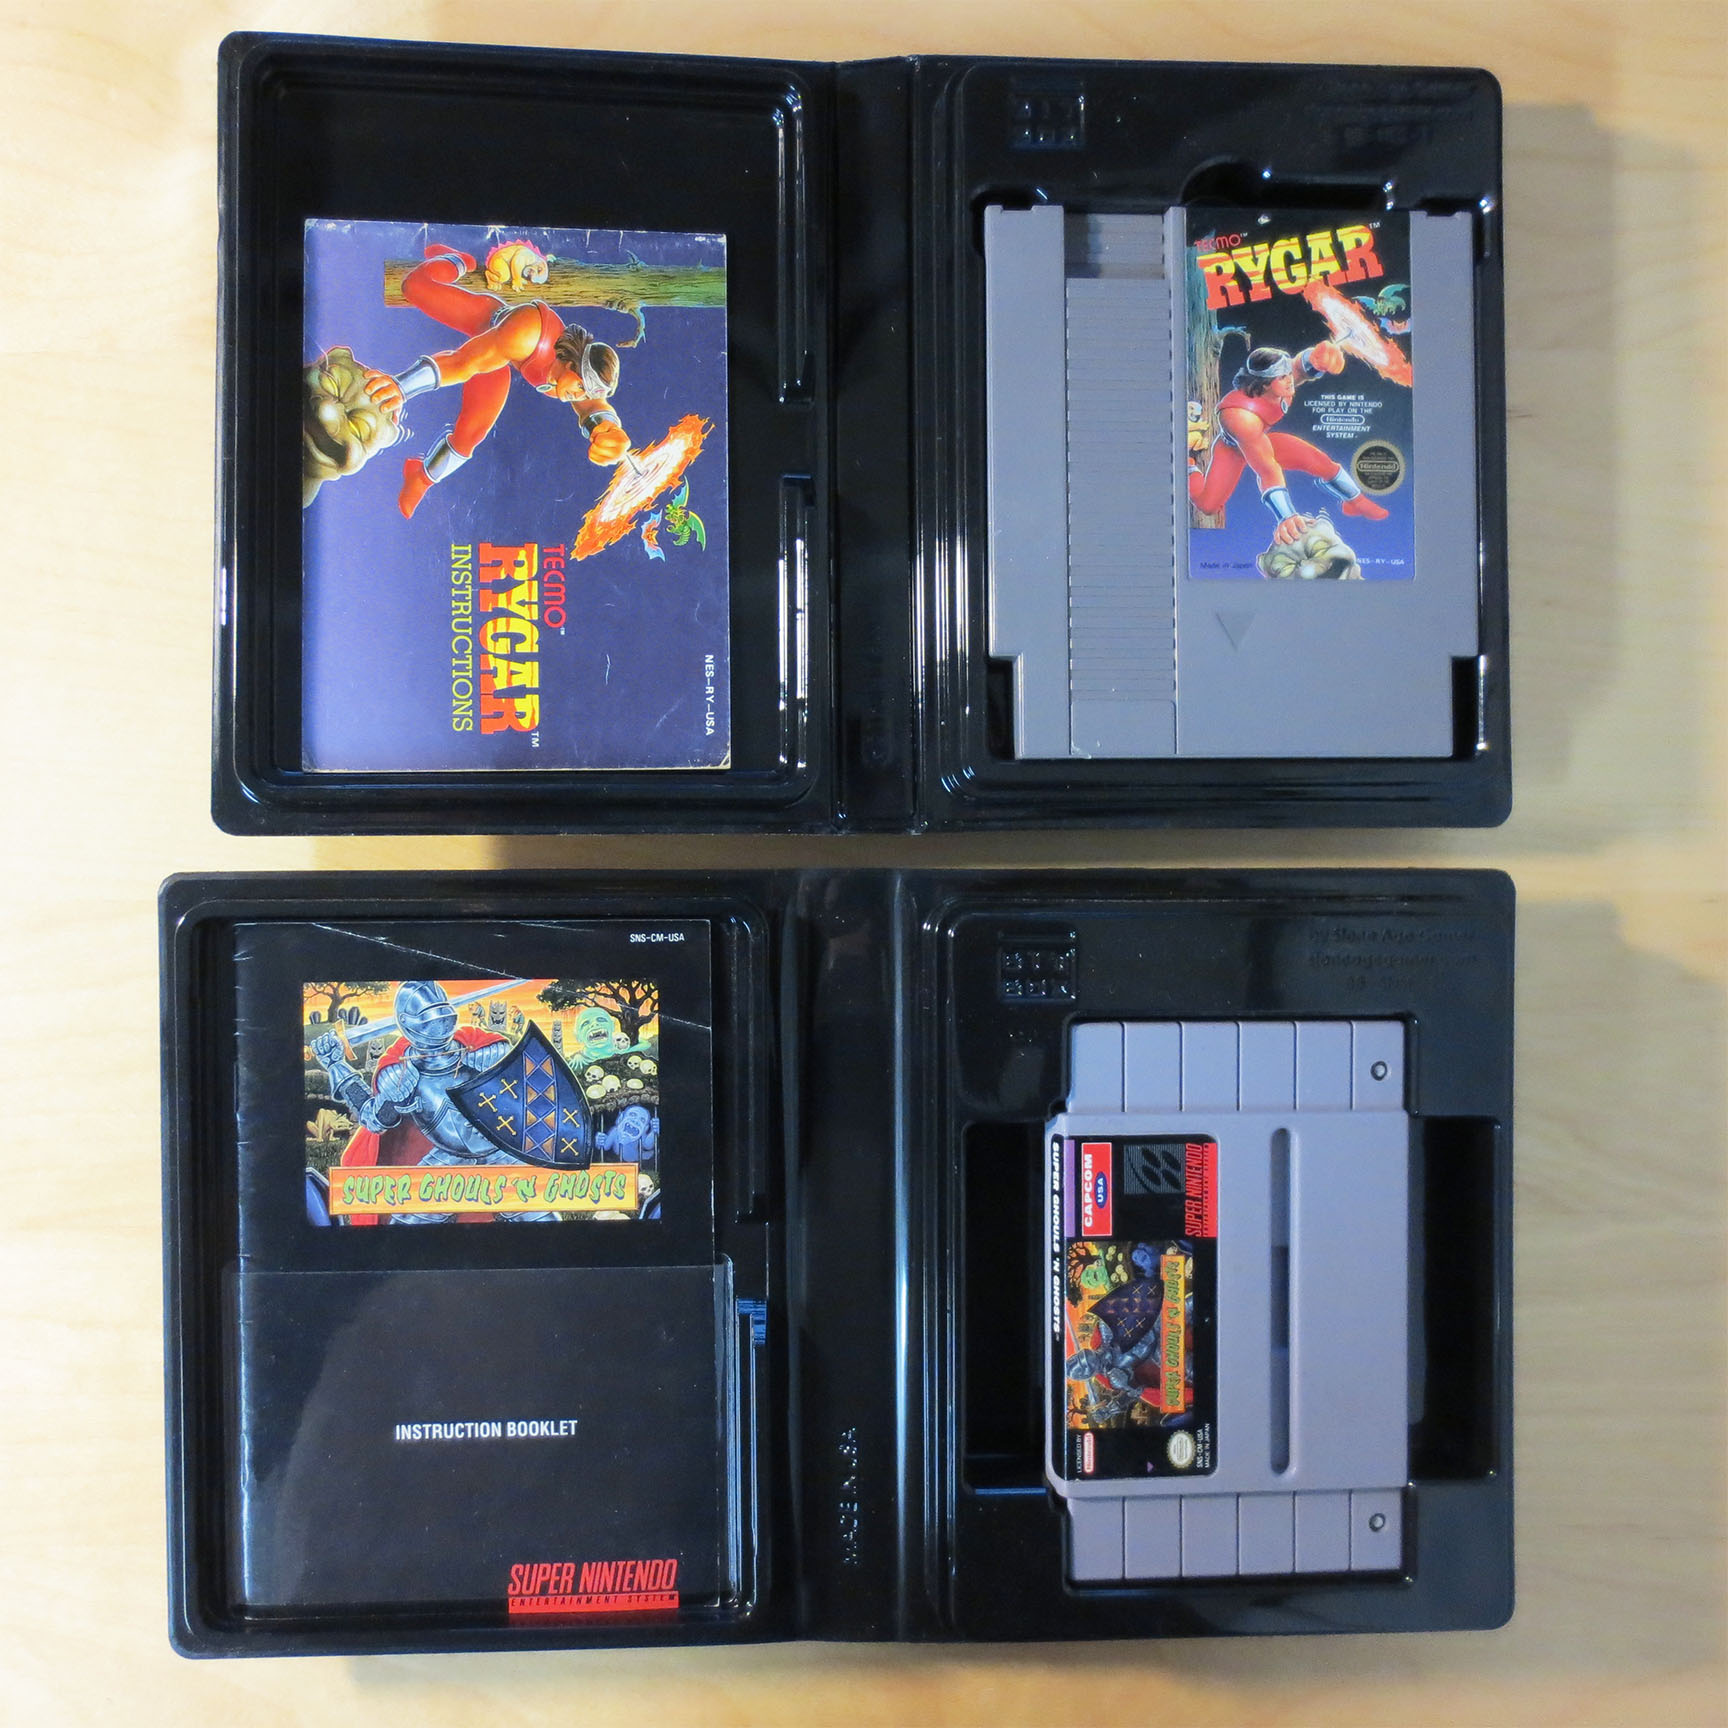
Pretty awesome right?! Here’s what they cost me. Each BitBox cost $4 USD plus 50 cents if you want a document strap. A document strap is a sleeve/band of clear plastic with one adhesive side. You open the BitBox and stick the document strap to the inside of the left side of the case, as close to the bottom as you can. (See Super Super Ghouls ‘n Ghosts below) Once installed you can slide a game manual into this clear plastic sleeve and it will be snugly held in place. At the moment I don’t have any document straps for my NES BitBoxes but I am going to get some.
I can’t really argue with Stone Age Gamers prices on these cases. They have created a really good product and if you’re looking for a nice case for your carts I really do highly recommend BitBoxes. Personally, I do like them more than UGC’s (Universal Game Cases). That being said UGC’s are still a great option because they also look good and they cost a lot less. My good friend Nintendo Joe has managed to buy UGC’s for about $1 each CAD when buying in bulk. You can also get a small price break when buying BitBoxes in bulk but they still cost significantly more money.
My only real problem with BitBoxes is I’m spending Canadian dollars on a product only available in the US and I have to deal with very expensive shipping costs (and I run the risk of duty and broker fees which can add up to another 80-90% more money). By the time my BitBoxes arrived at my door I’ll have spent about $6.50 CAD each. Then I go to my local print shop and get my covers printed for about another $3.25 each (includes printing and cutting). So BitBox cases will cost me about $9.75 each. Which circles back to my plan of trimming down the collection and other creative hobbyist tactics like removing my wife from this blog to help ensure a continued and healthy gaming budget.
If the cost alone didn’t hit hard enough some of my BitBoxes arrived damaged (despite being packaged well) and this was pretty upsetting. I took some pictures of the damage and emailed Stone Age Gamer and they did not question or hesitate. Right away they mailed me replacement cases. This initially bad experience transformed into a huge amount of trust and faith in Stone Age Gamer. Yes, you’re paying a premium compared to a similar product (UGC) but in my experience you will be taken care of.
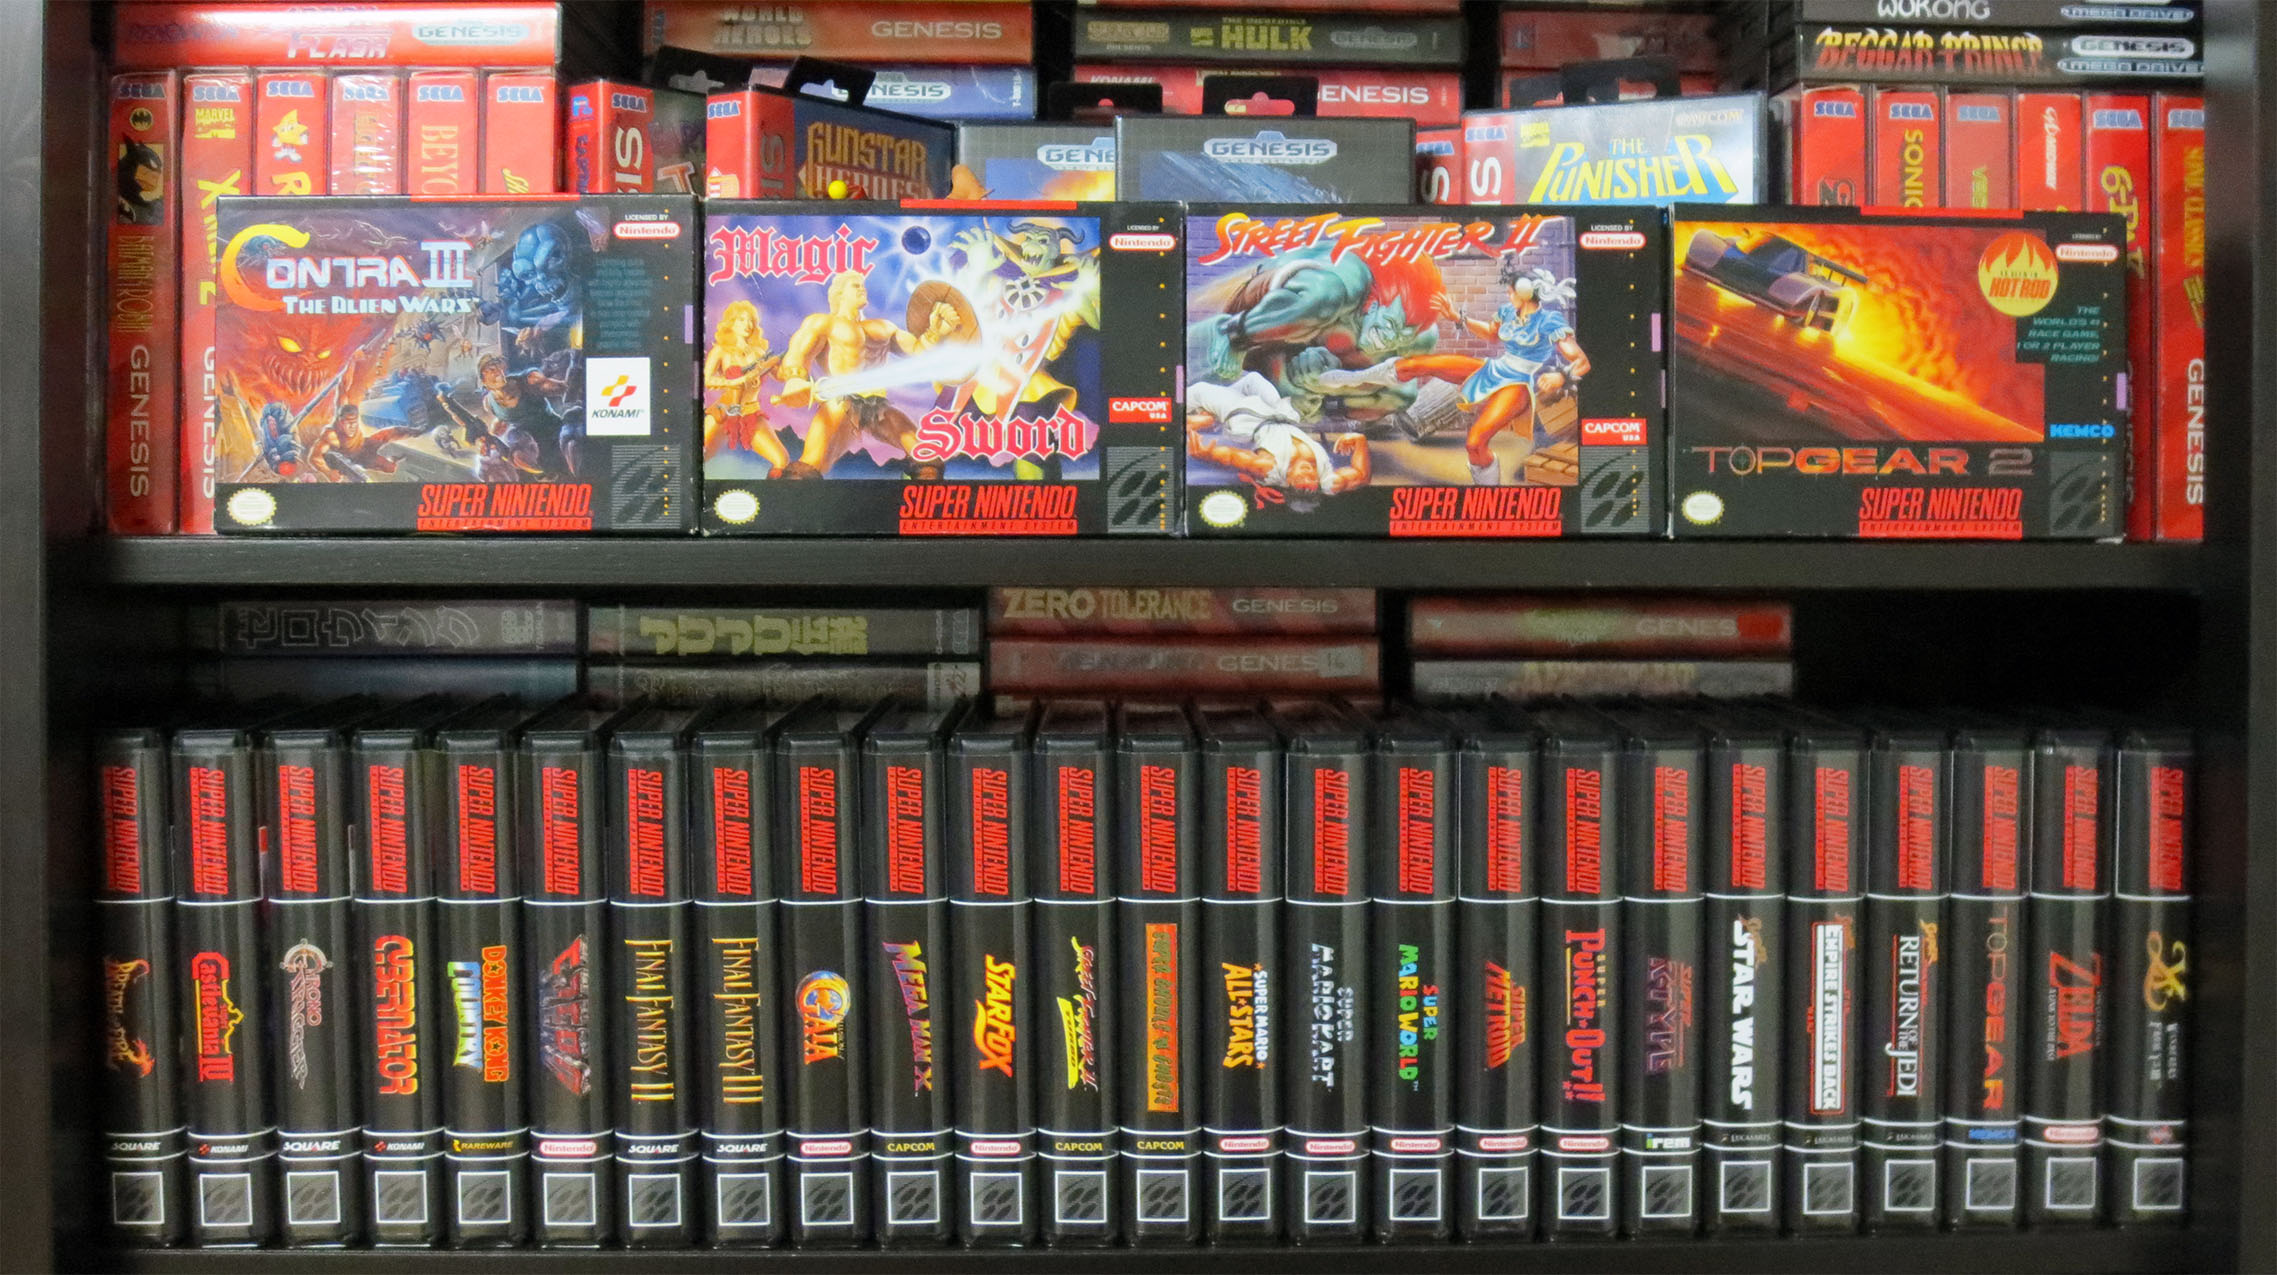
Below are all of my current SNES carts that I have BitBoxes for. All lined up like good little soldiers supported by the very few boxed SNES games that I have.
Of the boxed SNES games all but Magic Sword were given to me by a good friend who had them kicking around in his basement for many years.
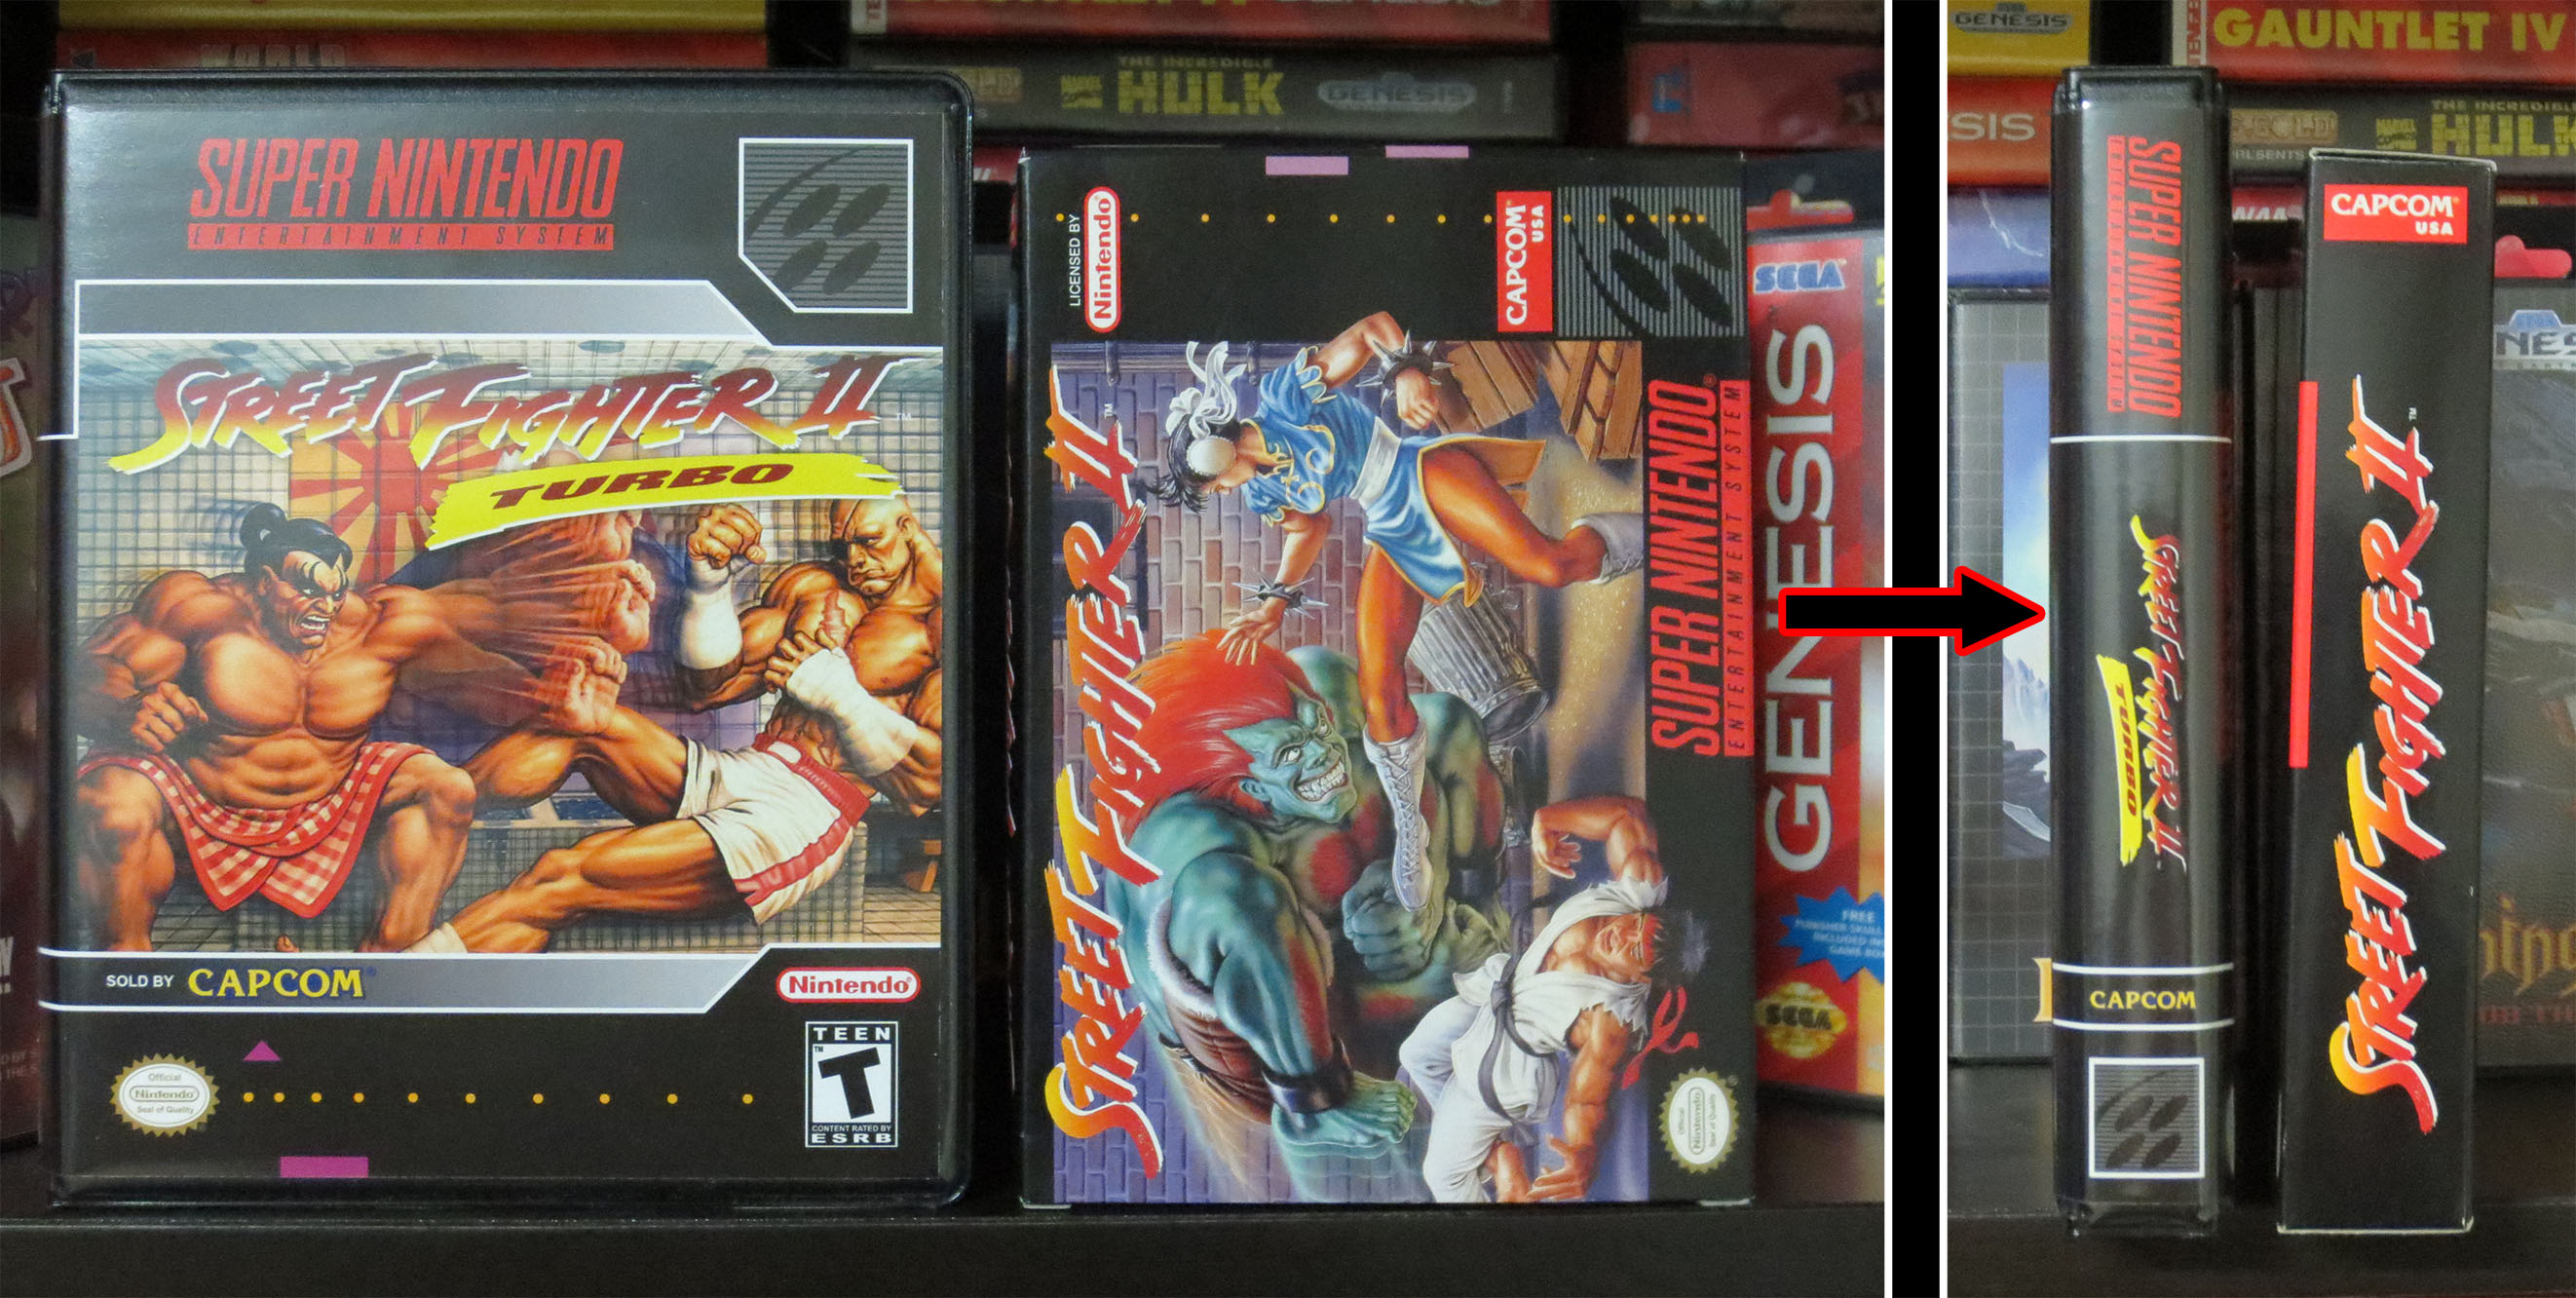
Below you can see the size difference between a Stone Age Gamer BitBox and an original Super Nintendo cardboard case. The BitBoxes are a little bit larger.
Below is my smaller contingent of NES games in their BitBoxes. I’m loving how these boxes dress up the collection and I already have another order placed with Stone Age Gamer.
All of the custom covers for BitBoxes can be found for free for anyone at the following to links:
What do you do with your carts? Are you content with loose carts? Do you only buy complete and in the original box games? What aftermarket Retro Video Gaming stuff are you enjoying?
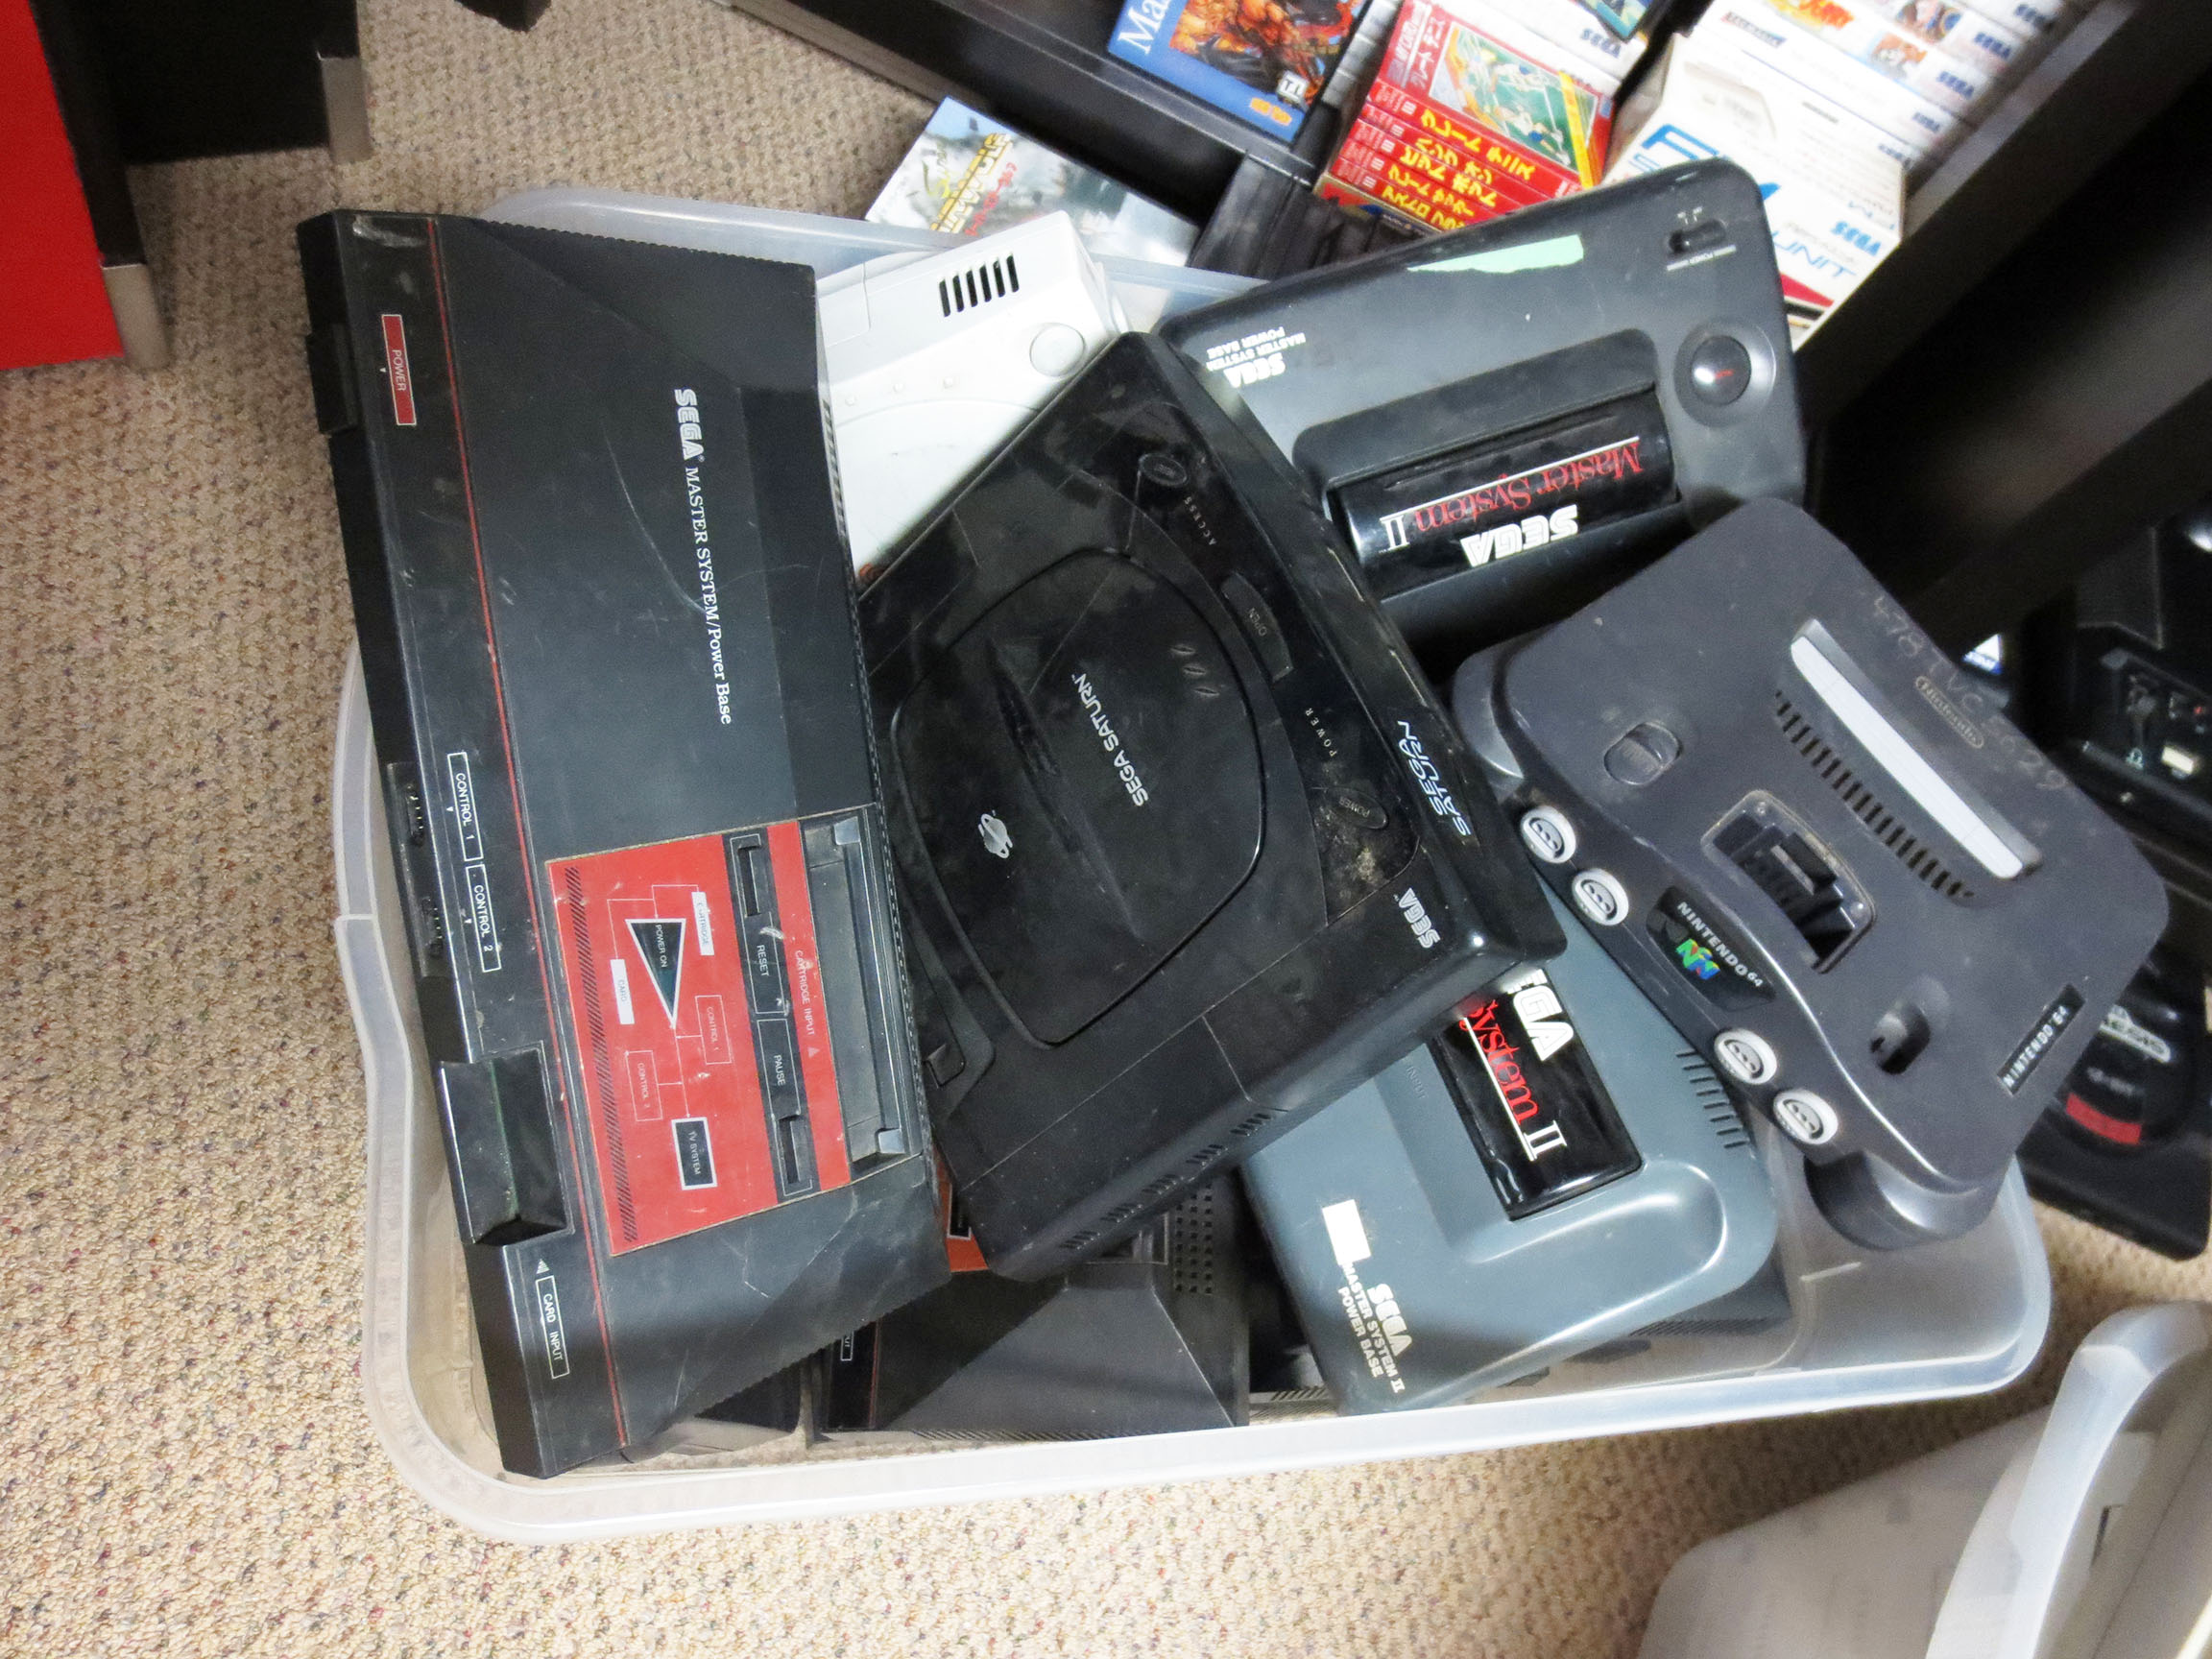
What do you do if you find 45 of your favorite video game consoles listed for sale on the local classifieds (Kijiji)? Well, you buy them… you buy them all.
Many of the systems you see below do not work for one reason or another. For the ones that do I’m going to clean them up and sell them for a fair price. I want to get them back into the hands of retro gamers. **Yeah, I’m going to pretend that I’m righteous and all that 😛
My other motivation is to have some hardware to work on. I’d love to see if I’m able to repair some or all of the broken consoles.
Those buckets be full!
That’s a lot of Retro.
Both me and these old video game consoles have a long journey ahead of us. I have big plans and I know it will take time.
Will I make any money on this venture? I’m guessing if I do it will not be a lot but at the same time I dove in because the price was right and I don’t think I’m at risk of losing much money either. I paid $180 CAD for everything you see in the bins (I had to give the bins back). So that’s $4 per console! But the lot was sold ‘as is’ and yes many do not work. Before the purchase I estimated that I’d only need about 6 or 8 in working condition to make my original $180 back so it felt like a safe gamble.
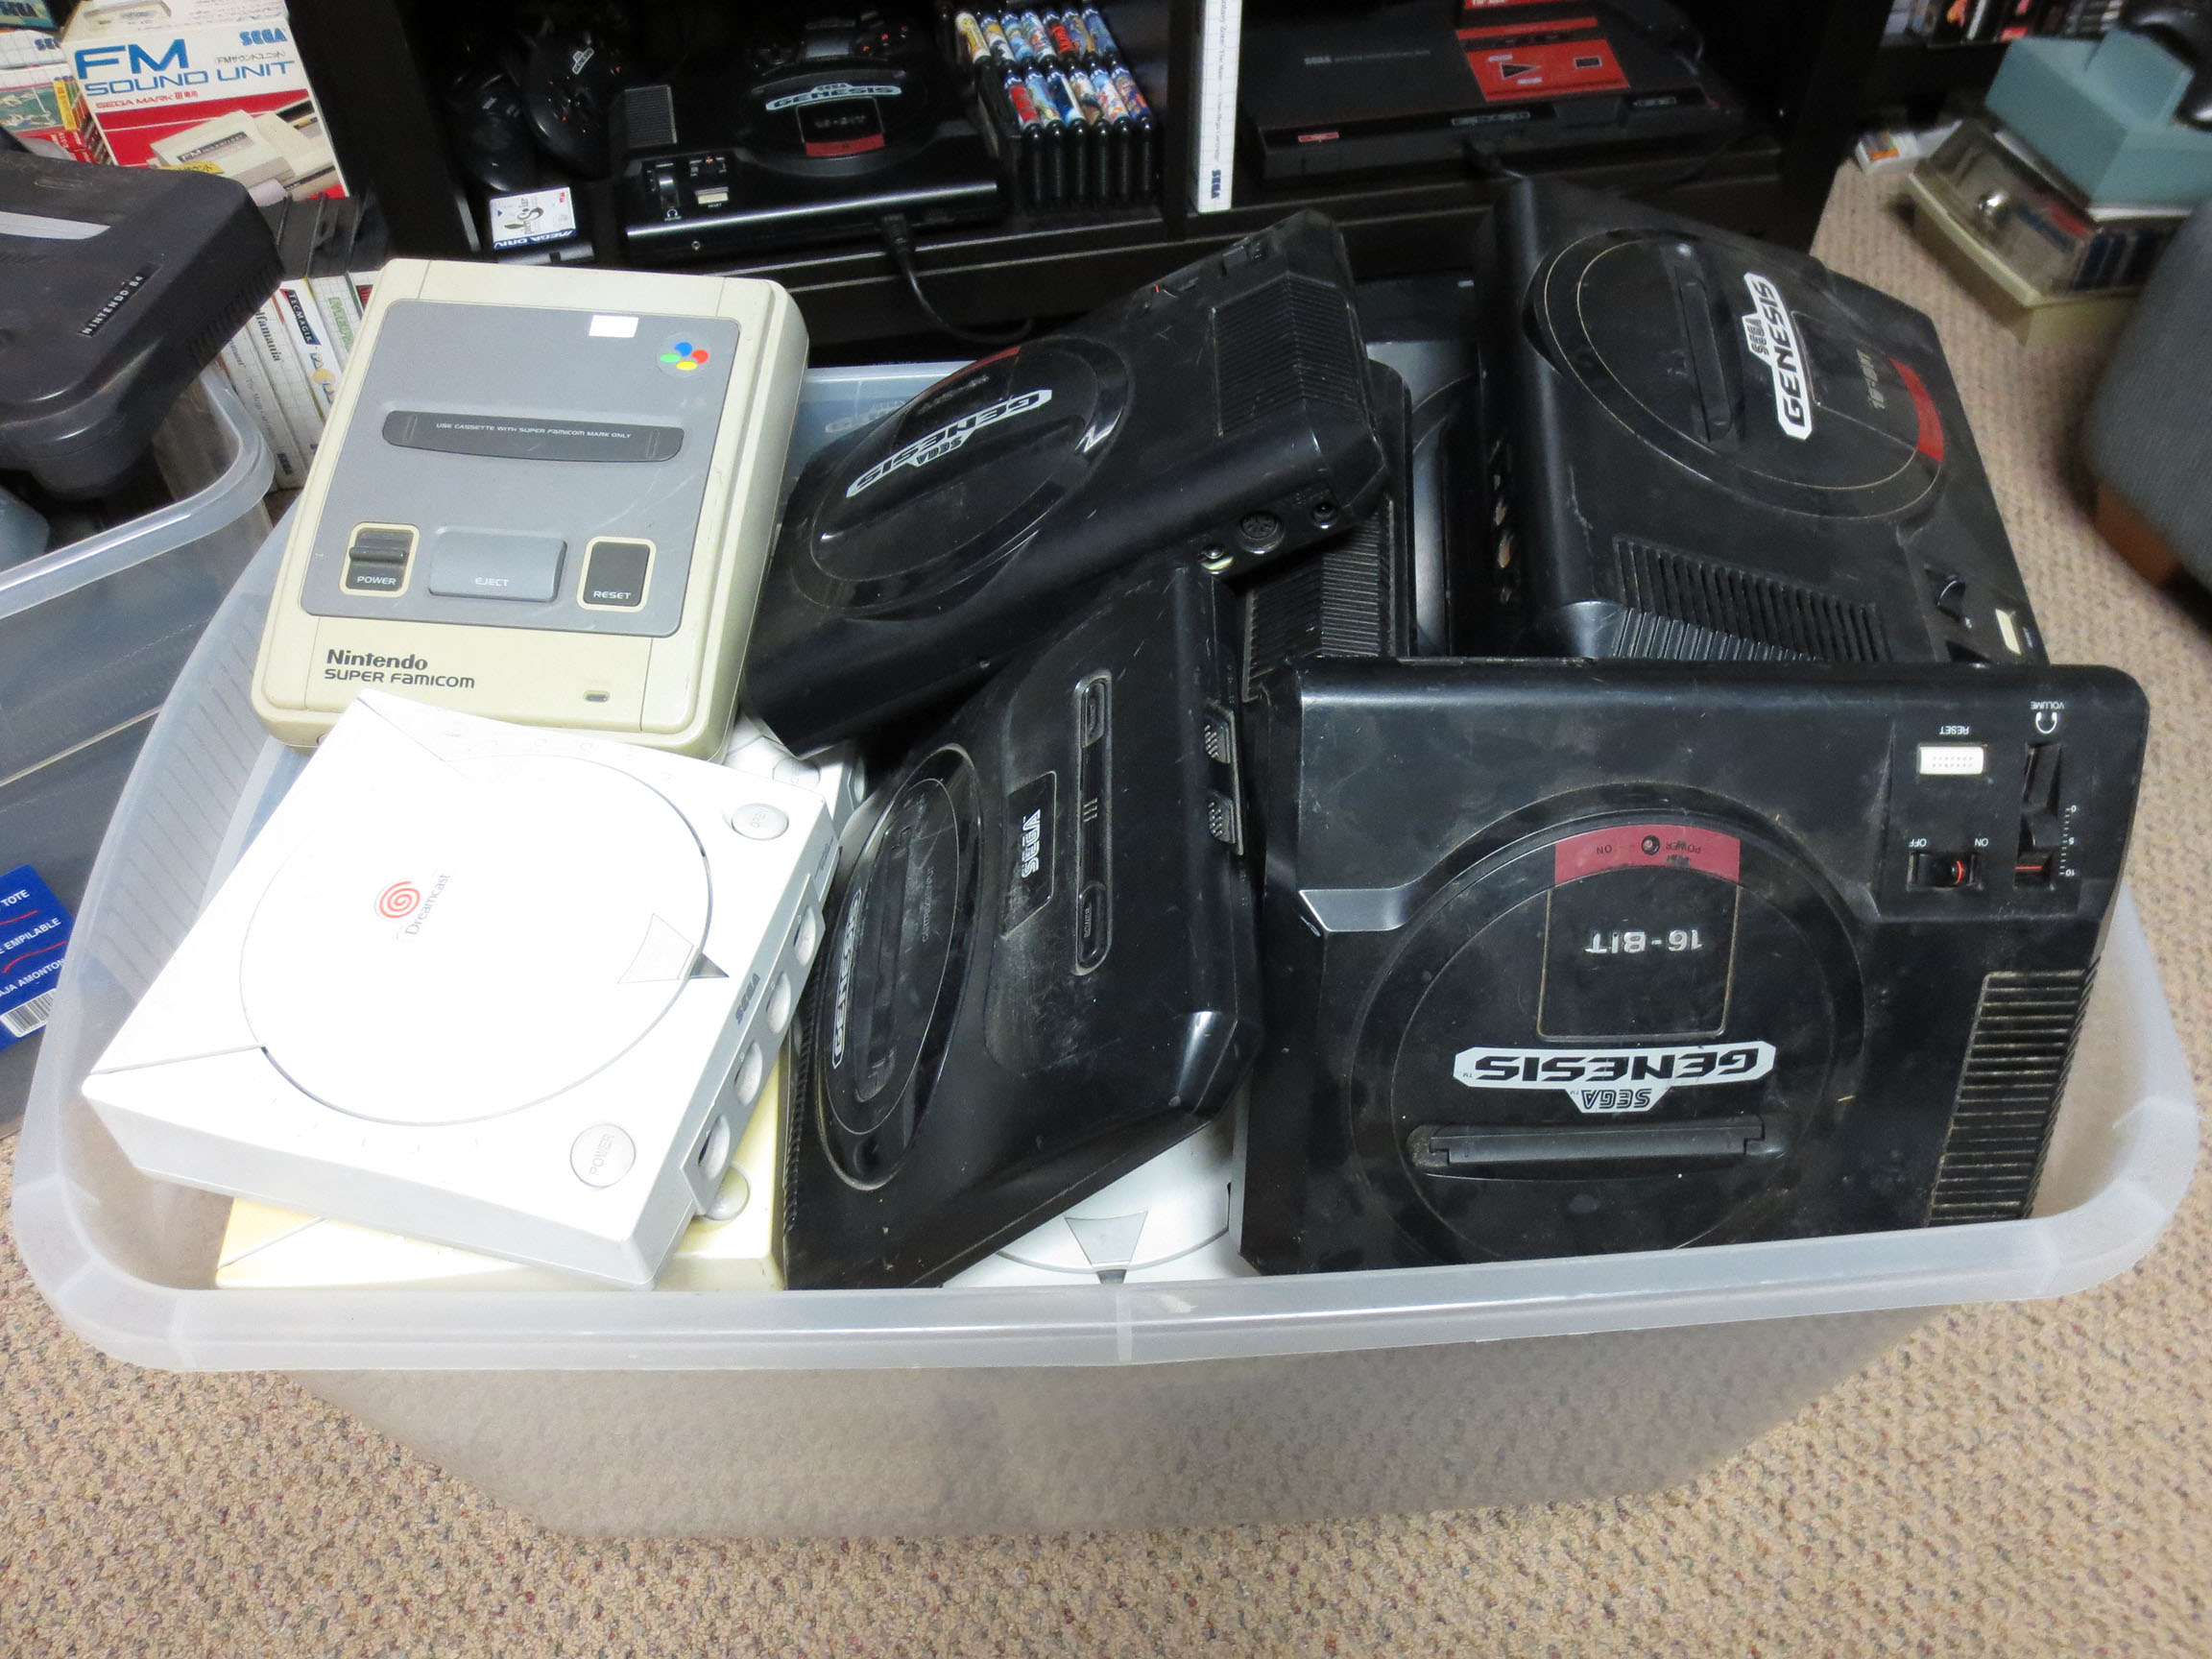
Bucket Close-up 01
Bucket Close-up 02
What I was concerned about (which is turning out to be true) is it’s hard to sell loose systems. Most people are going to want a system with a power cable , a video cable and at least one joystick. So I’ve anticipated that this little project will take a long time to complete. But that’s OK and it’s somehow comforting have an army of (mostly) Sega consoles in the basement.
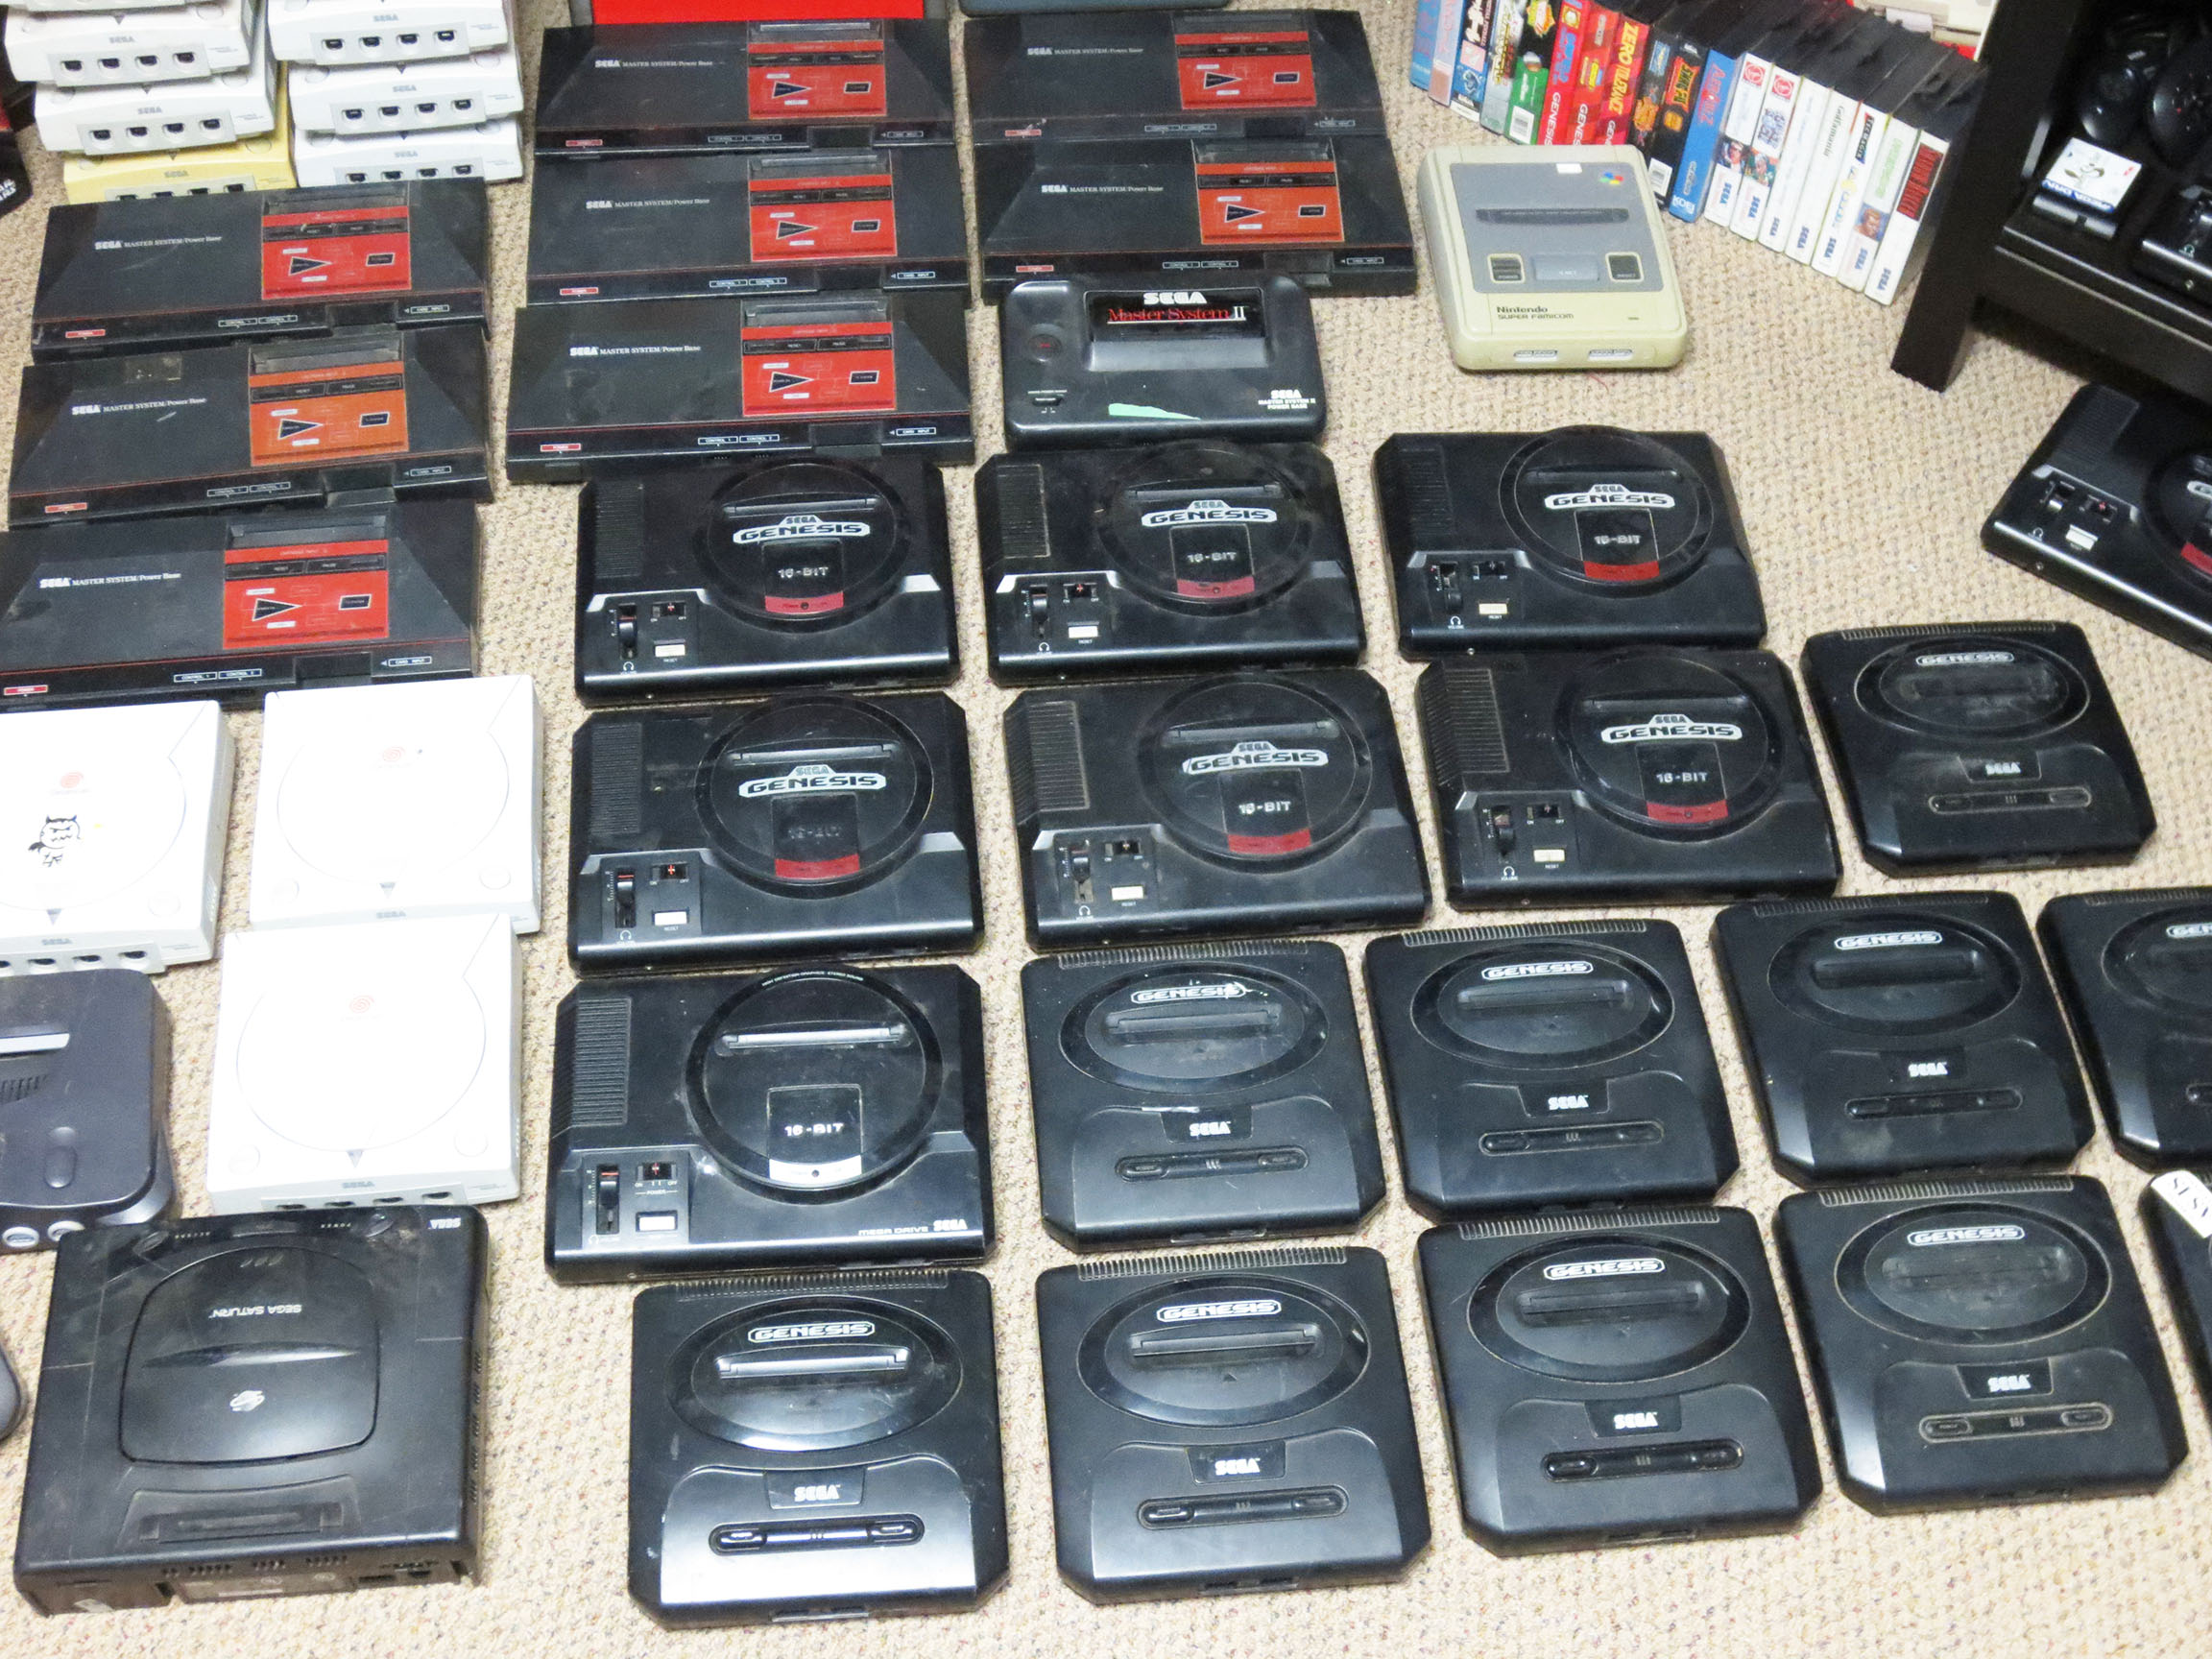
Want to get a better idea of what 45 consoles look like? 🙂 Behold!! Beautiful, isn’t it?
It’s like heaven fell from the stars.
For a loose working system (any Sega Master System, Sega Dreamcast, Sega Genesis or Sega Saturn) I decided to sell each for $30 CAD. Is that a fair price? I think it is except maybe for the Genesis consoles. They are pretty common and I personally believe $20 would be a great price so what does that say about $30? Maybe once I’ve made my money back I’ll considering selling loose Genesis consoles for less… Or Plan B; see below:
This massive heap of consoles actually did come with a bunch of joysticks. But again just like the consoles many do not work. And even if a joystick works I need to be sure it’s working well. However, since some of them are in good order I decided to throw some more money into this venture and buy some third party power and video cables and make a few of these systems whole. Yes, my costs goes up but I think I’ll be able to sell them faster this way. For an additional $160 CAD I managed to buy power and video cables for most of the systems.
I got a good price on the cables at just about $10 for a set (one power cable, one video cable). I valued any good working joystick at $10. So for a complete systems I added in my cost and I’ll sell them for $50 or possibly $60 for those that are in better cosmetic condition or if it comes with a game or something.
I’ve already had these consoles for a few months now and I have made some sales (locally on Kijiji). Slowly but surely it’s happening. So far I’ve sold five consoles and I’ve given away two complete Genesis console to two cousins who I recently found out were into retro gaming. I also gave each of them a flash cart so they’ll have lots to play. Before I bought the flash carts I tried finding cheap loose carts of a few good games and it was so expensive that I just gave up.
Here’s what I’ve sold so far (all in CAD dollars):
Sega Master System – $50 complete and with common game cart.
Sega Master System – $60 complete and with common game cart.
Dreamcast – $30 loose
Dreamcast – $20 loose and broken *It was wanted as a display model.
Genesis – $30 loose
Genesis – free complete *for family
Genesis – free complete *for family
So of my total $340 put in I’ve made back $190 with $150 to go. Not bad, and I think I’ll get there eventually.
This lot also came with a Super Famicom and a PAL Genesis. I think I’ll keep both of those for myself. It also came with two Sega Master System II’s. I was really surprised when I noticed that the SMS II only has a coaxial RF video port; which boasted the worst possible video quality. I like the look of the SMS II so I think I’ll see if I can do an s-video mod on them and make them more desirable.
As it stands I have five consoles left that are working right now. Selling them loose will get the rest of my money back. Selling them complete (which I think I can do) will net me about $100. And if I can fix any of the others, well, that would be just groovy.
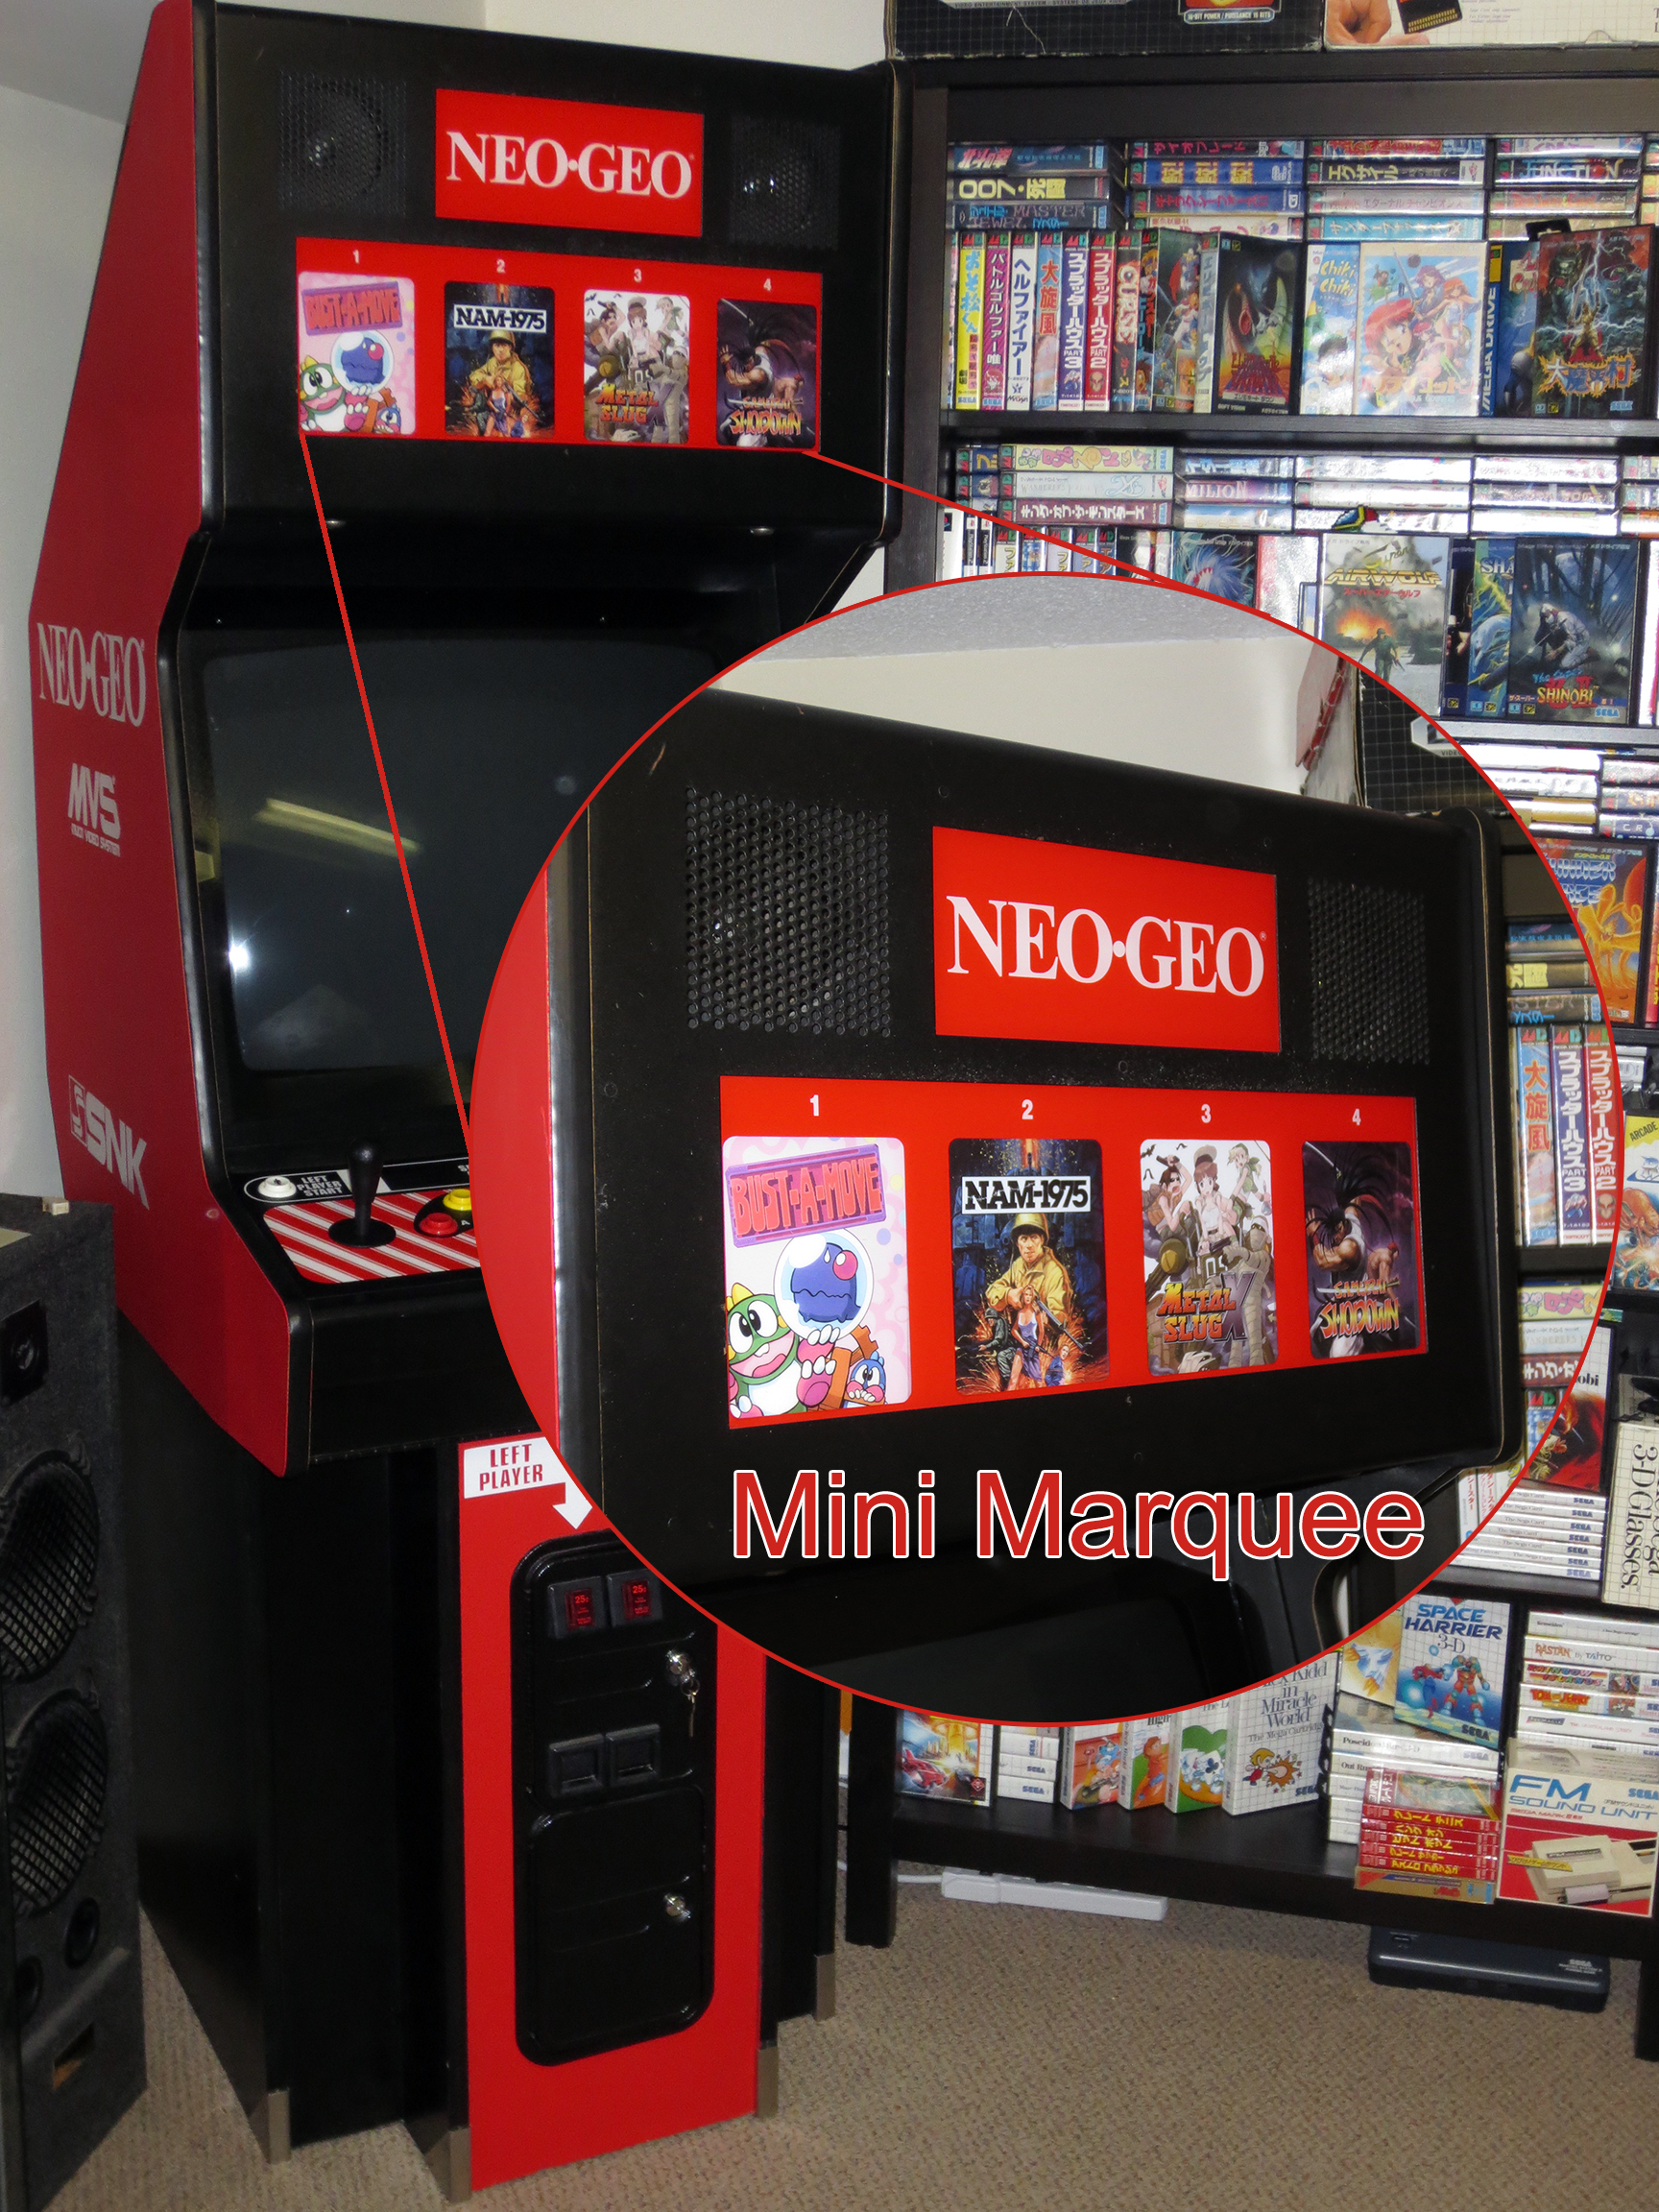
I’ve really enjoyed fixing up my Neo Geo MVS Arcade cabinet. At this point all of the really important stuff like the PCB, joysticks, buttons, monitor and sound are working great. So before I tackle why my Memory card isn’t always seen by the Neo Geo I’d like to do something a bit more fun and something that will help make the cabinet a little bit more pretty.
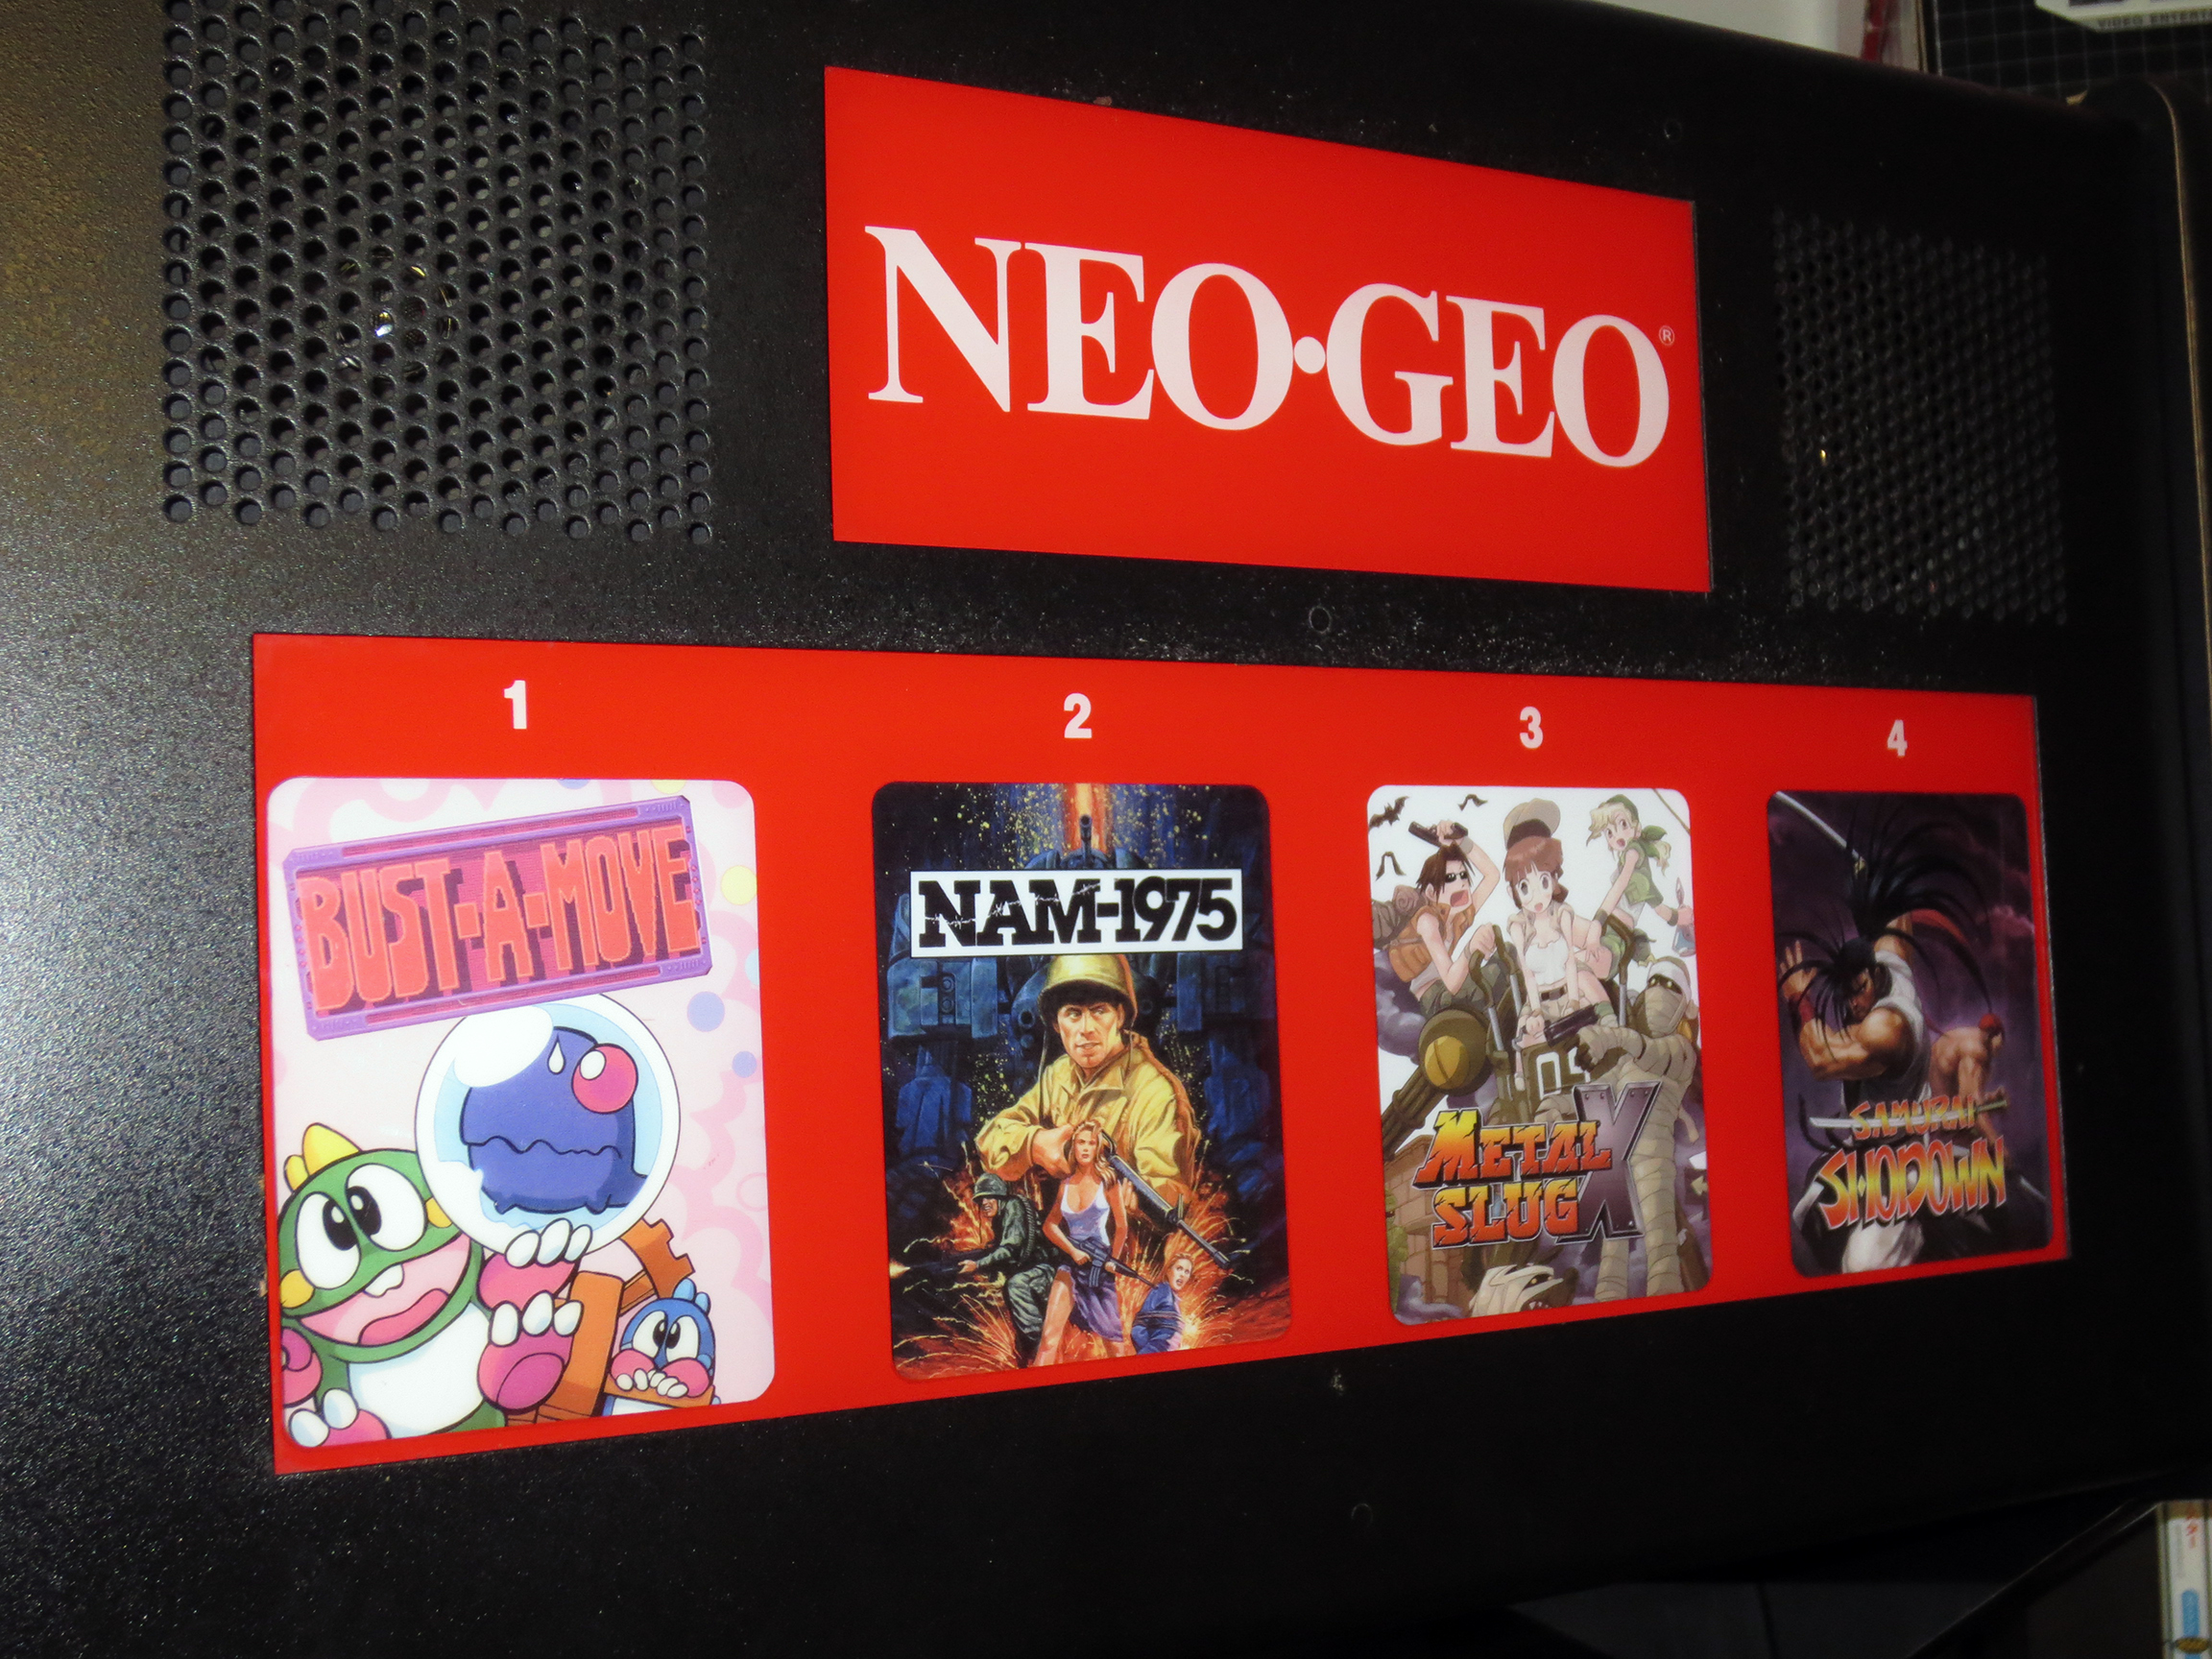
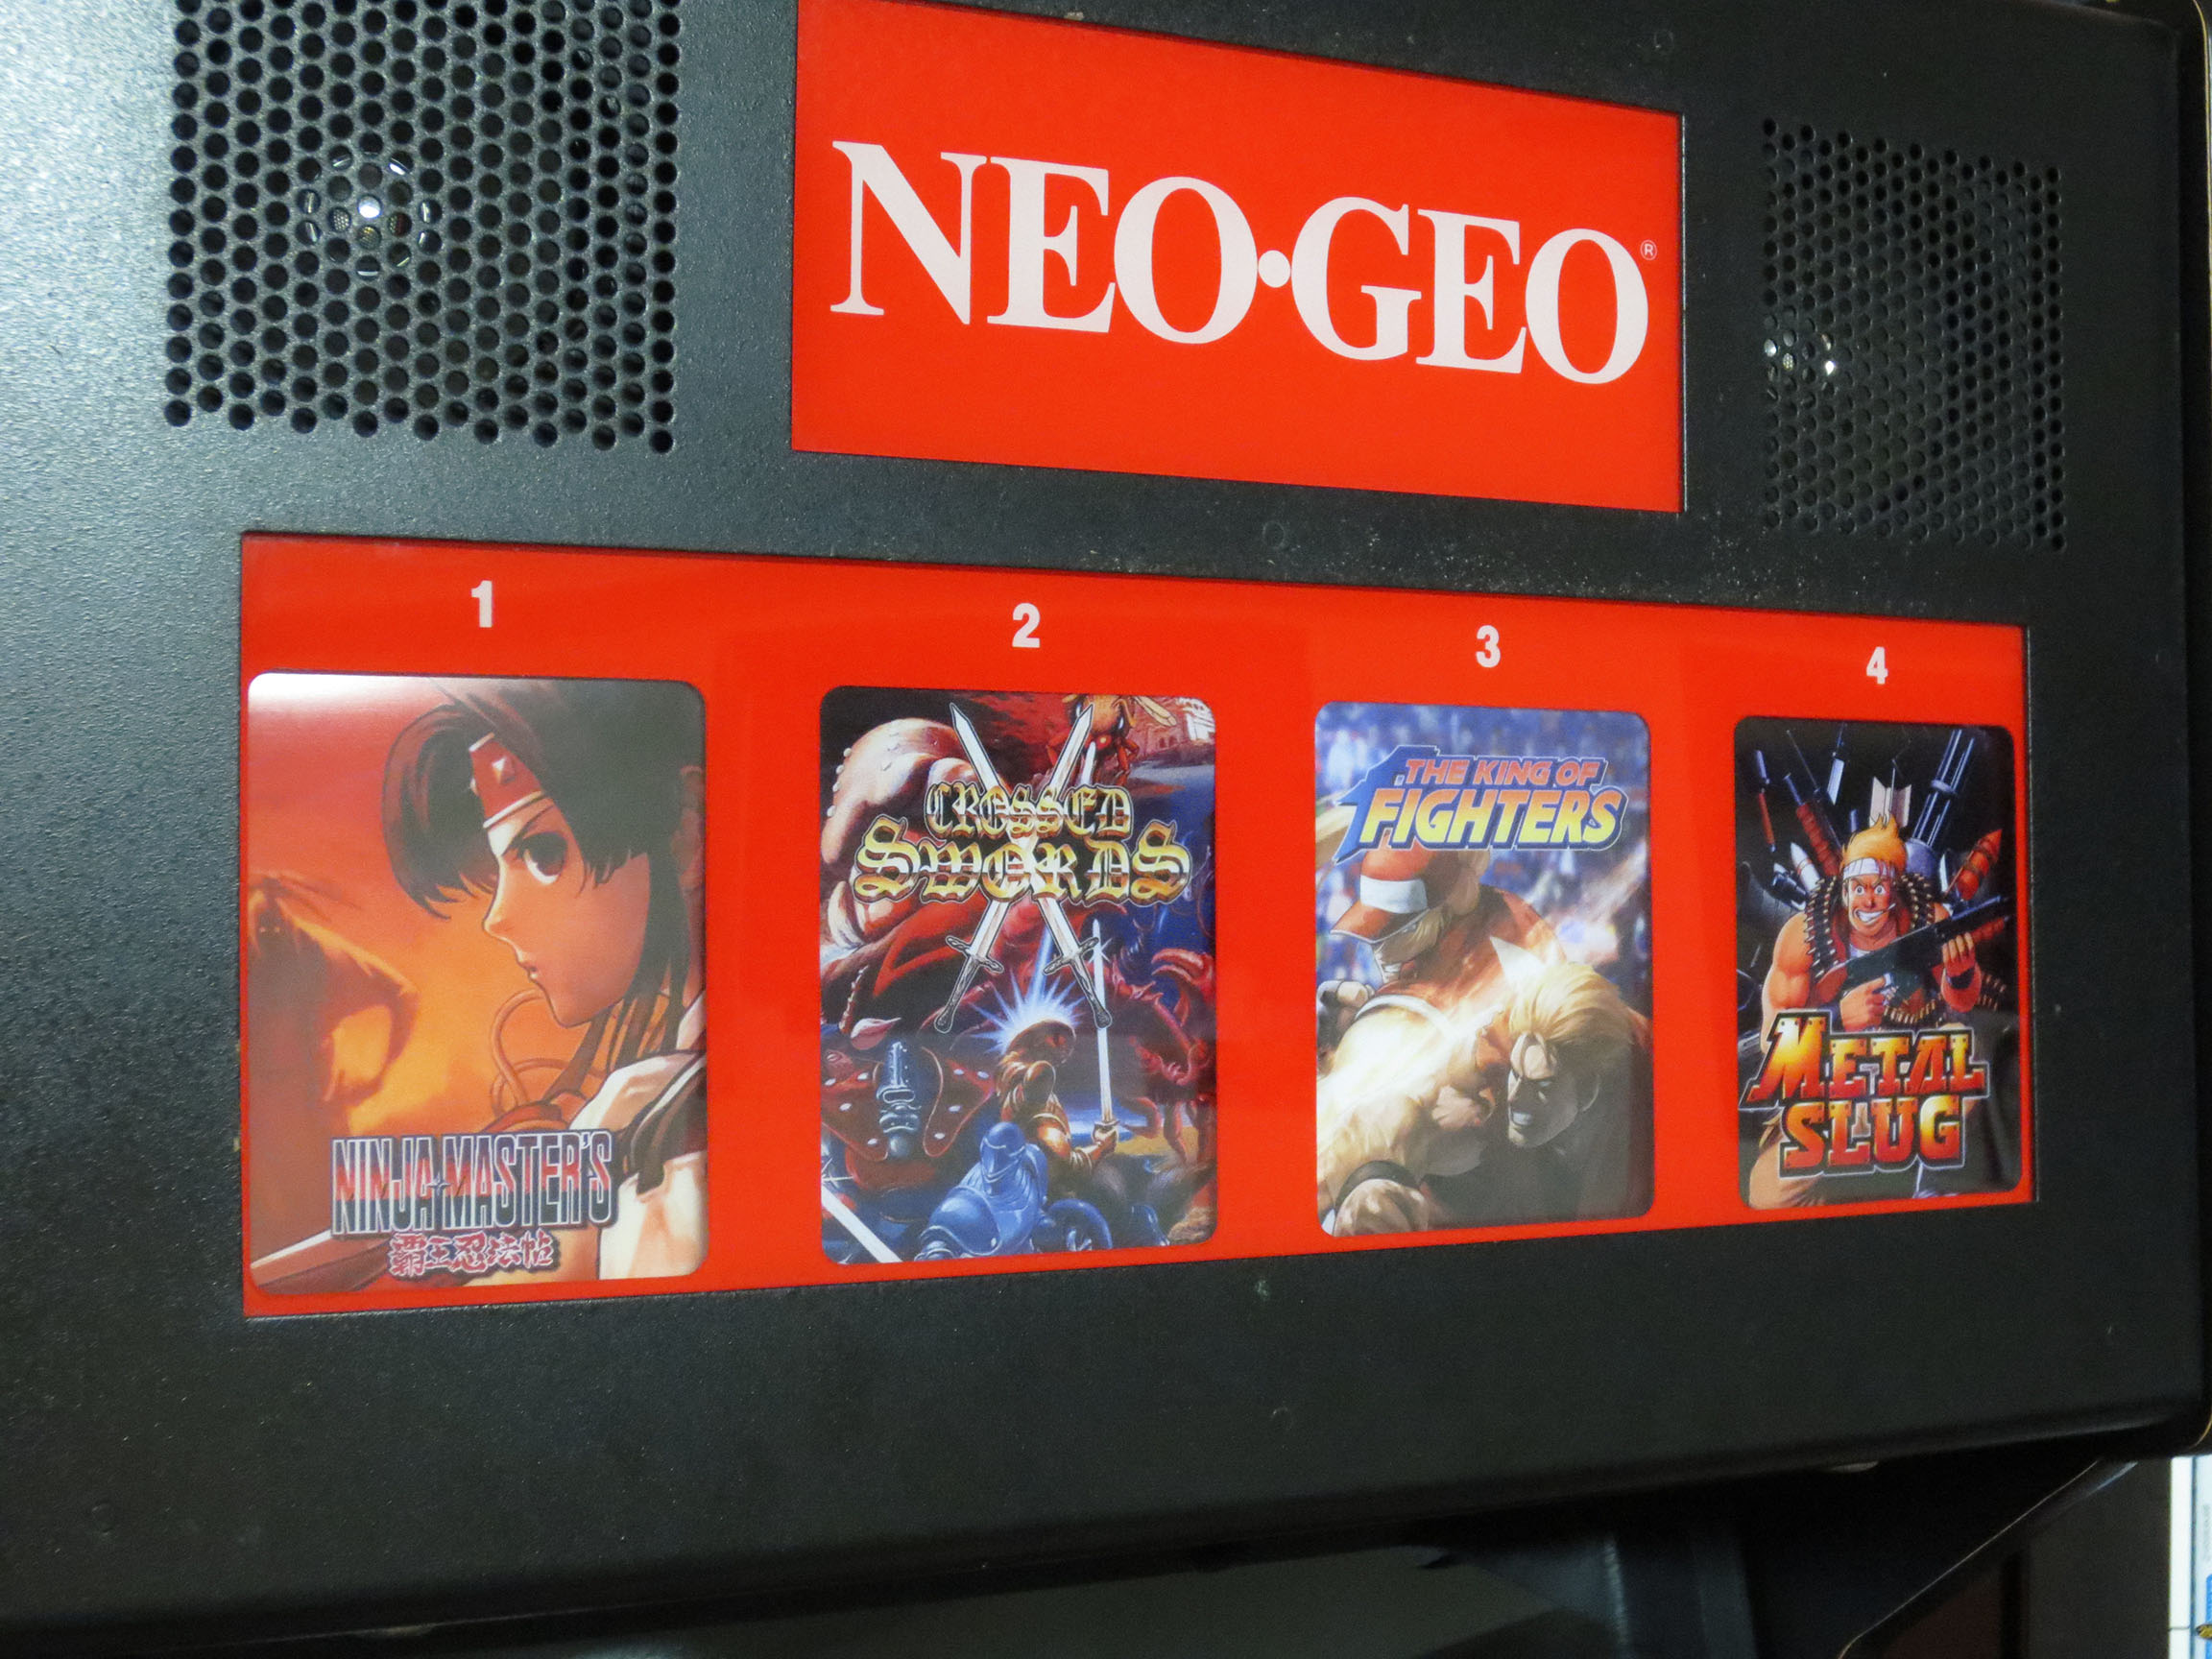
In an arcade cabinet where you’re able to play one of four games you need a way to select your game of choice. Across the top of my Neo Geo MVS arcade cabinet is a marquee made up of four Mini Marquees. A Mini Marquee is really just a small poster displaying the name of the game and some artwork to give you a quick idea of what it might be. Pressing the Neo Geo’s Select button will cycle between each game lighting up the currently selected poster/game so that it is illuminated and stands out from the rest.
Four games ready to go. Bust-A-Move, NAM-1975, Metal Slug X and Samurai Shodown.
Even though it’s entirely unnecessary I would like to have a Mini Marquee for each game I have. So when I switch cartridges I can also slide in a Mini Marquee that will match the game.
Below are a few that I’ve made. Keep in mind I can’t take any credit. All I’ve done is some cutting and pasting of other peoples work. I searched the Internet for a large high resolution image that I liked for a particular game and make it the backdrop. I would then find a high resolution title for the game and paste it on top.
You can click on any of these custom Mini Marquee’s to see the full sized image that is ready for printing.
I’ve had a bunch of these mini marquees printed on 12mm backlit film. They are 4.44 inches by 5.44 inches and they cost about $8 CAD each. It’s not cheap but it really makes the cabinet look excellent.
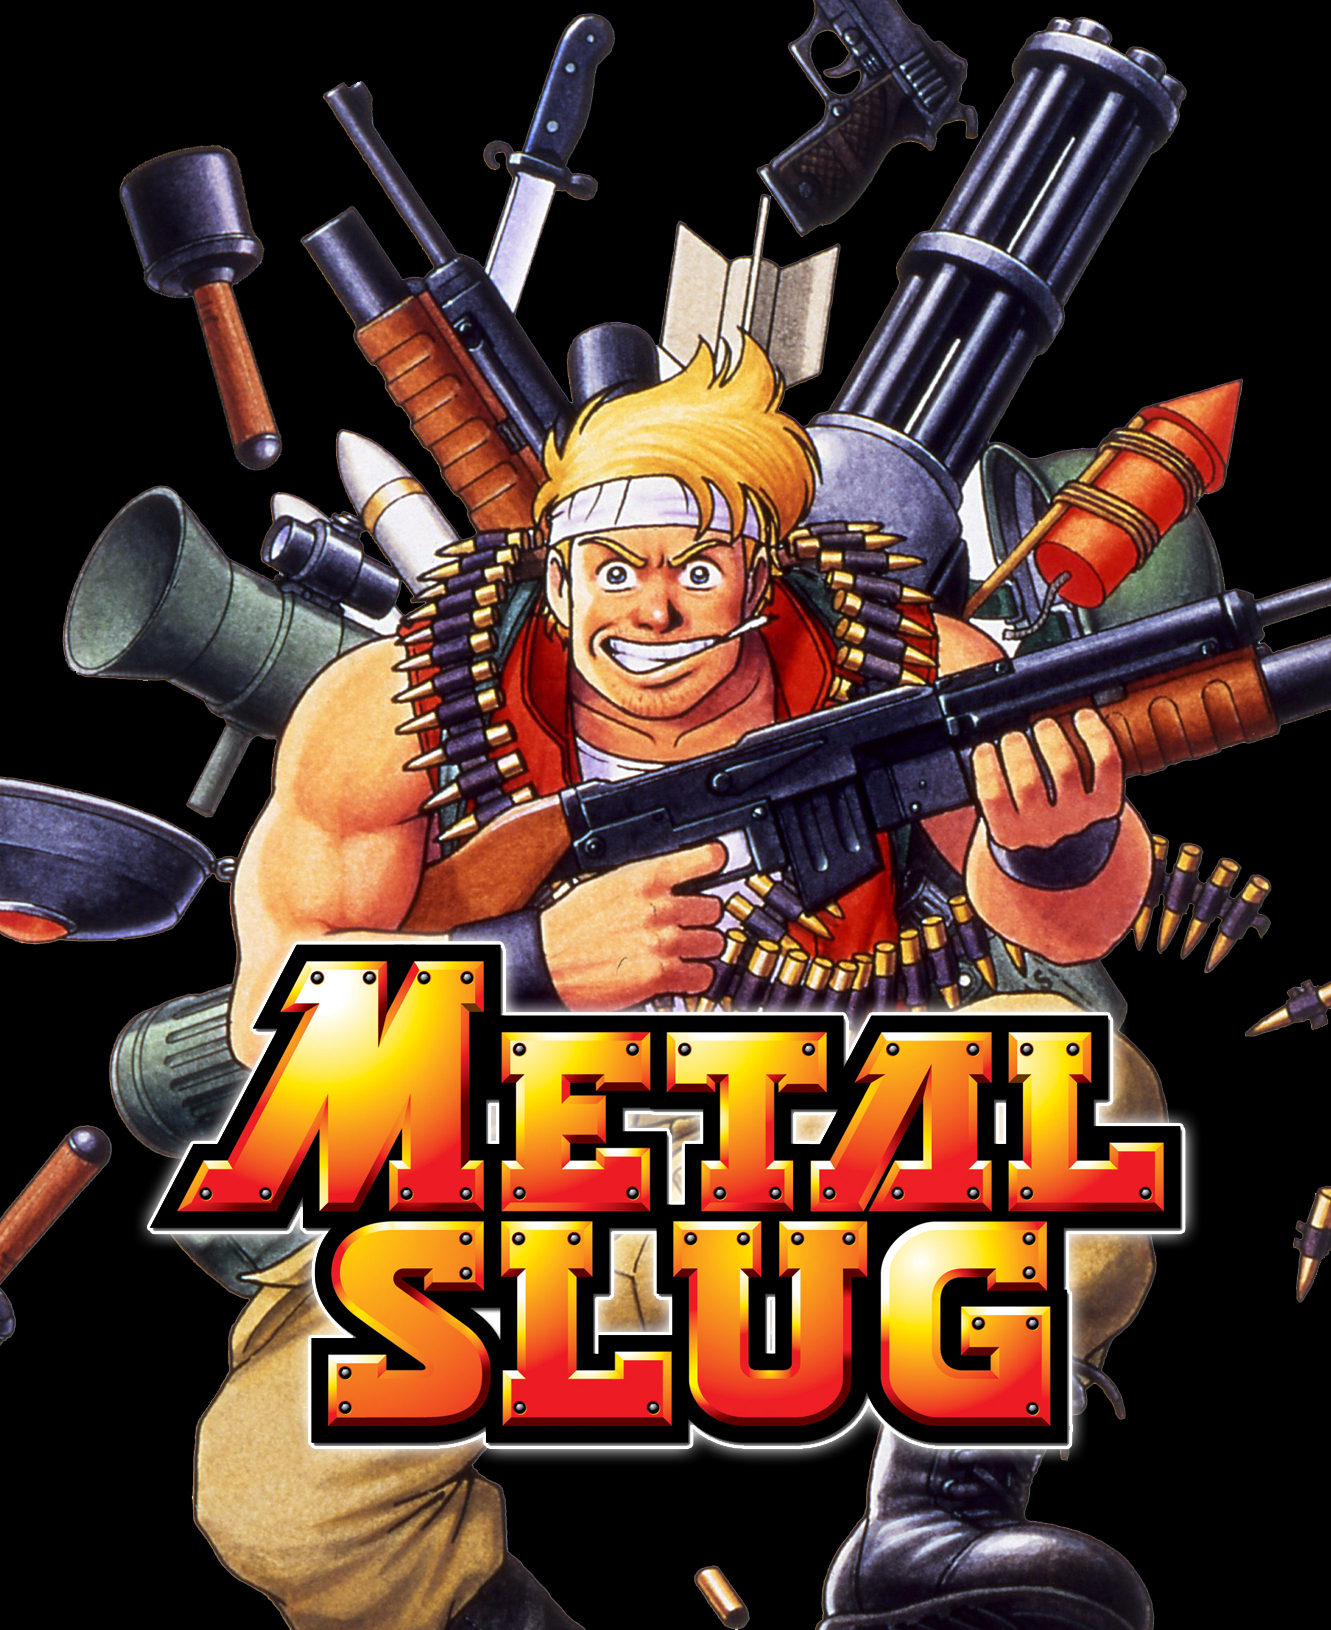
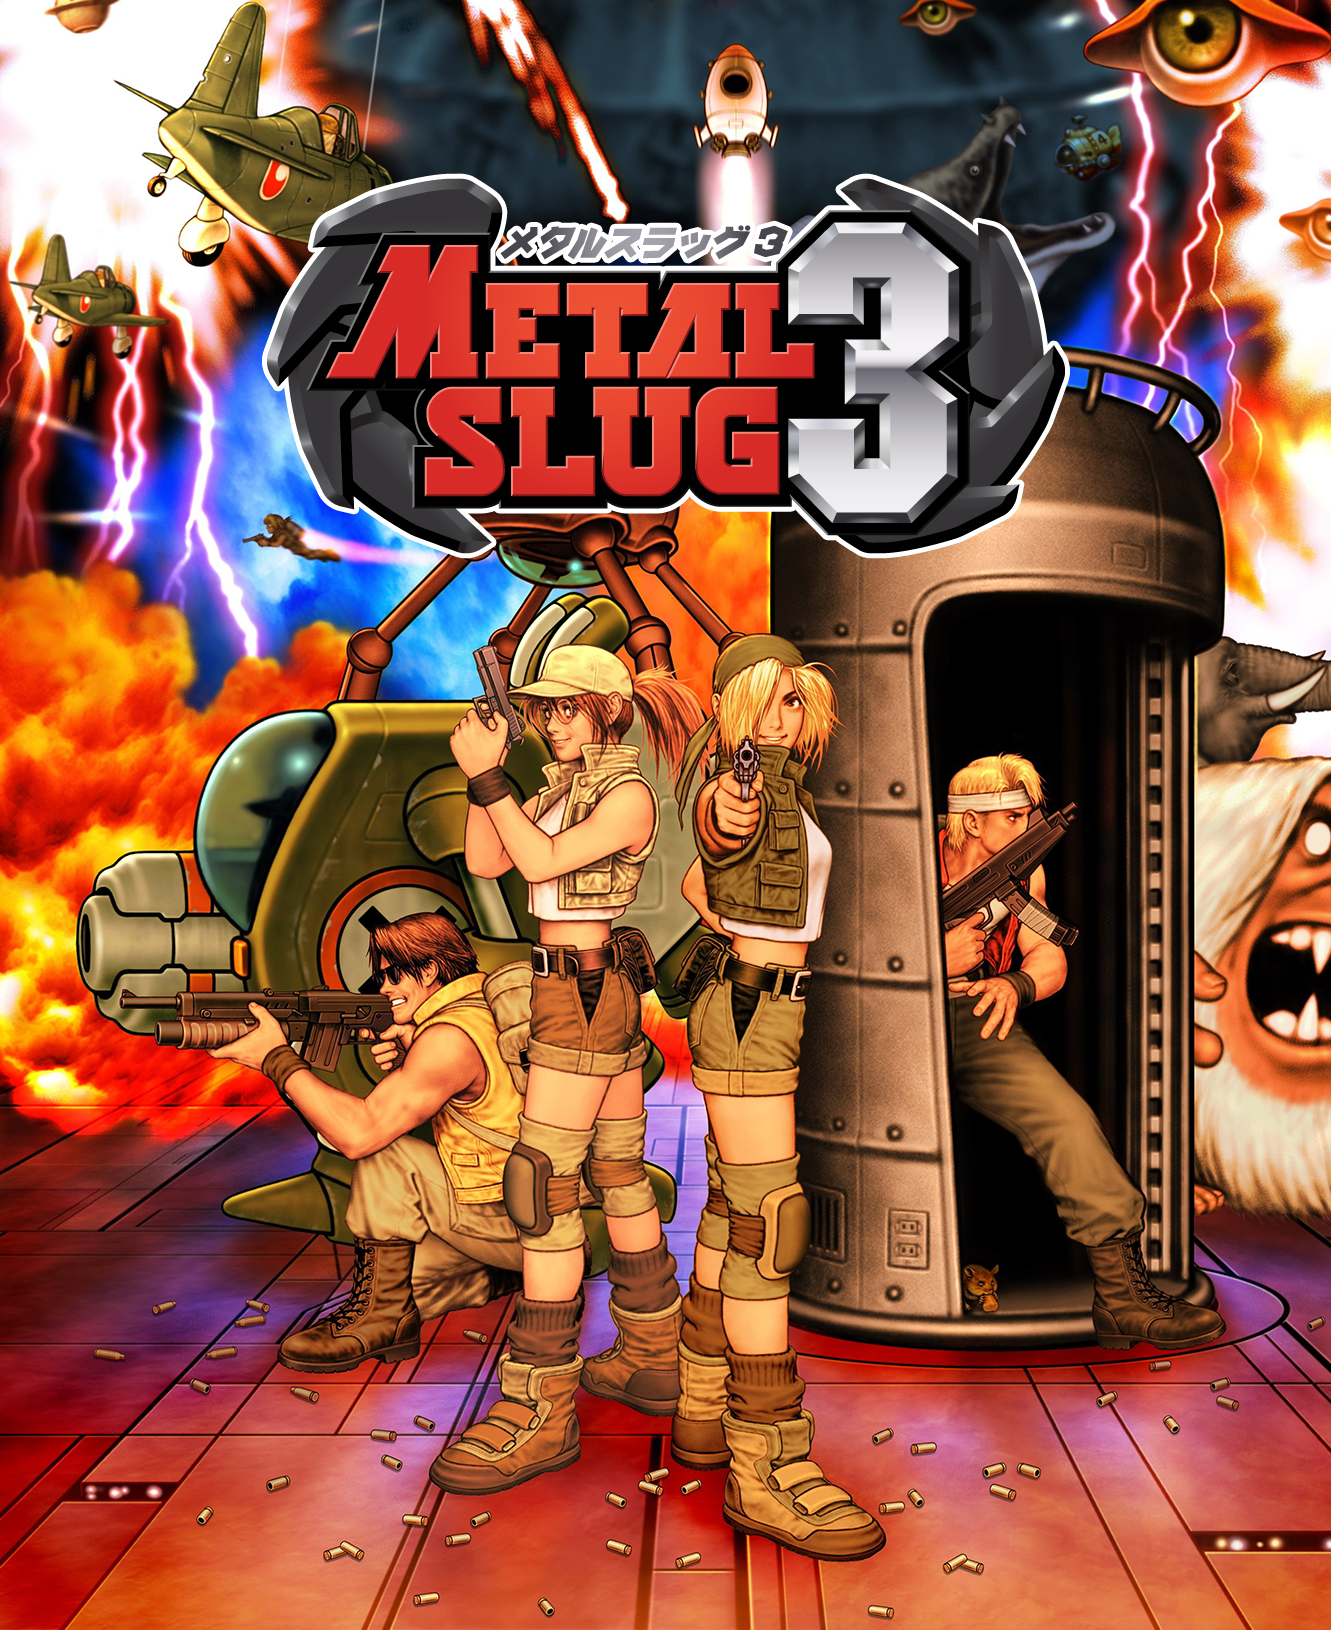
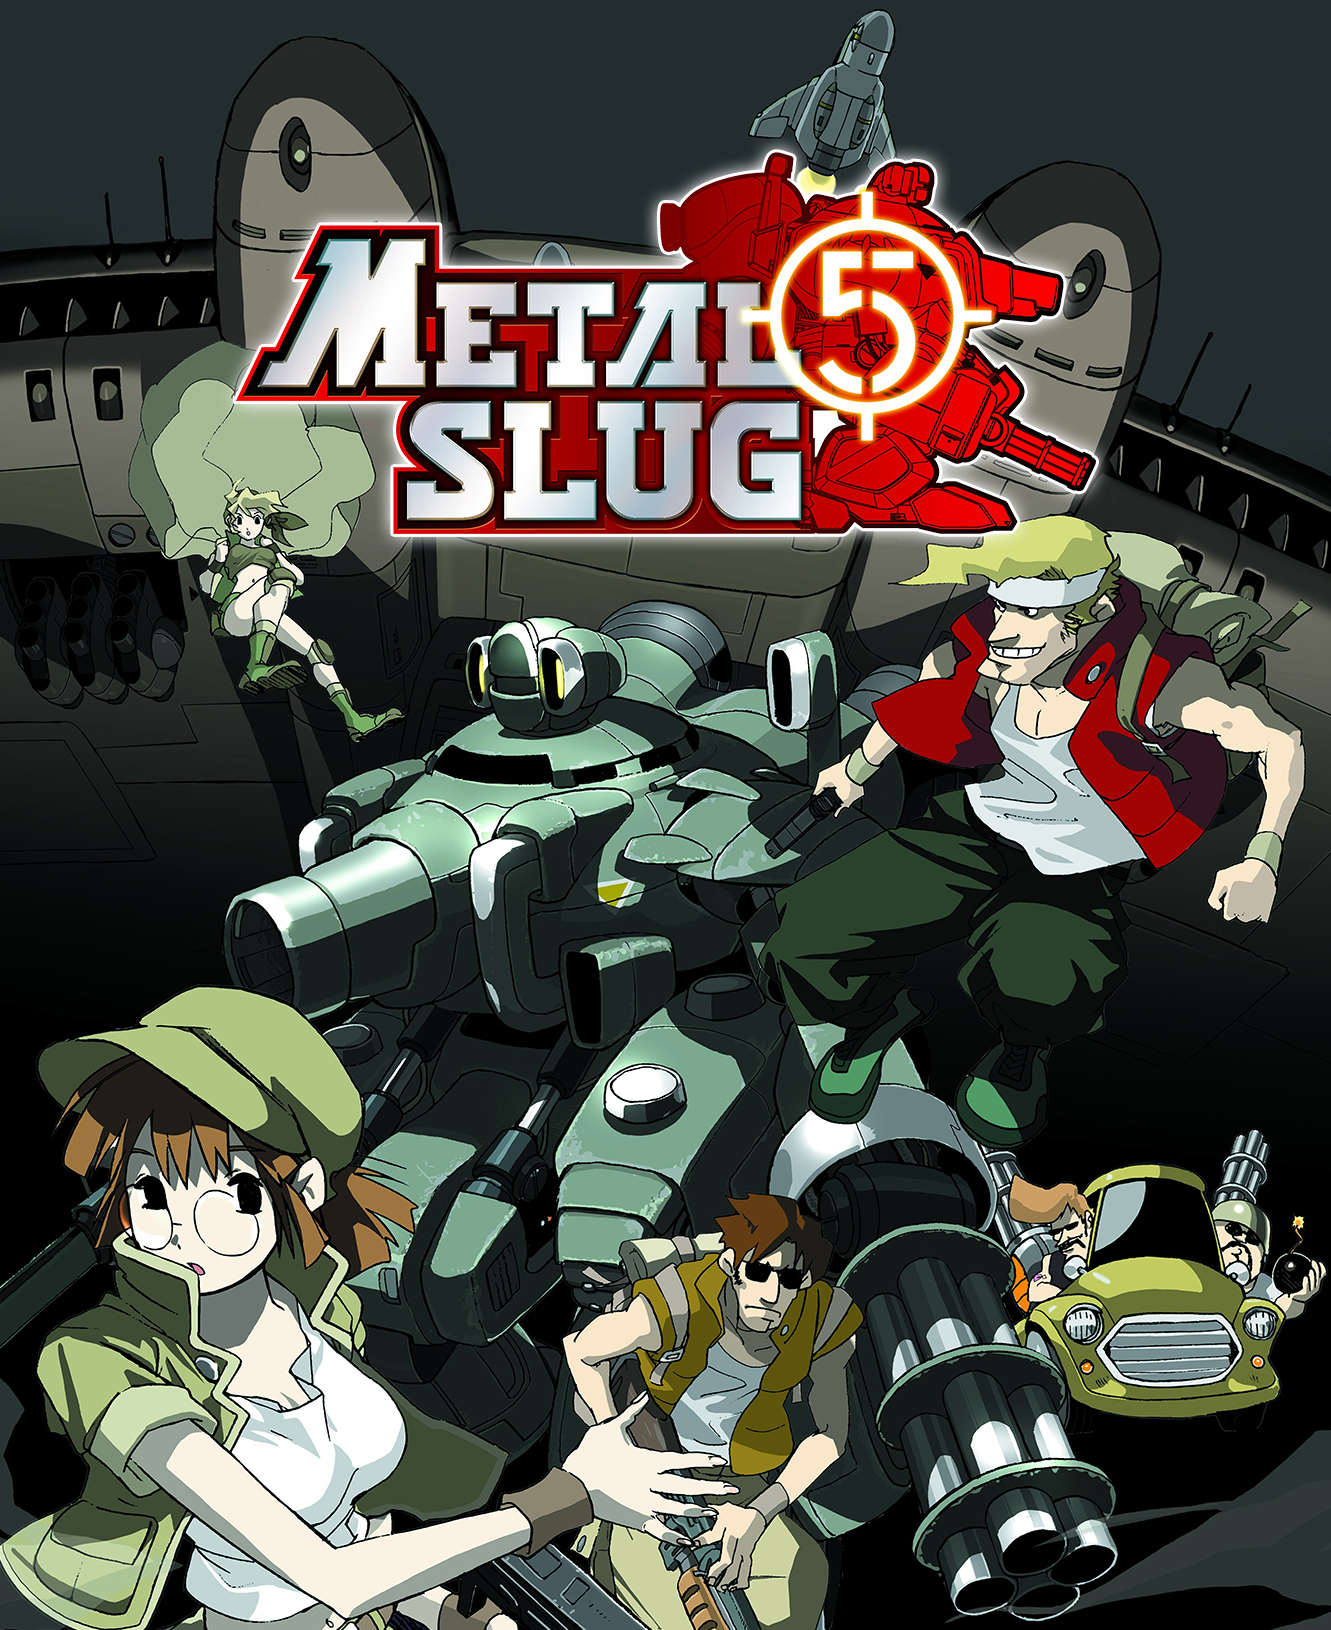
So far I’ve whipped up four Metal Slug Mini Marquees. I think they all look great thanks to the high resolution artwork and graphics available online.
Metal Slug Mini Marquee
Metal Slug X (a remake of Metal Slug 2) Mini Marquee
Metal Slug 3 Mini Marquee
Metal Slug 5 Mini Marquee
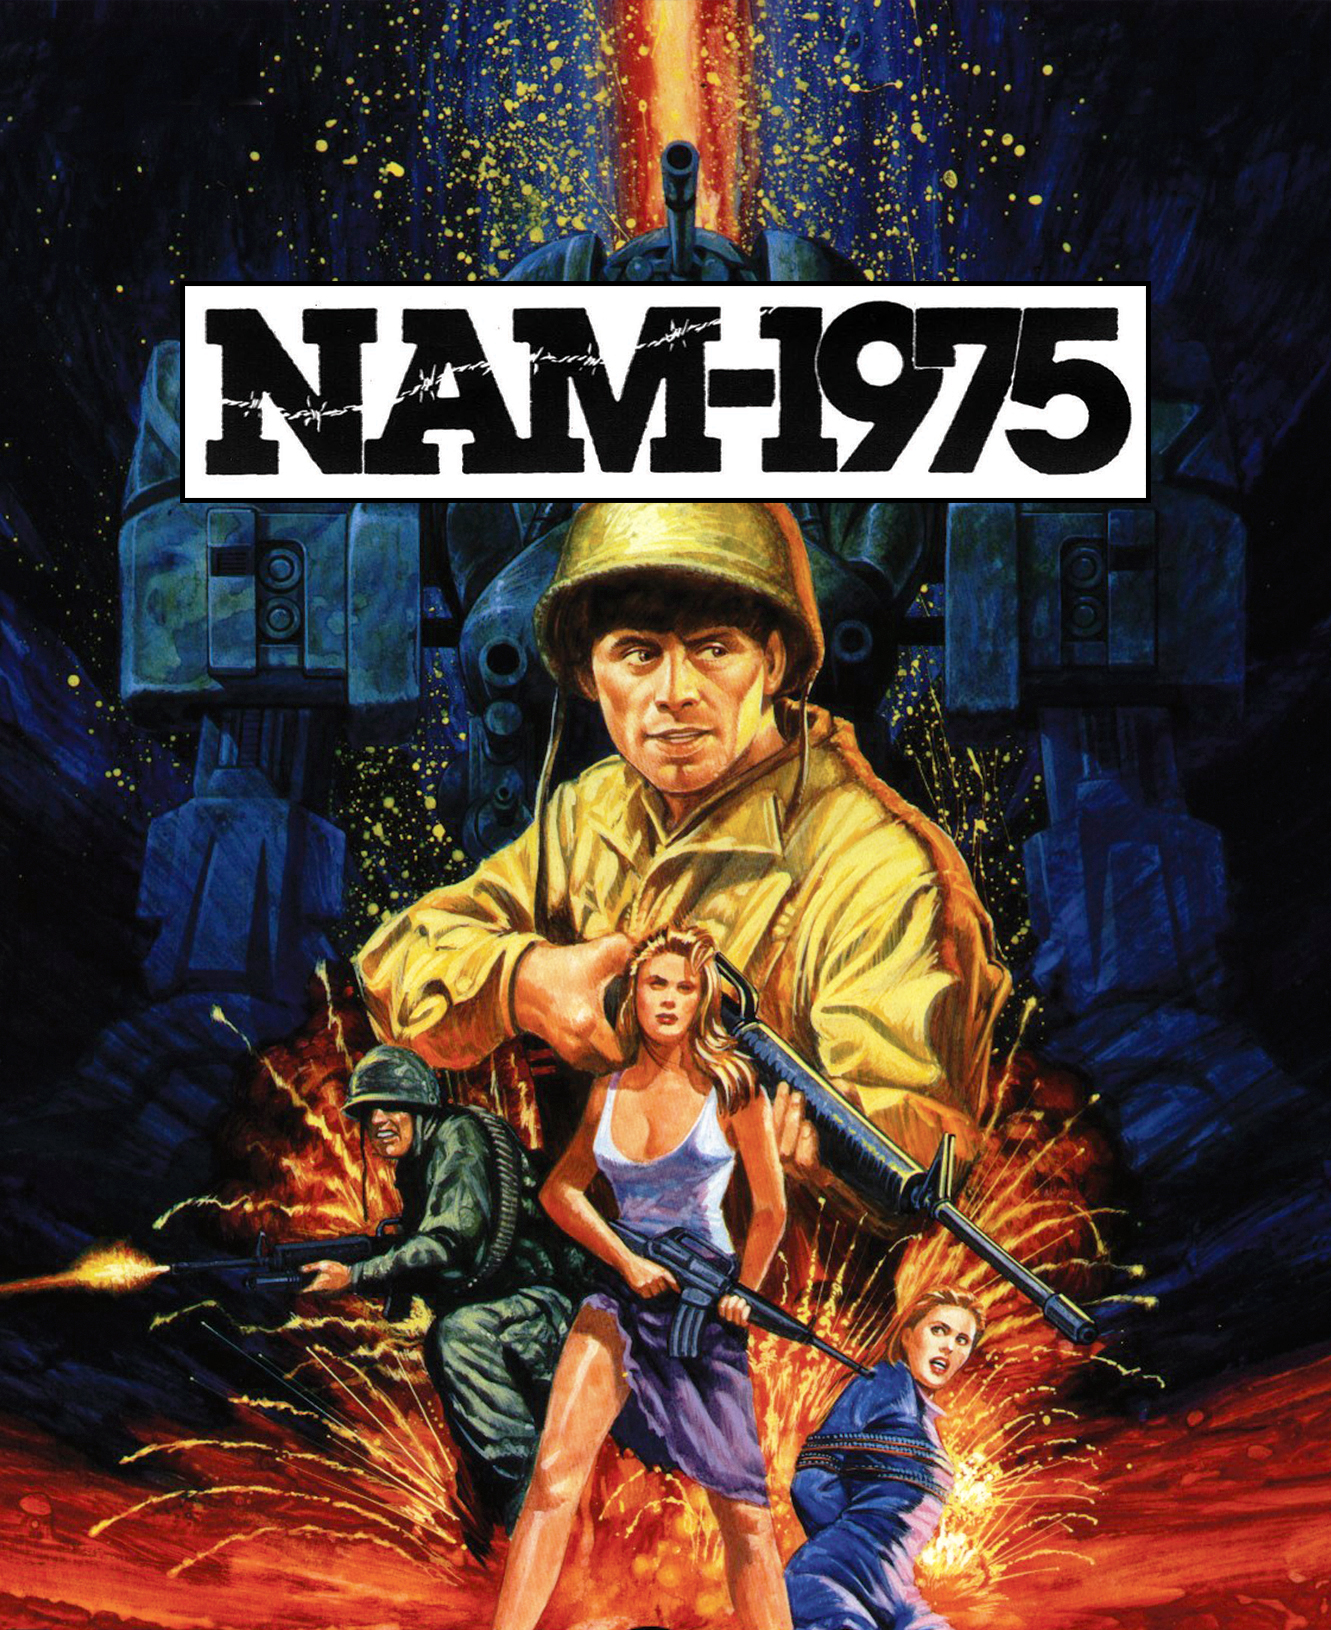
NAM-1975 turned out really well. I was concerned that it might be too dark to see well when it’s not lit up but as it turns out it looks great in both states. Same with Metal Slug 5 (above). It’s a dark image but it is still clear and easy to see and read.
NAM-1975 Mini Marquee
Burning Fight printed very well. I just wish I could get the Title a bit larger without loosing quality but the source is not big enough. I also wish there was a better place to position the title so that it’s not covering faces. So far this is the best I’ve come up with.
Burning Fight Mini Marquee
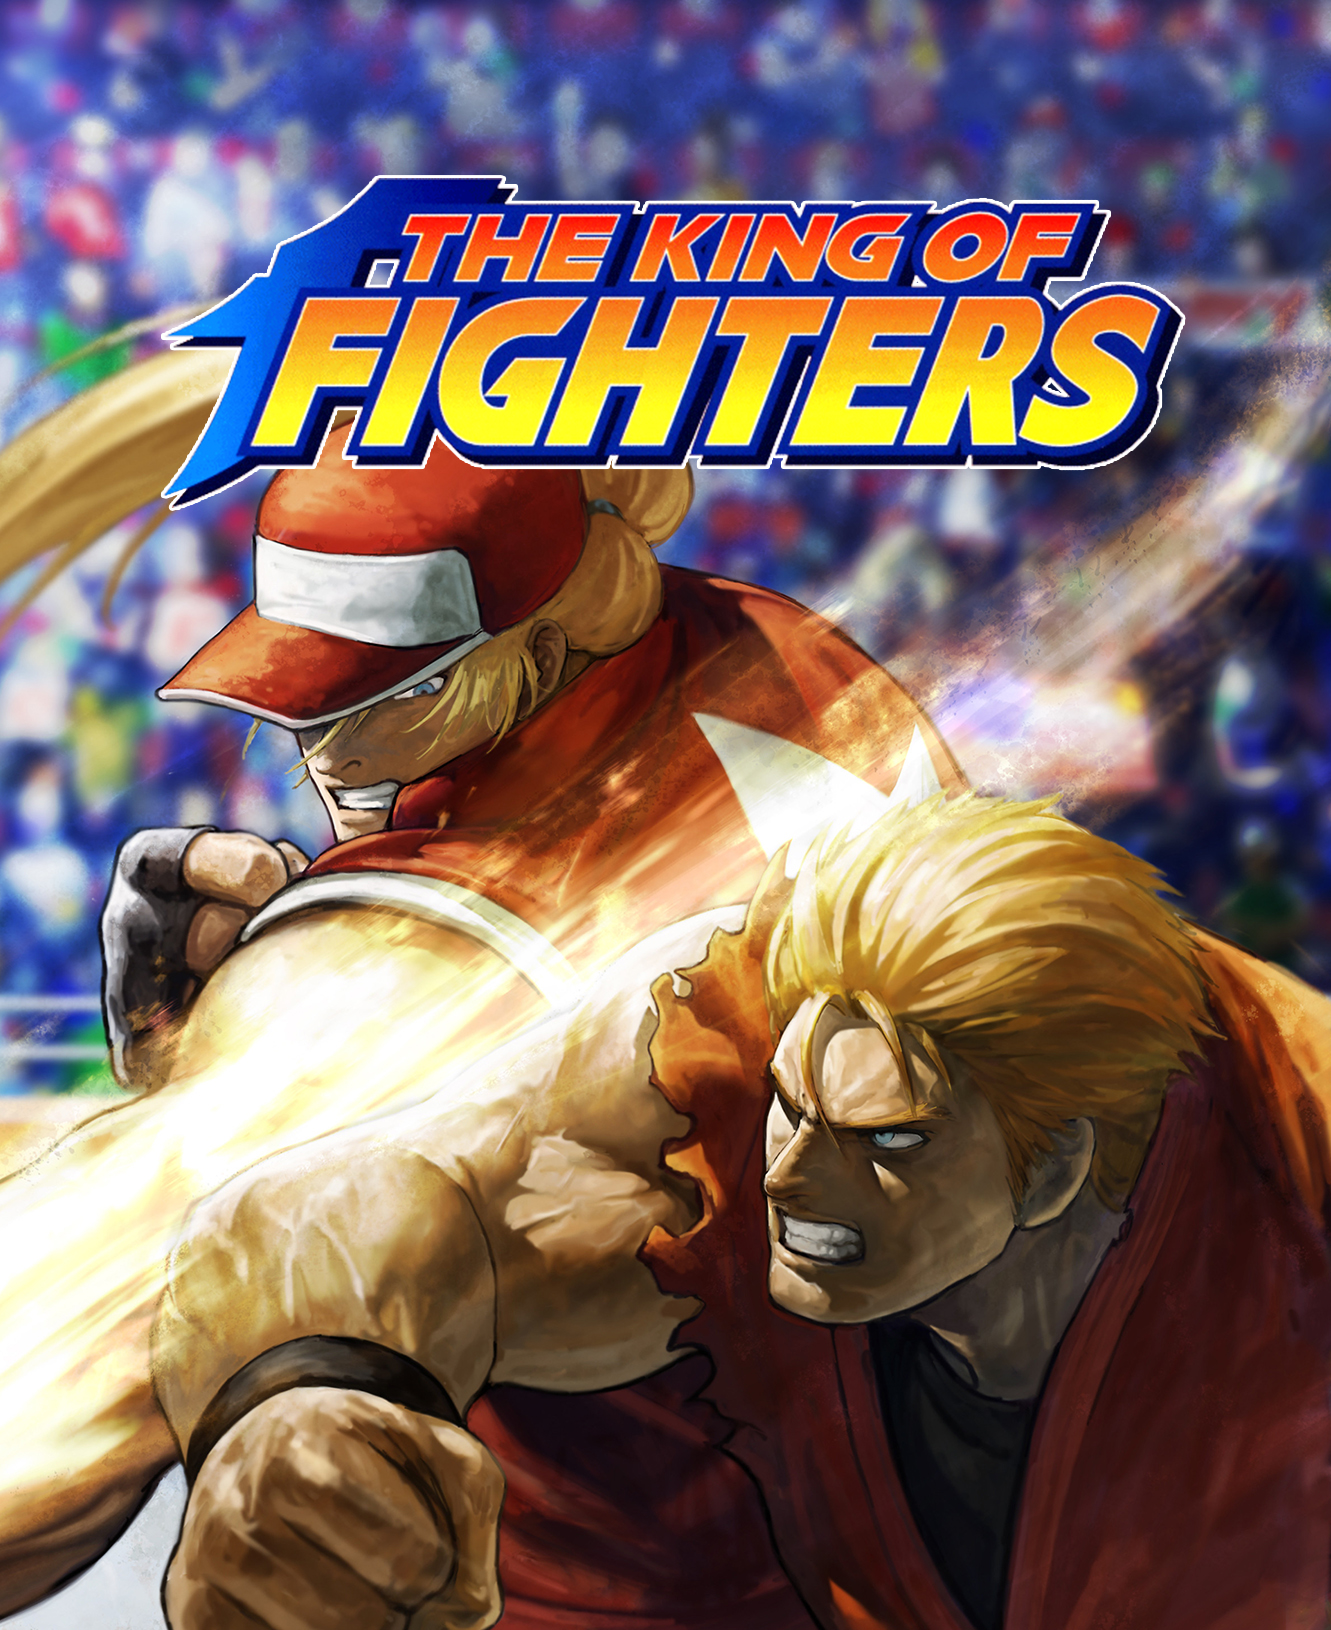
There are so many King of the Fighter games (KOF 94, 95, 96, 97, 98, 99, 2000, 2001, 2002, 2003) that I’ll start with one mini marquee as generic as possible to represent the series. I had this one printed and I think it looks excellent!
The King of the Fighters Mini Marquee
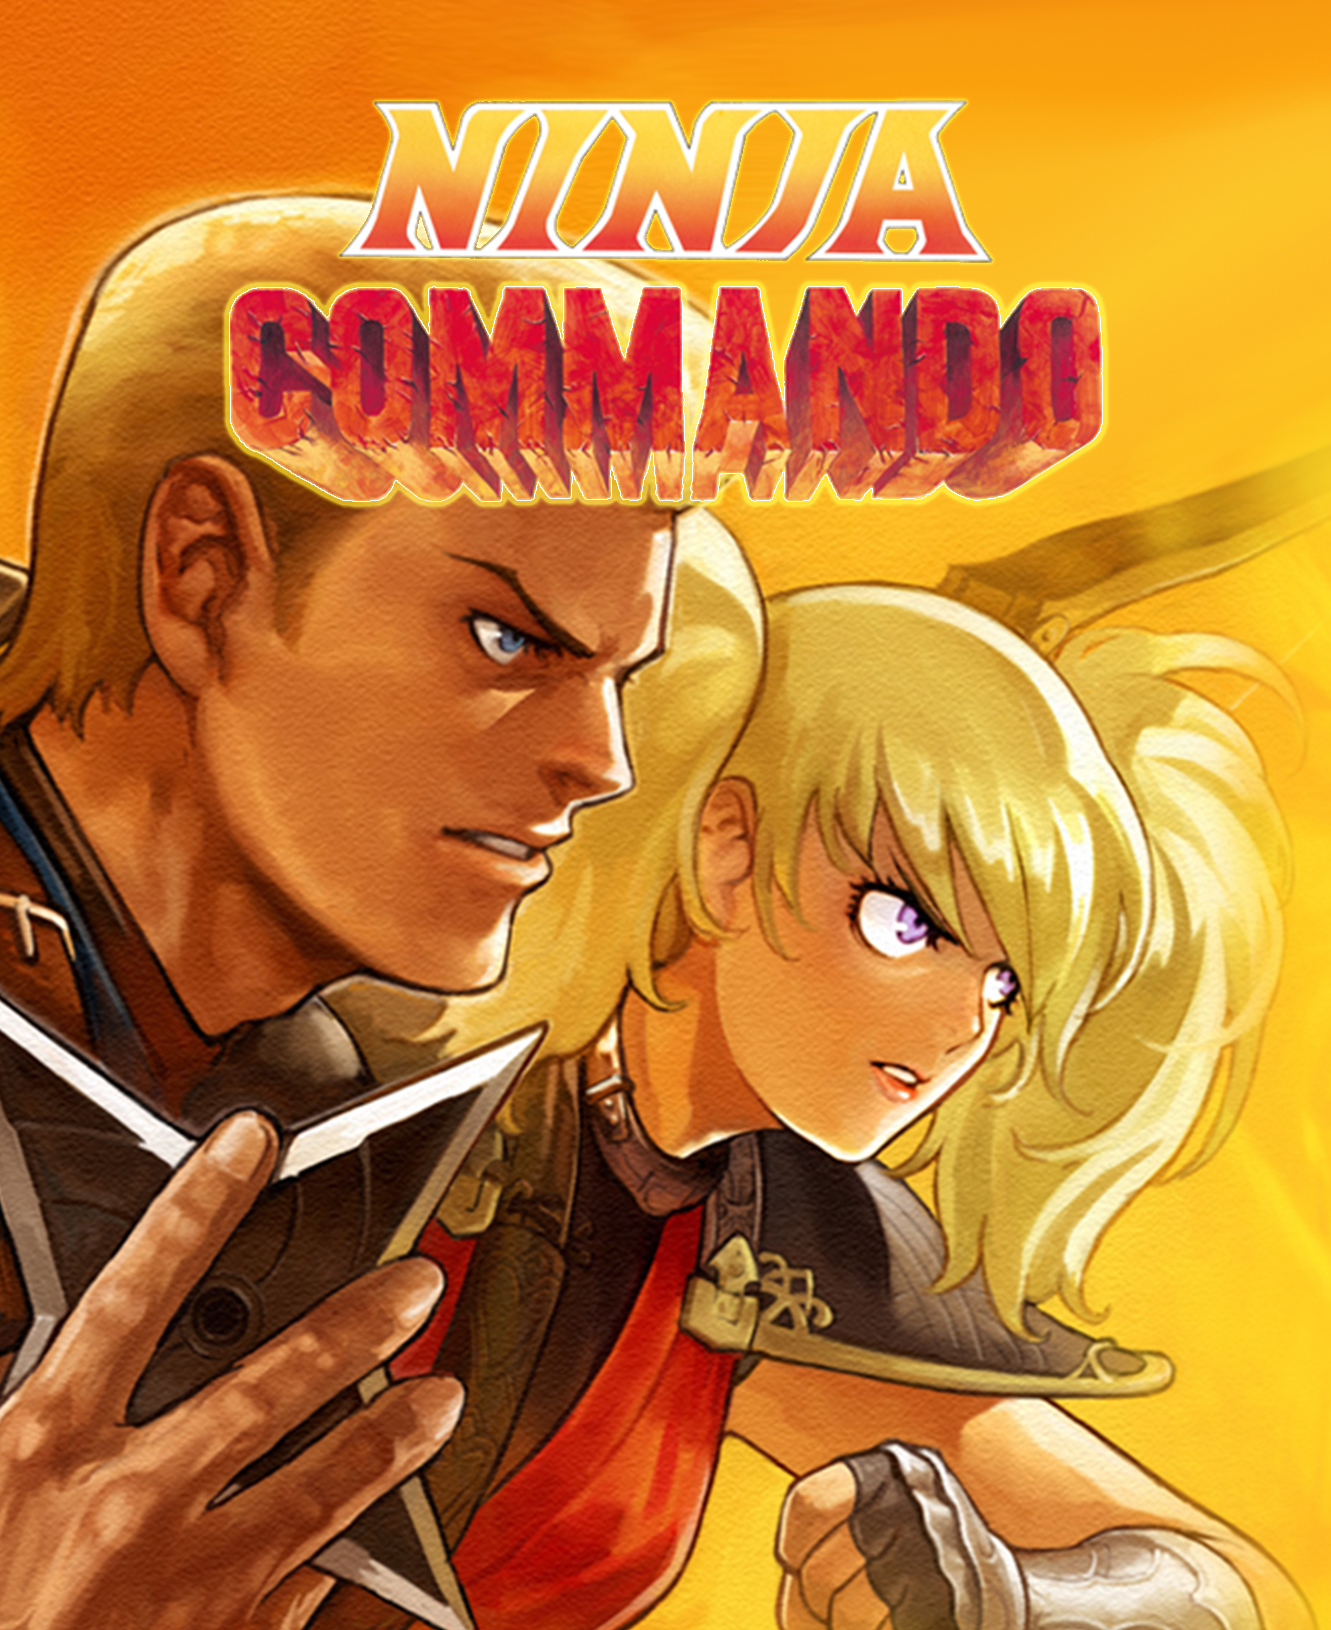
Ninja Commando is one of the more recent Mini Marquee that I’ve worked on. This one was tough. I had to remove the Title from the image (which was in the upper right corner) and cover up what I cut out. I used Photoshop’s smudge feature to blend the yellow to orange covering the white gap I left after cutting out the title. When I get a chance to print it I’ll know for sure if it will be good enough. Typically the bright and vibrant images always look great when both lit and not lit.
Ninja Commando Mini Marquee
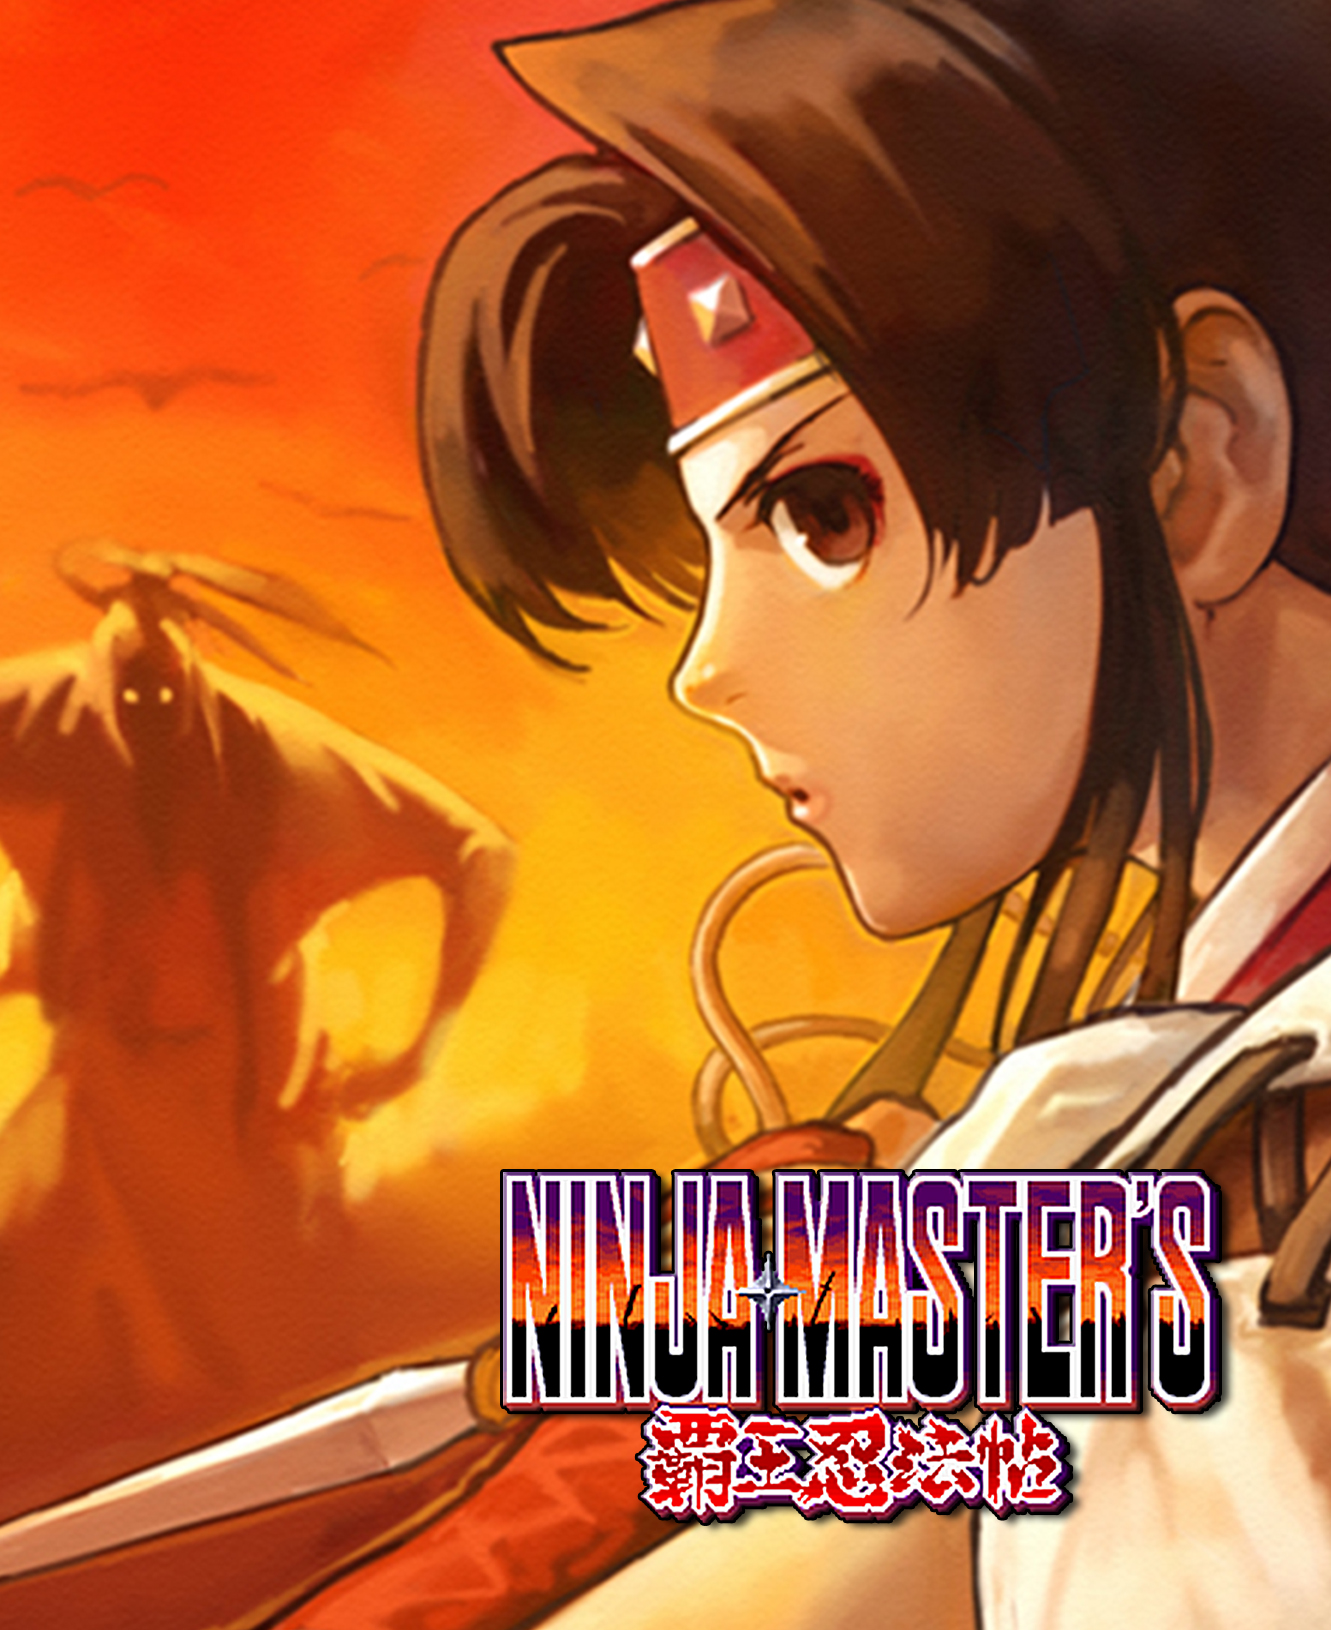
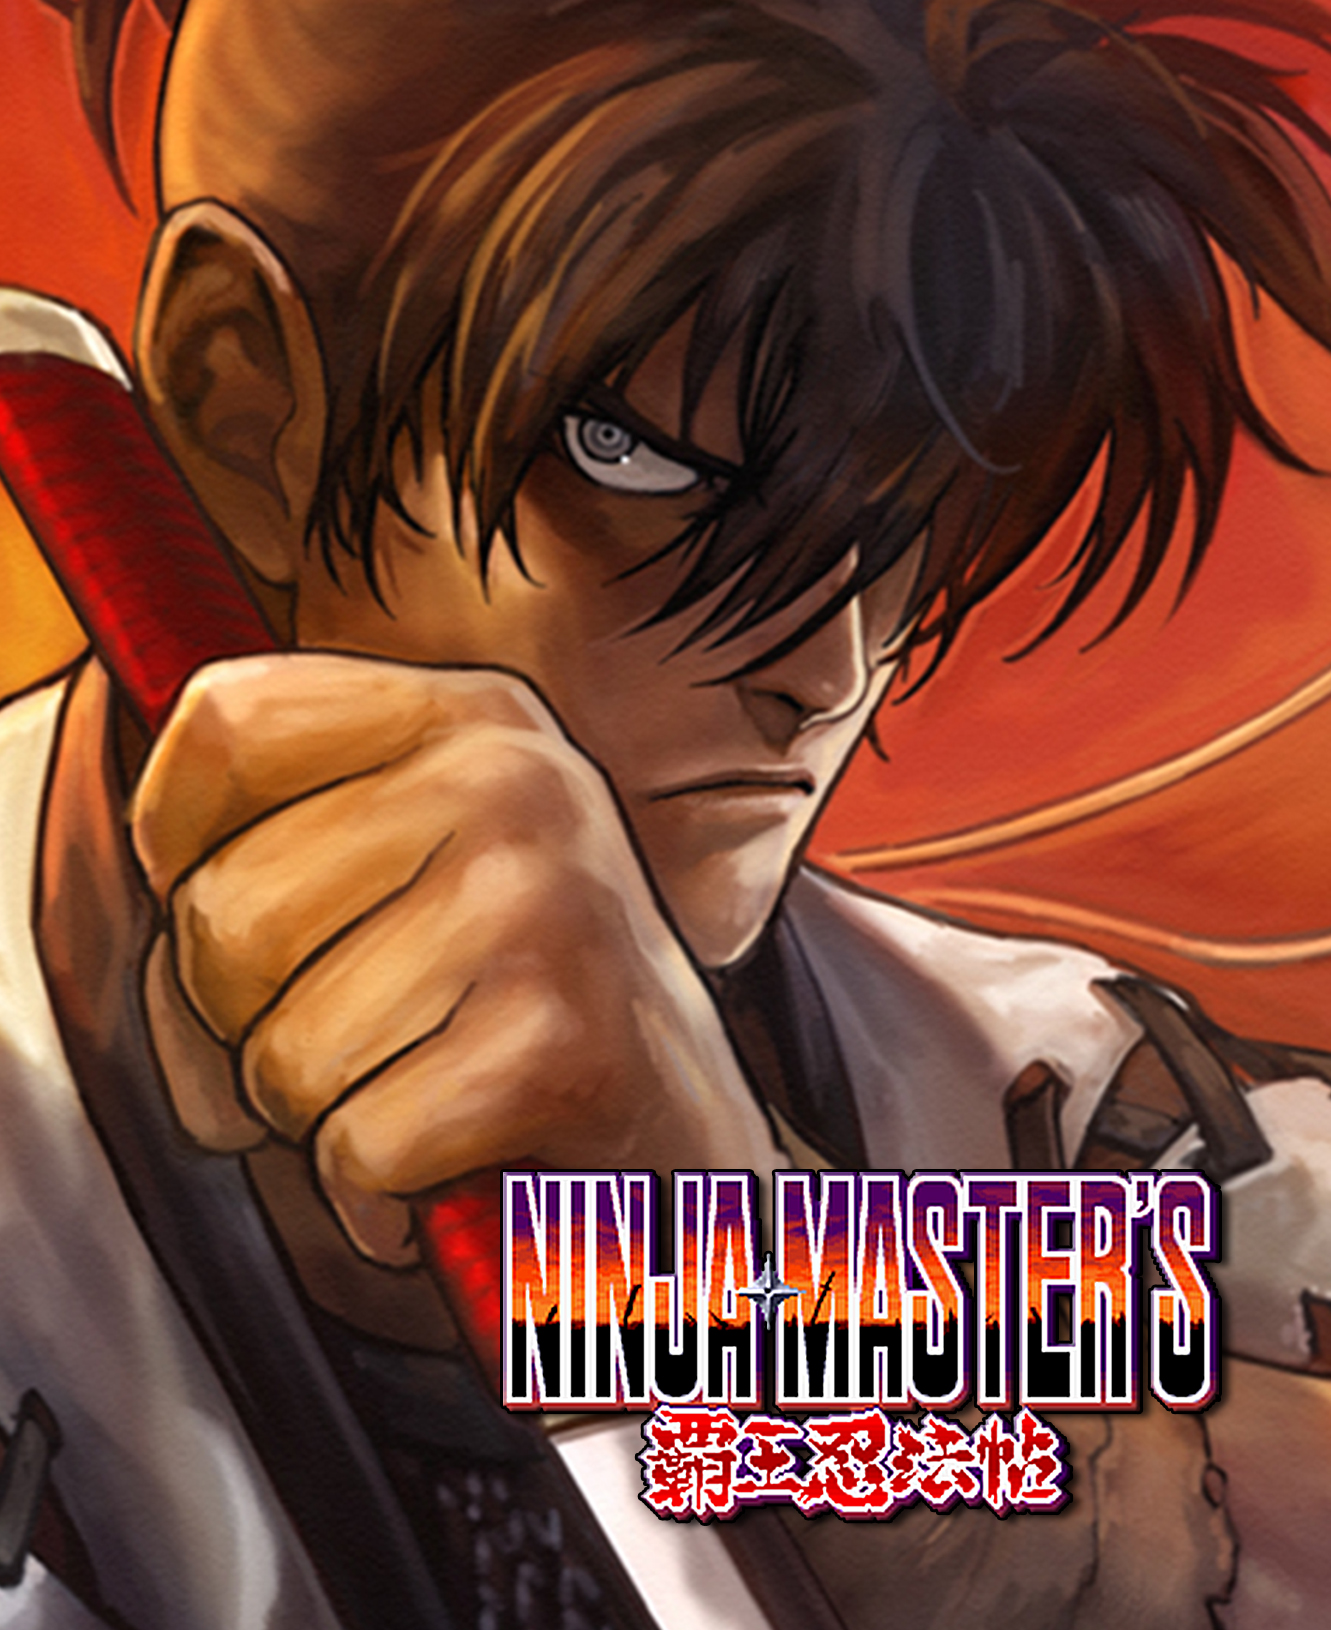
I tried really hard to find a sharp and large resolution title for Ninja Master’s but I just couldn’t do better than what’s below. I very slightly increased the size of the title image, placed it on the background image and sent if off to the print shop. Both Ninja Master’s Mini Marquees printed really well. Turns out the title image is just fine. I’m really happy with these two. There is only one Ninja Master’s game but I could not decide which mini marquee image I liked more so I printed both.
Ninja Master’s Mini Marquee
Ninja Master’s Mini Marquee
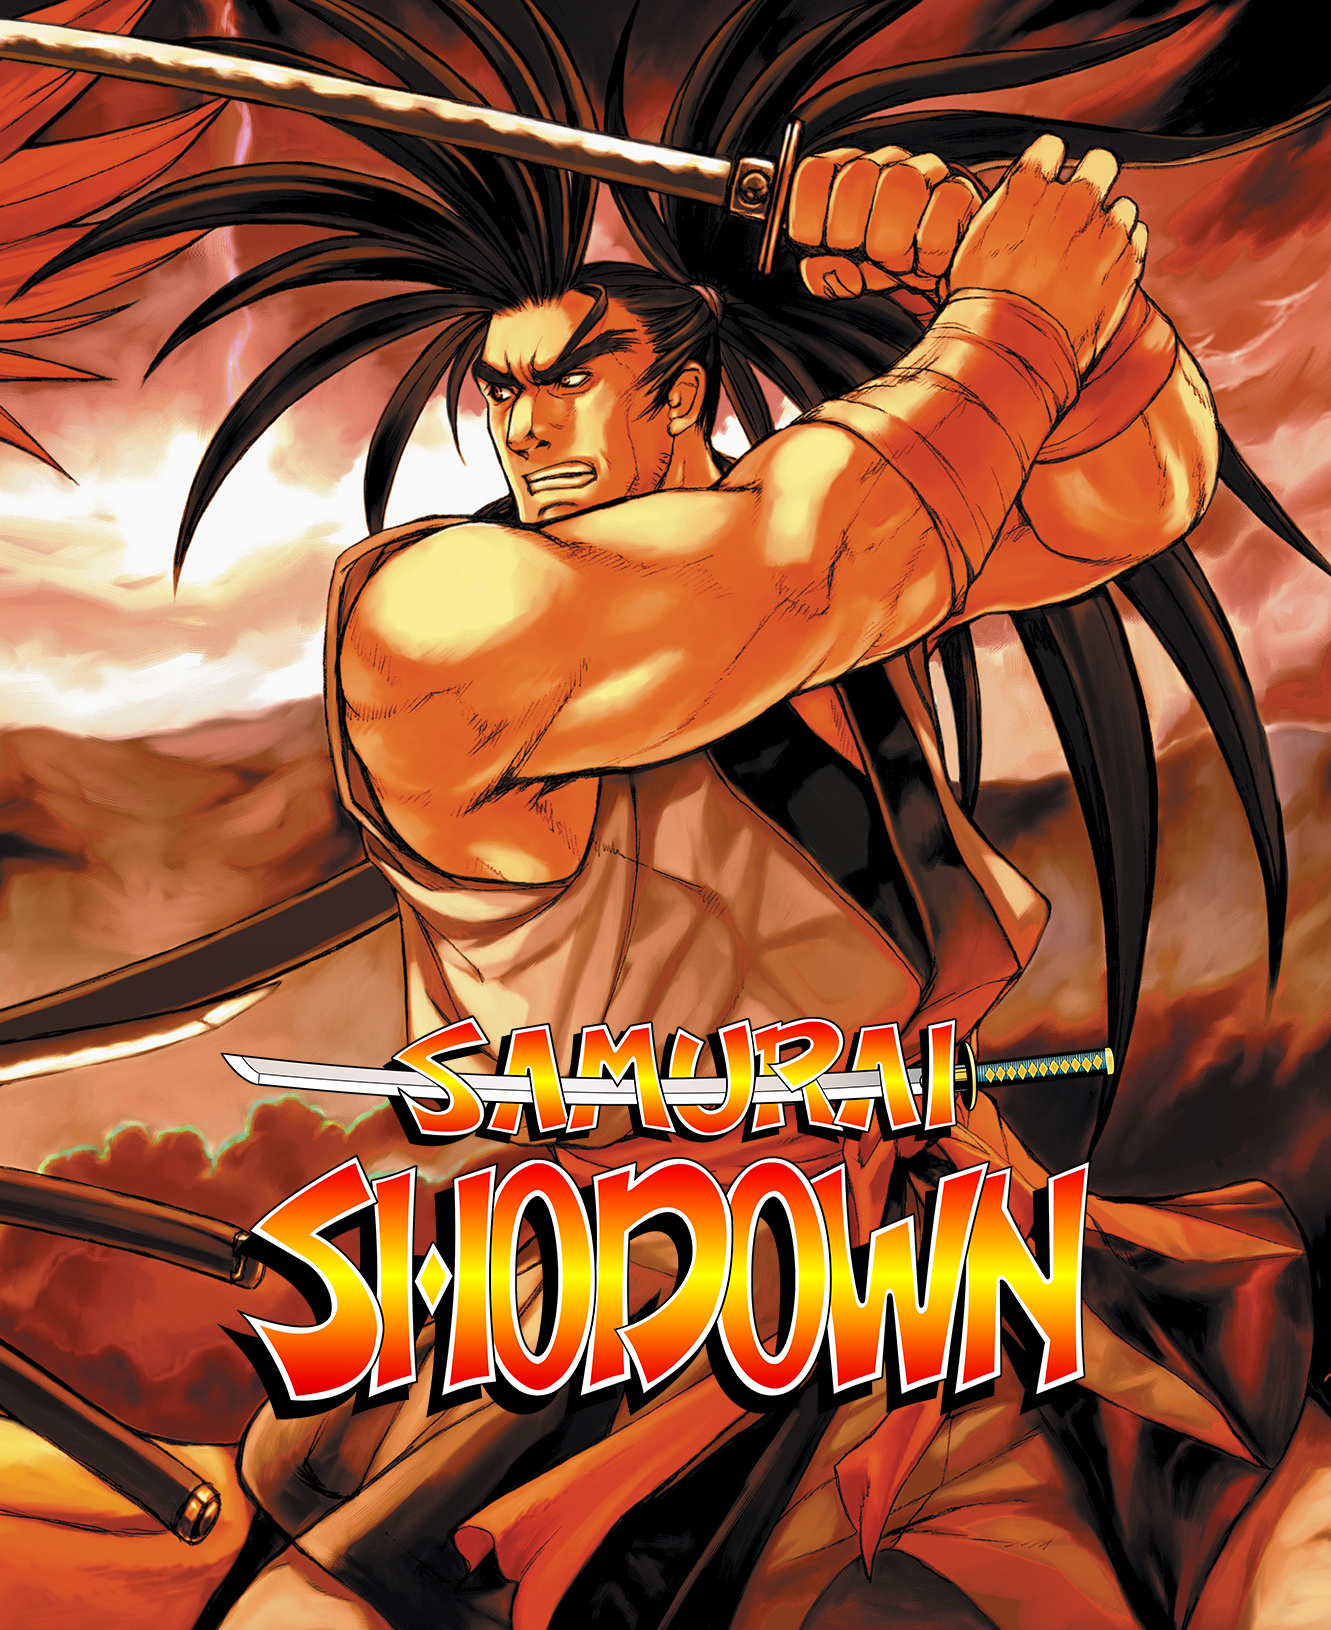
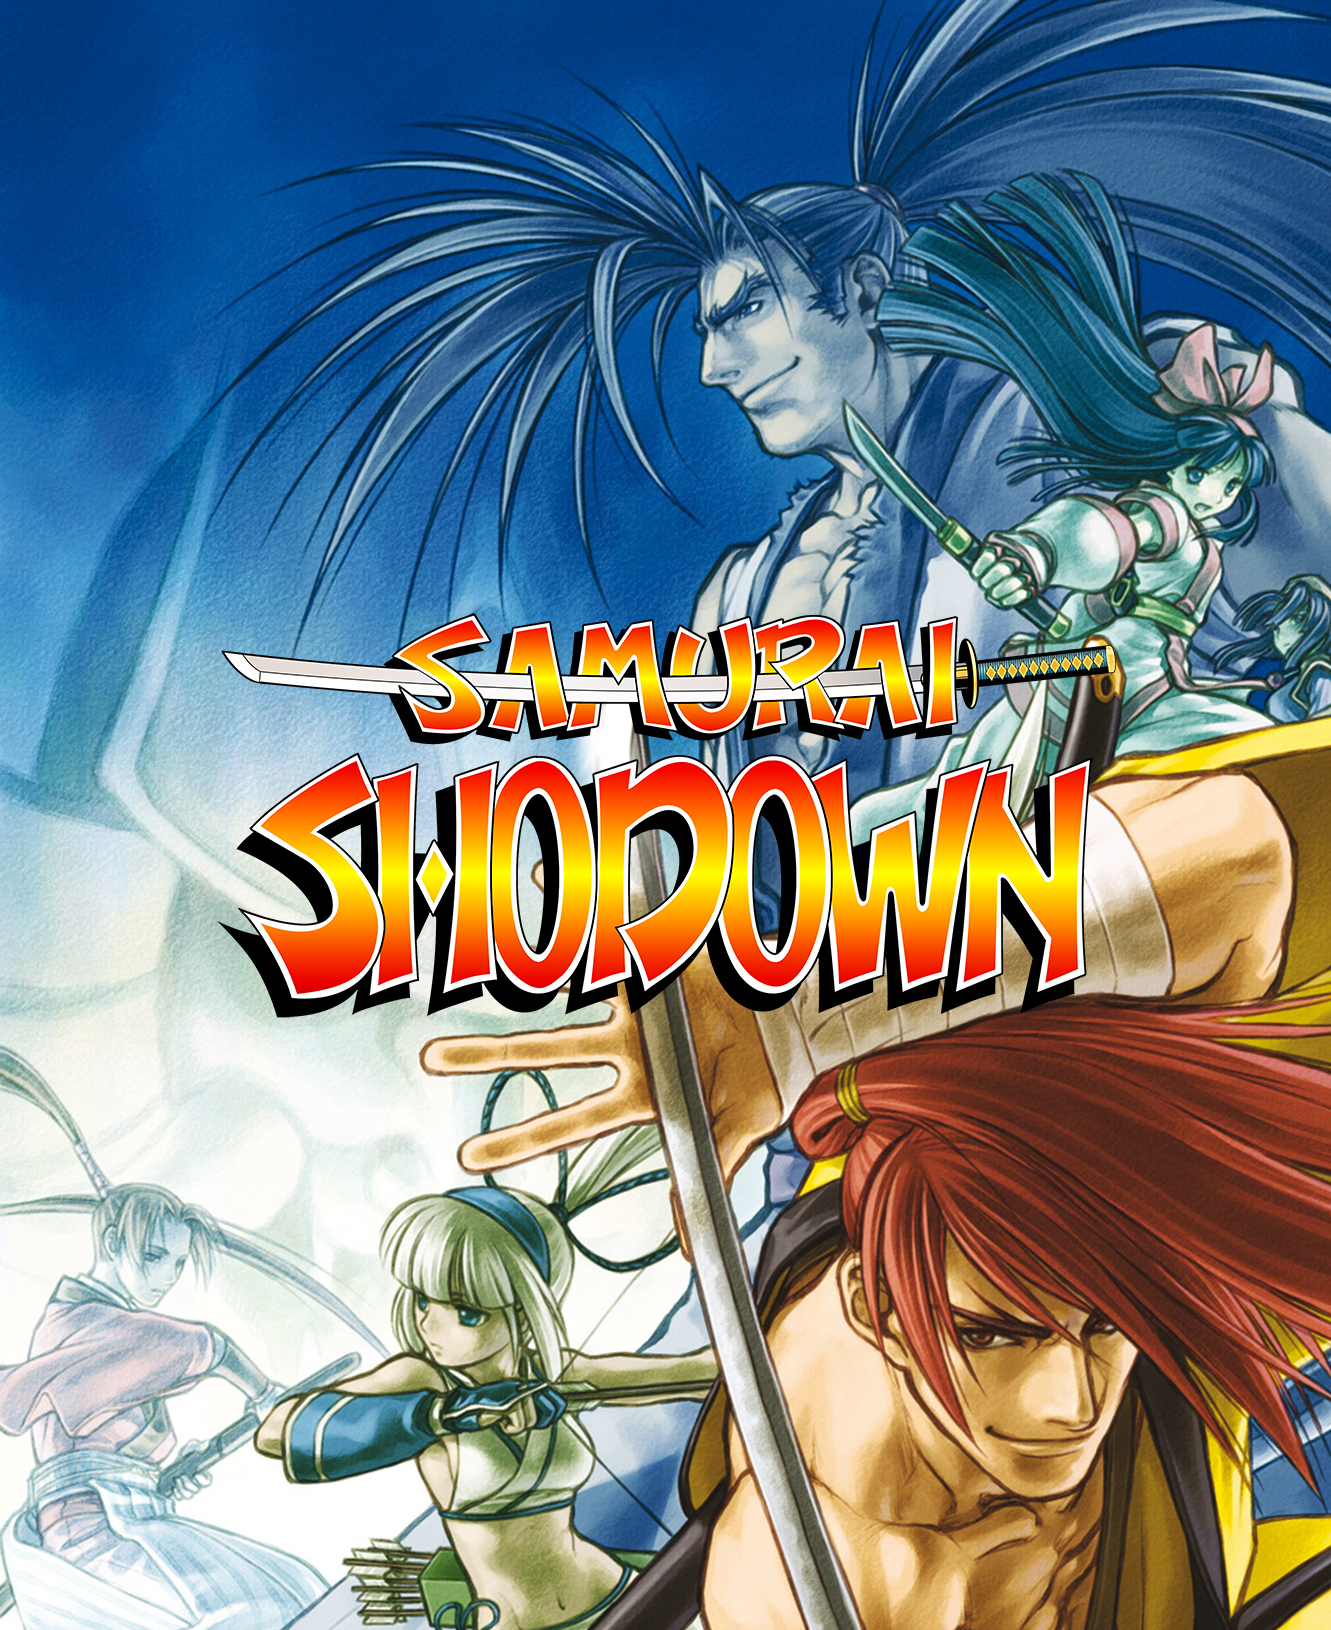
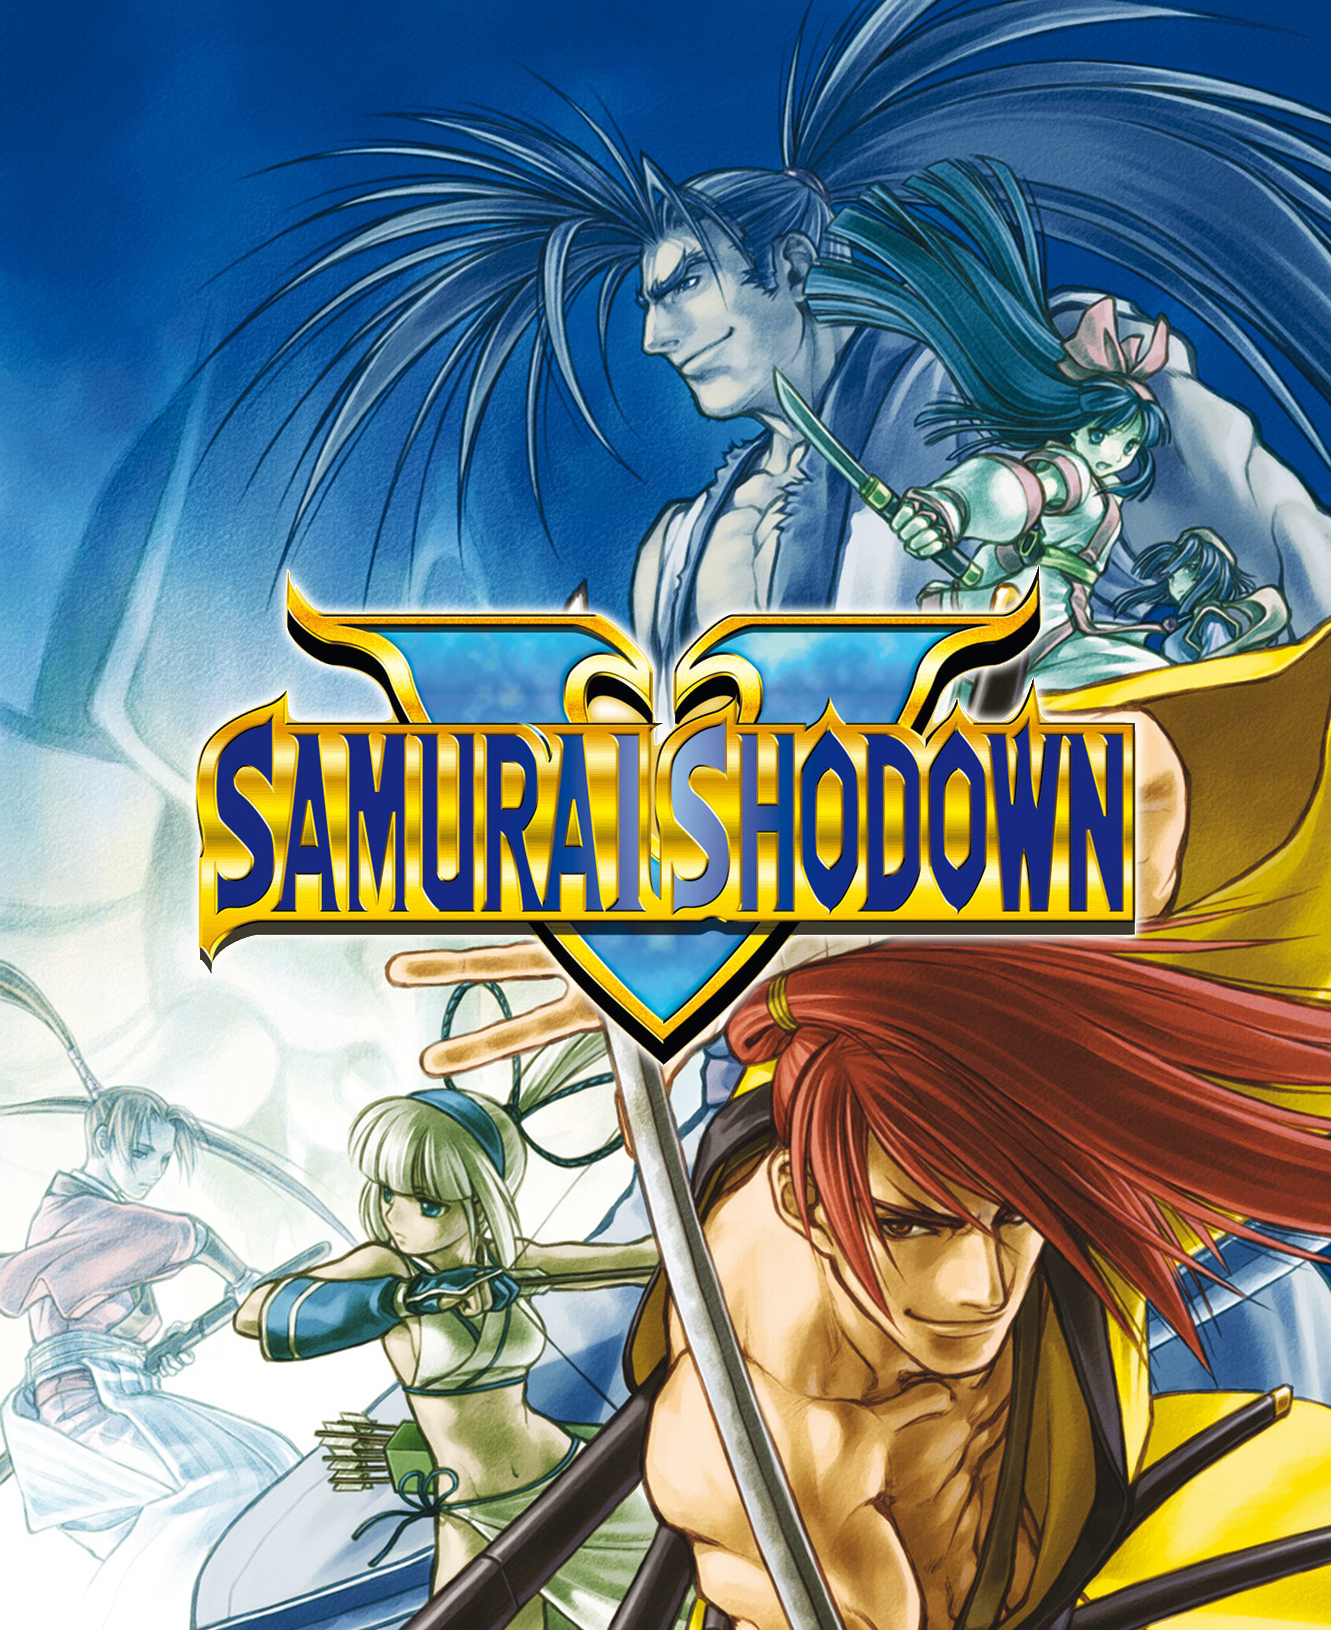
There are six Samurai Shodown games for the Neo Geo (SS1, SS2, SS3, SS4, SS5, SS5 Special). So just like King of the Fighters I started by making one as generic as possible for use with any Samurai Shodown game.
There is a lot of really nice artwork out there for this series. It was easy to find a bunch that look really good.
Samurai Shodown Mini Marquee
Samurai Shodown Mini Marquee
Samurai Shodown Mini Marquee
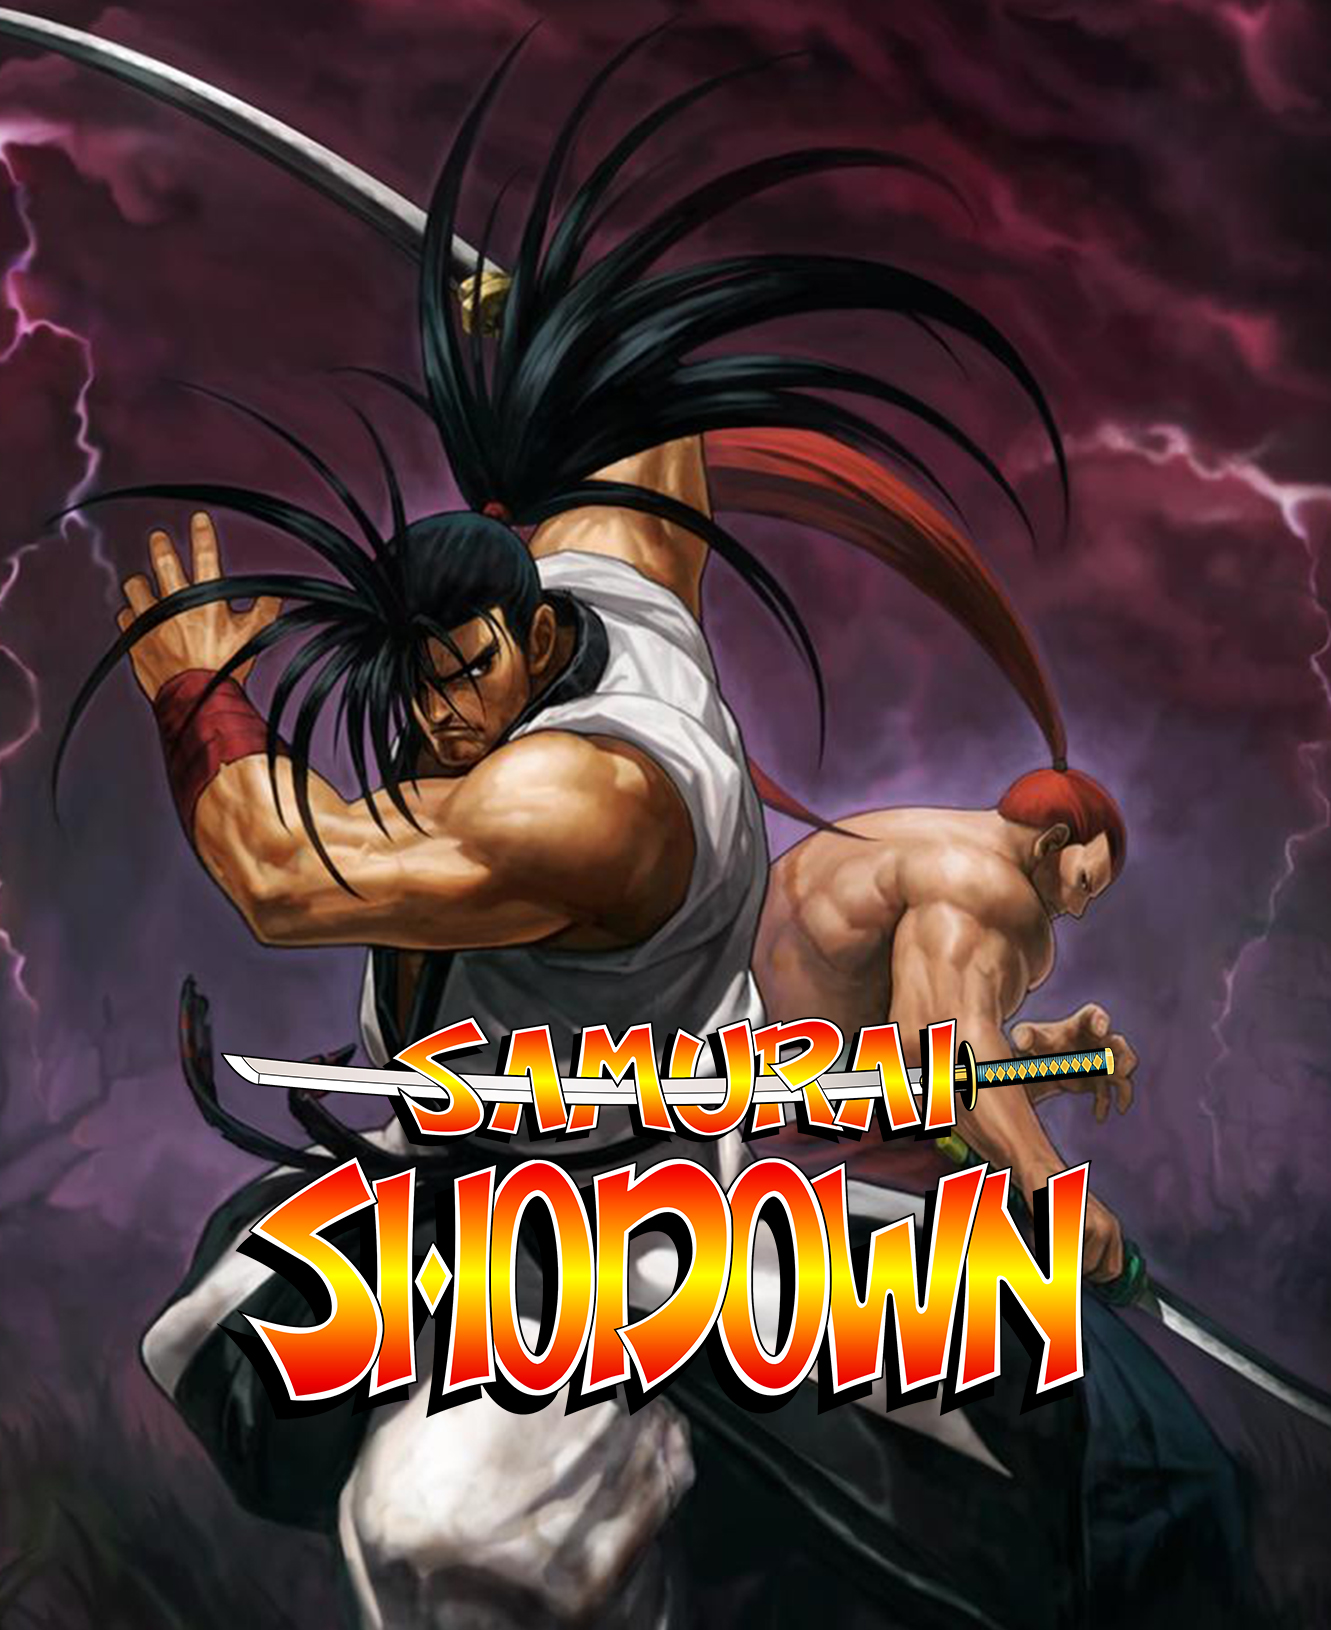
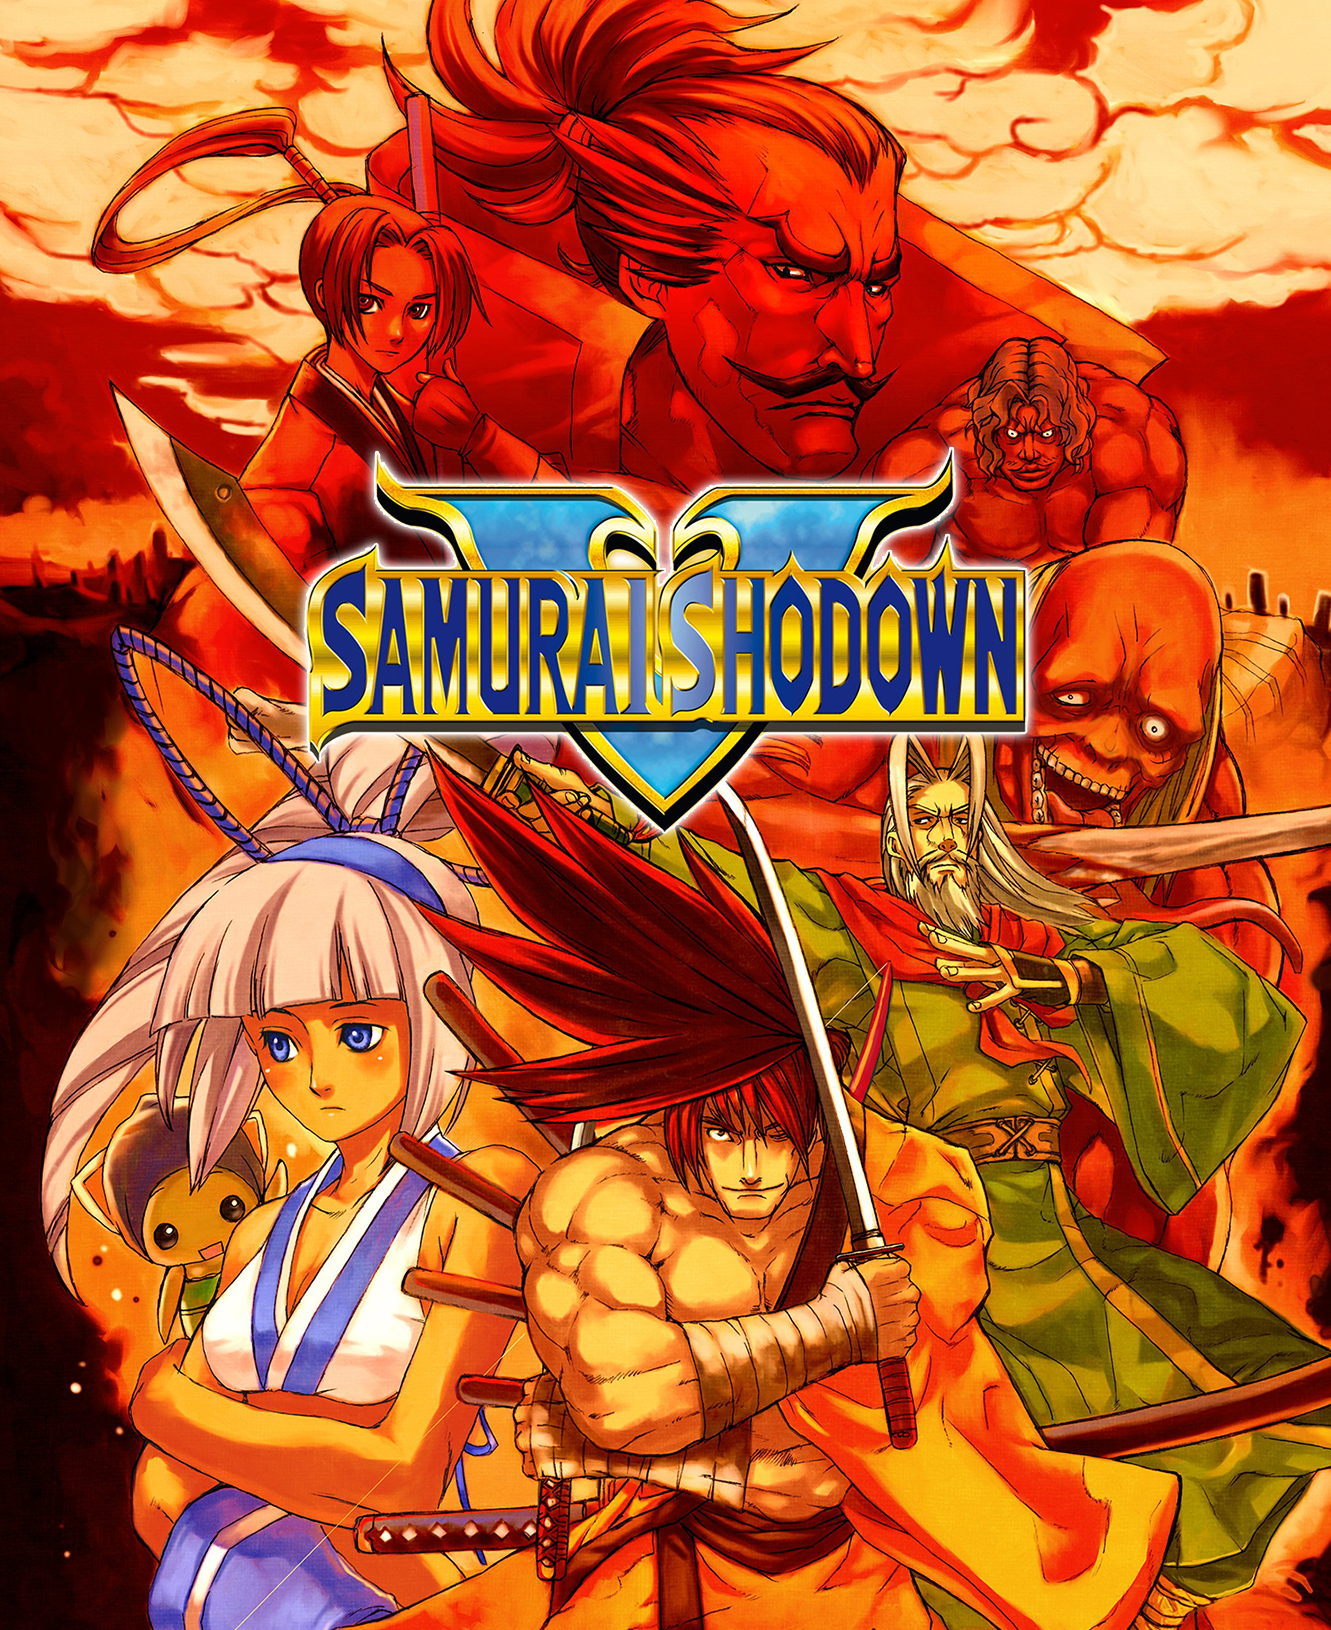
Pretty much any artwork you find for Neo Geo games was drawn for one particular edition of a game. This one above was meant for Samurai Shodown 5 so when I found a good high resolution title I made it again.
Samurai Showdown 5 Mini Marquee
This one below was also too cool not to use!
Samurai Shodown 5 Mini Marquee
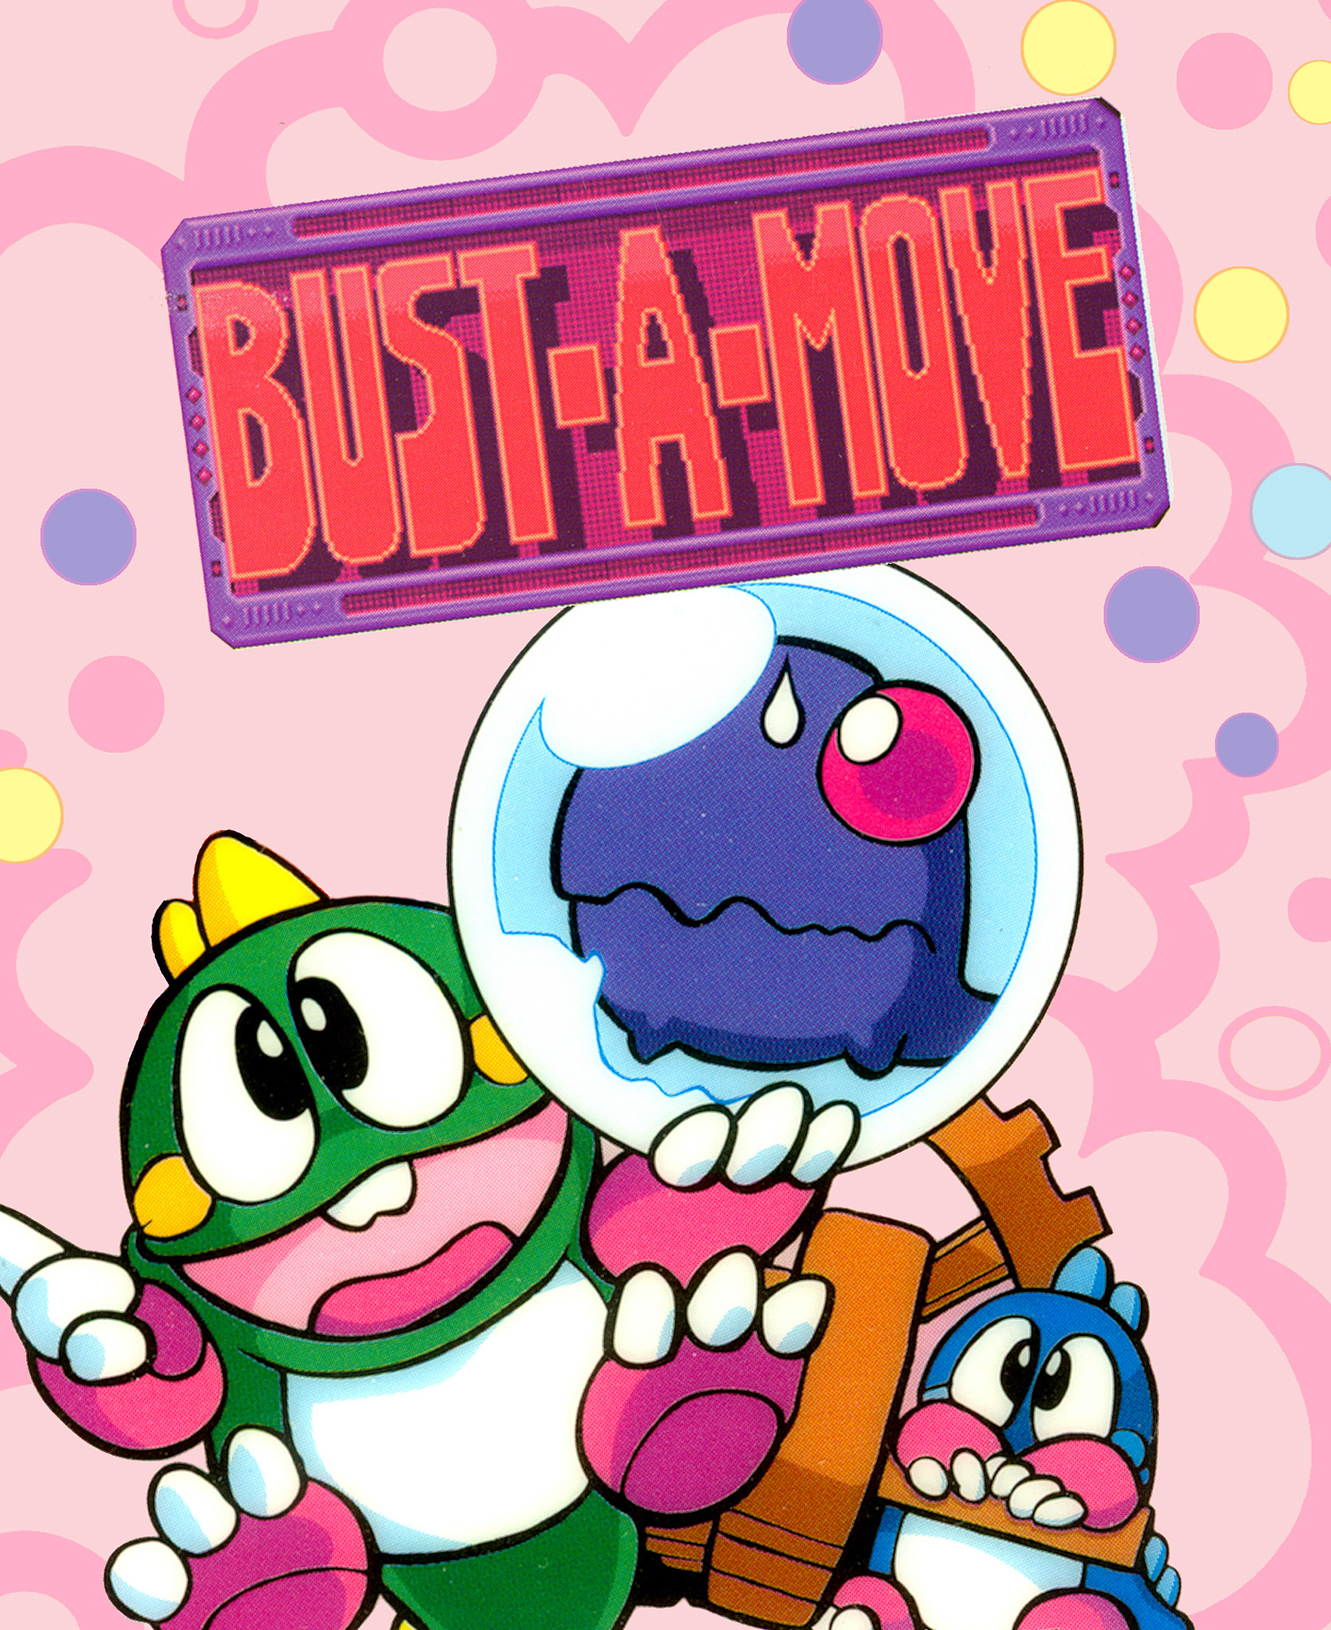
Bust-A-Move is pretty good but it’s lower resolution does show a bit. When printed the title suffers the most. I will try to find something better but it does print OK and I will use it.
Bust-A-Move Mini Marquee
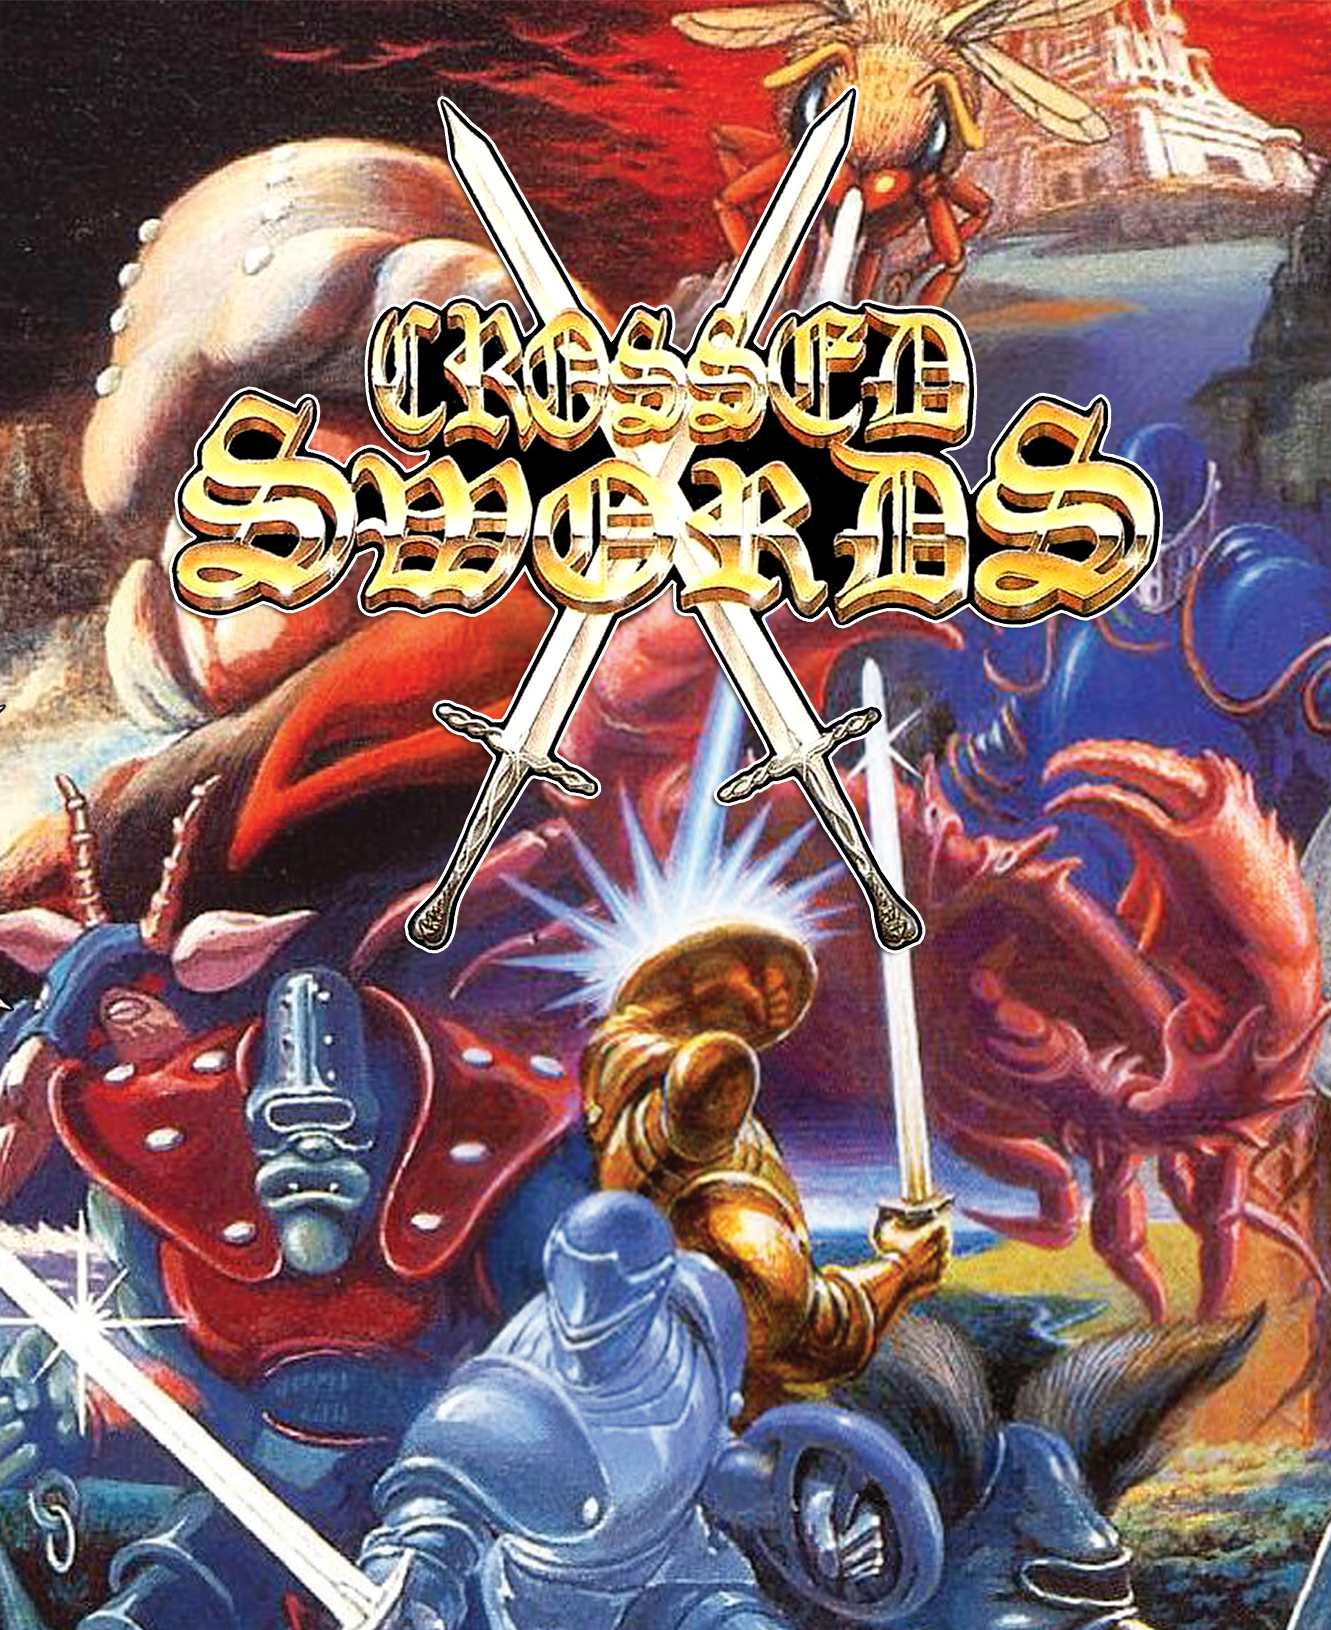
Just like Bust-A-Move, the image quality of Crossed Swords is a little on the low side. But since I’ve been playing and really enjoying this game I decided to print it anyways. As it turns out it printed very well and looks very nice in the cabinet. The title is a bit hard to read but that’s mostly because of the font and not because of the image itself.
Crossed Swords Mini Marquee
I’ve made others but above are the only ones that I think are worth printing. Eventually I’d like to have at least one Mini Marquee for each of my Neo Geo MVS games.
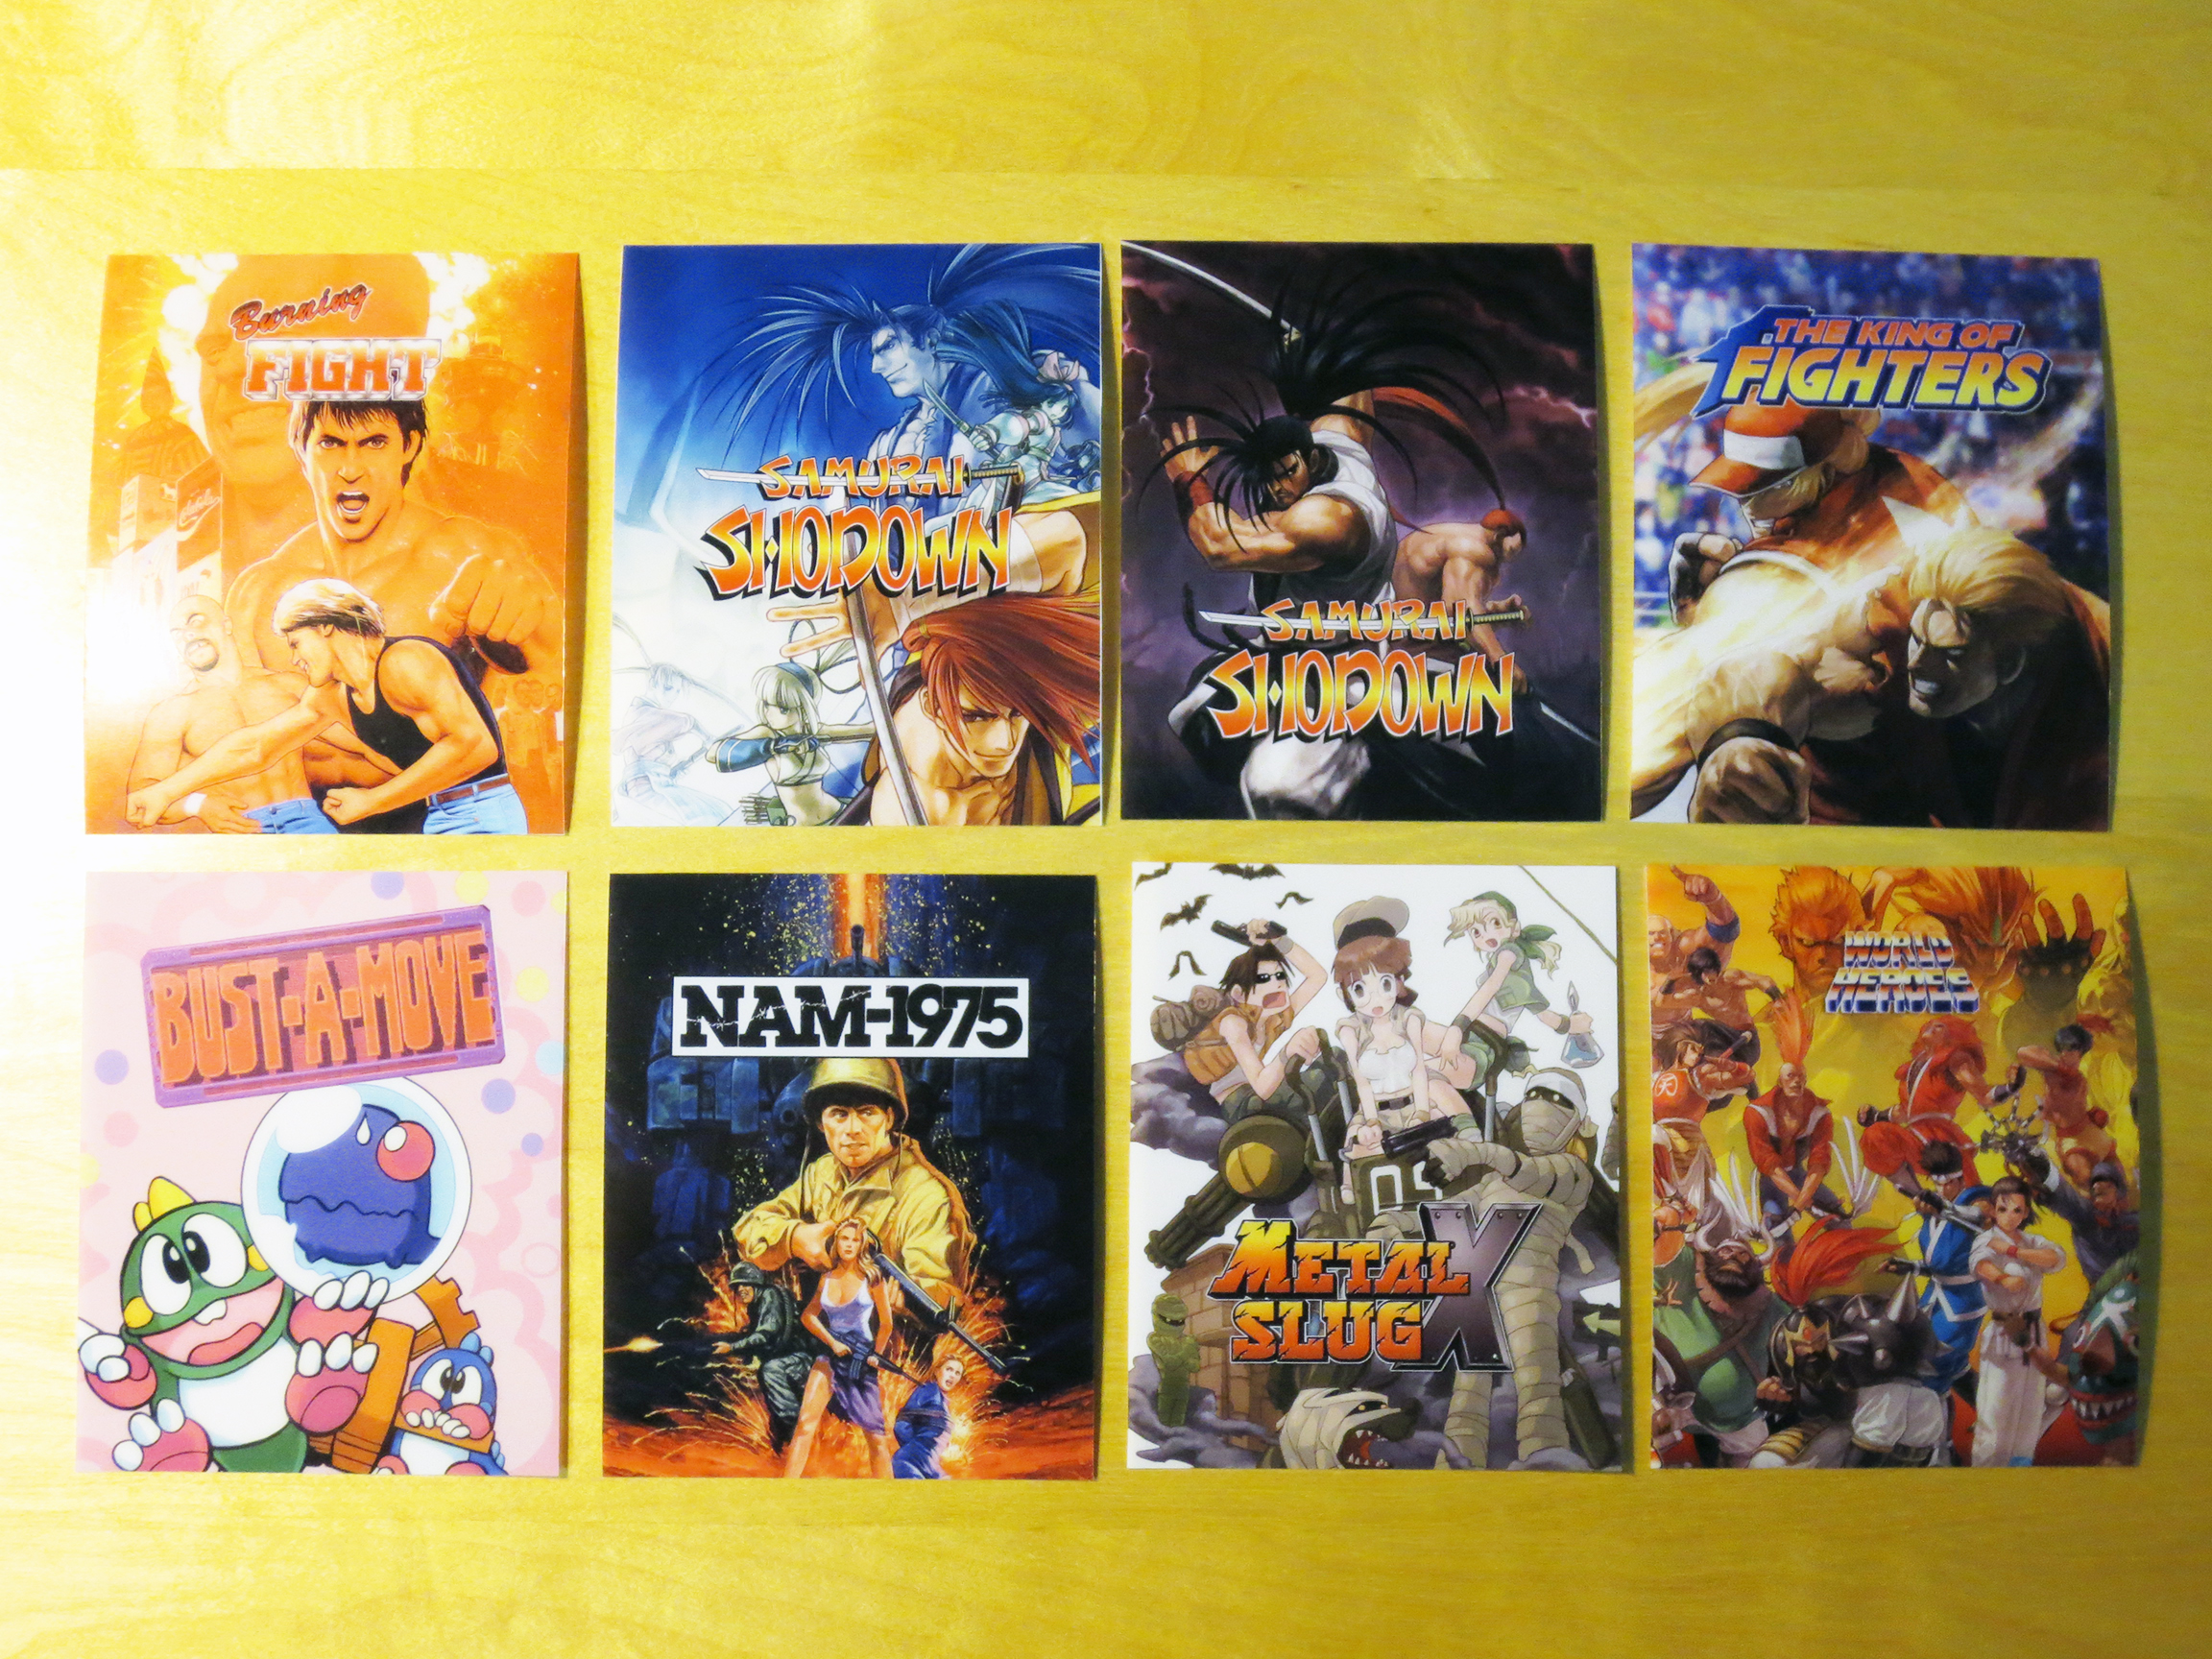
Below are some that I’ve printed. They look as good under close inspection as they appear here. I think they turned out really well.
The first printed batch.
World Heros in the image above isn’t good enough yet. The title is just too small. I’ll have to find a better source.
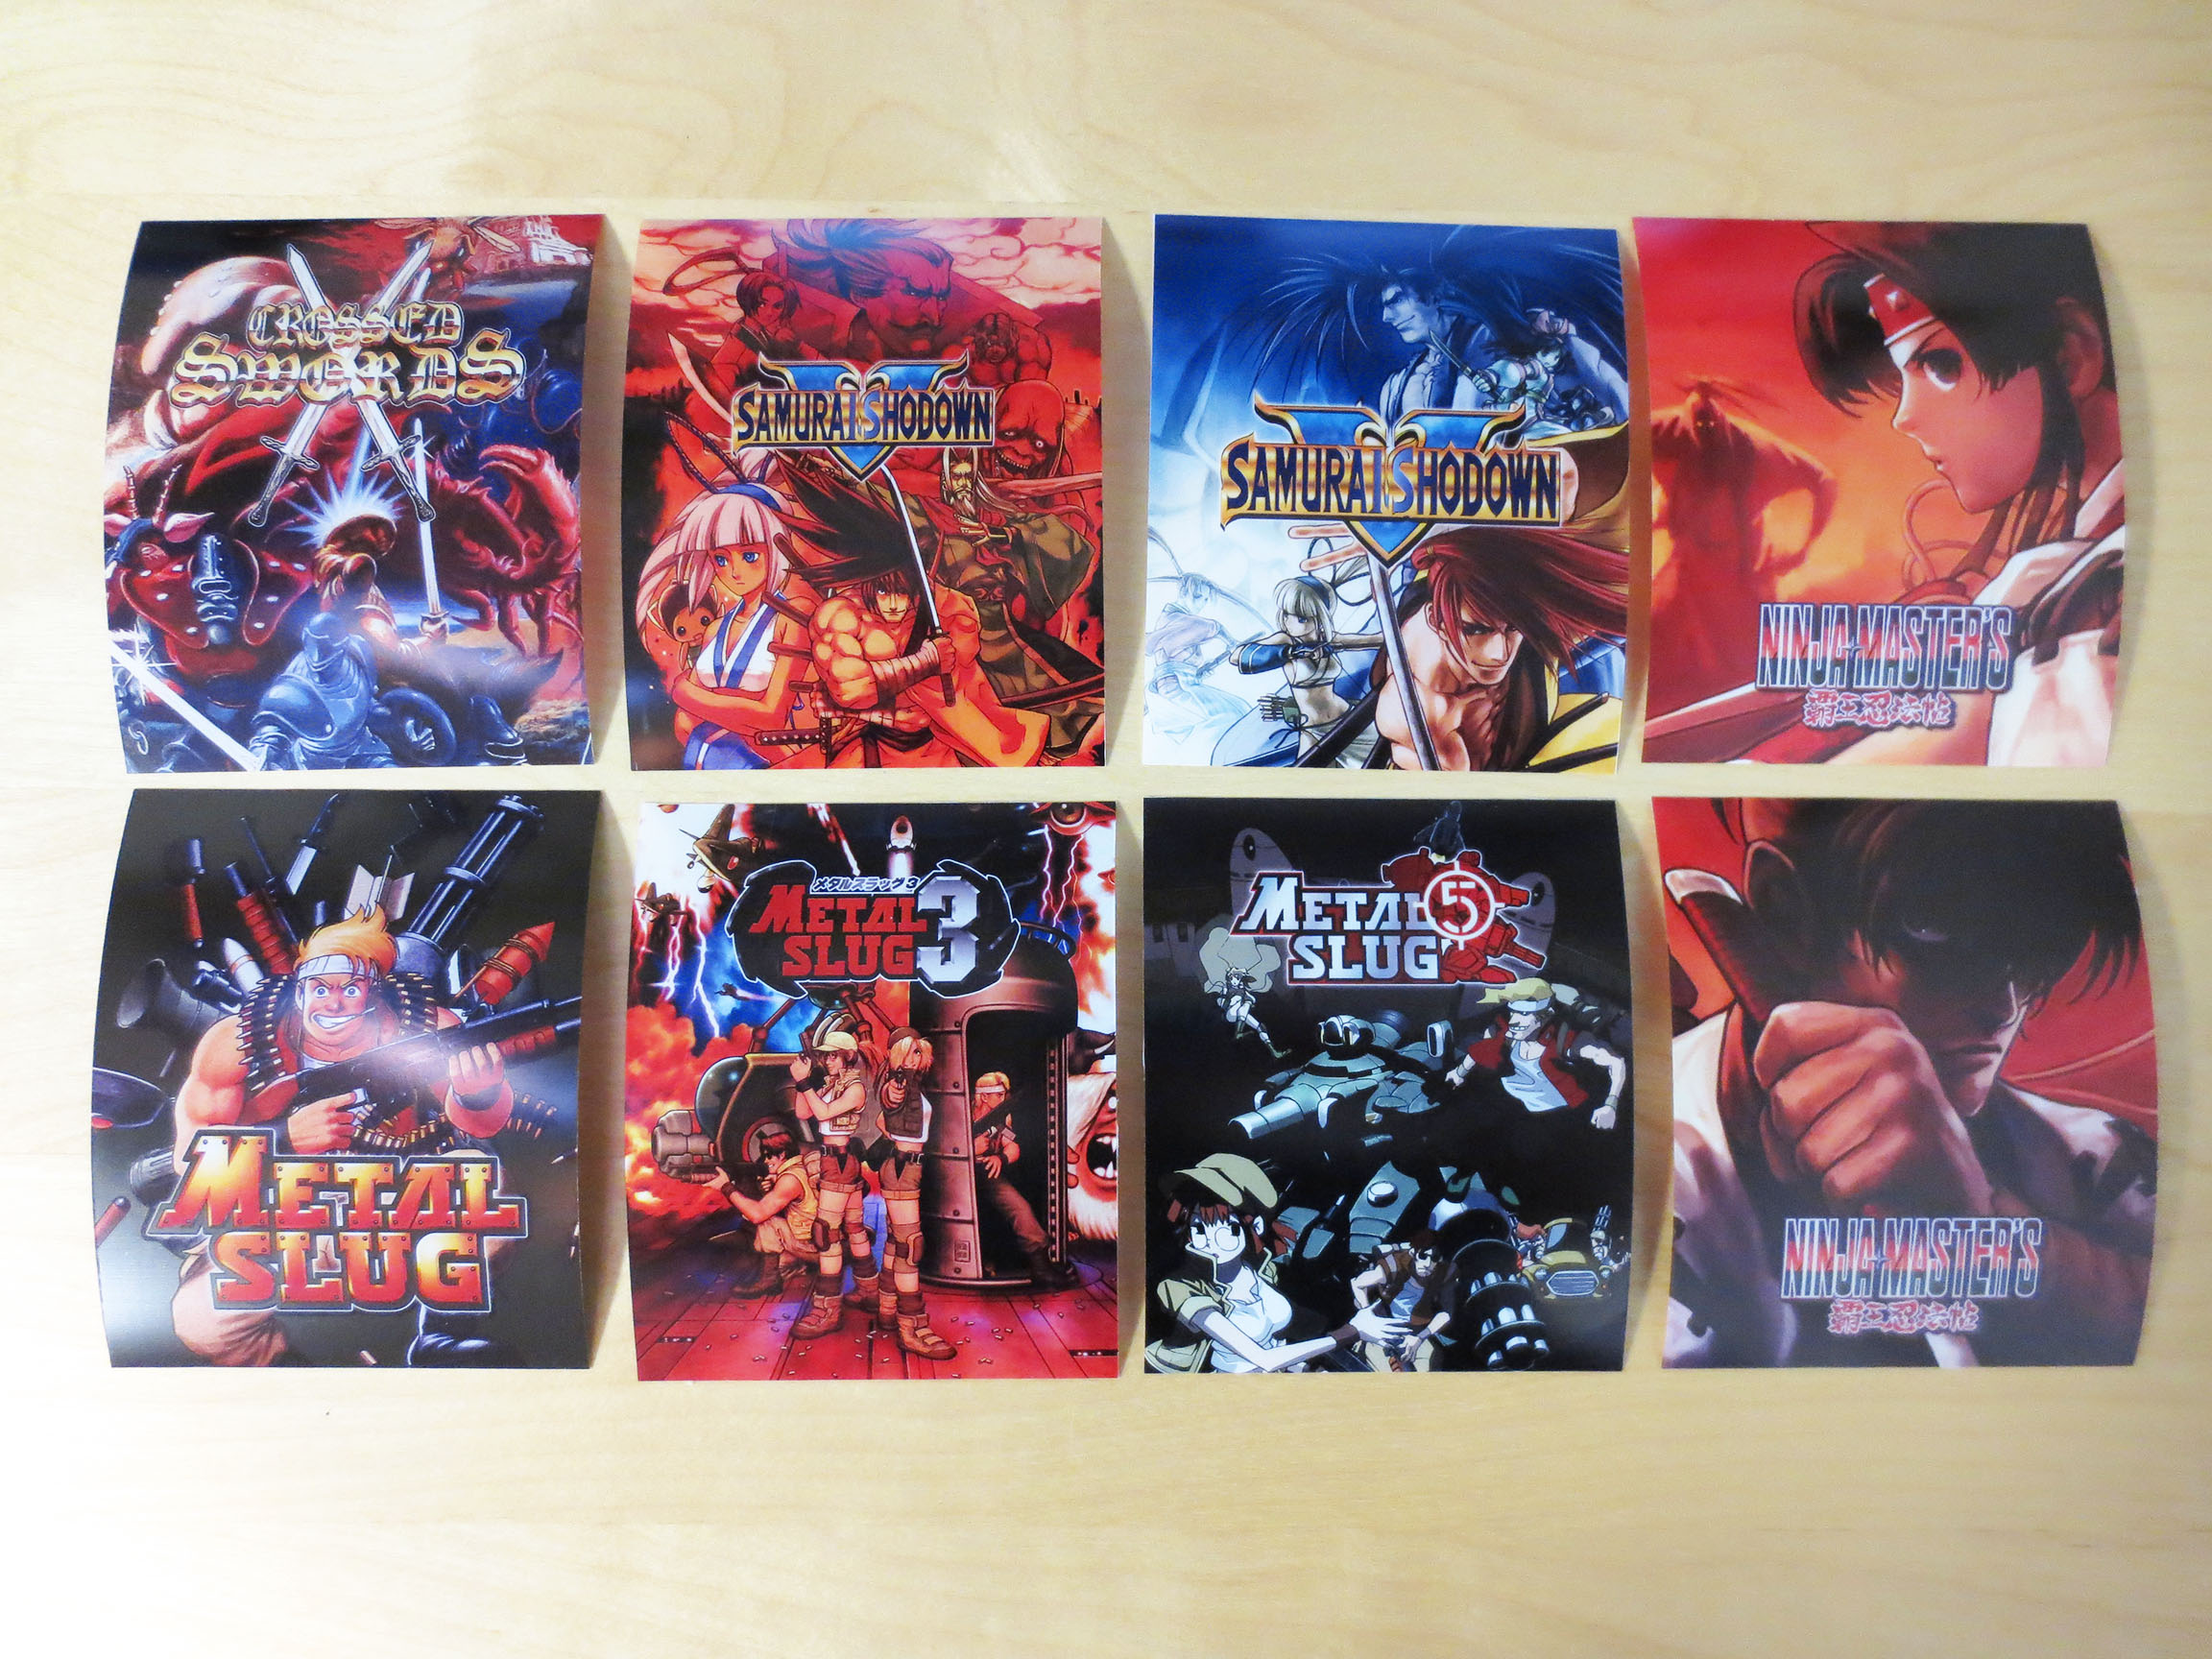
The second print batch.
Unfortunately taking a picture while they’re lit doesn’t really work. But in real life these Mini Marquees are working perfectly; just like the old originals.
A closer look at the new Mini Marquee’s in Big Red.
A closer look at a few others.
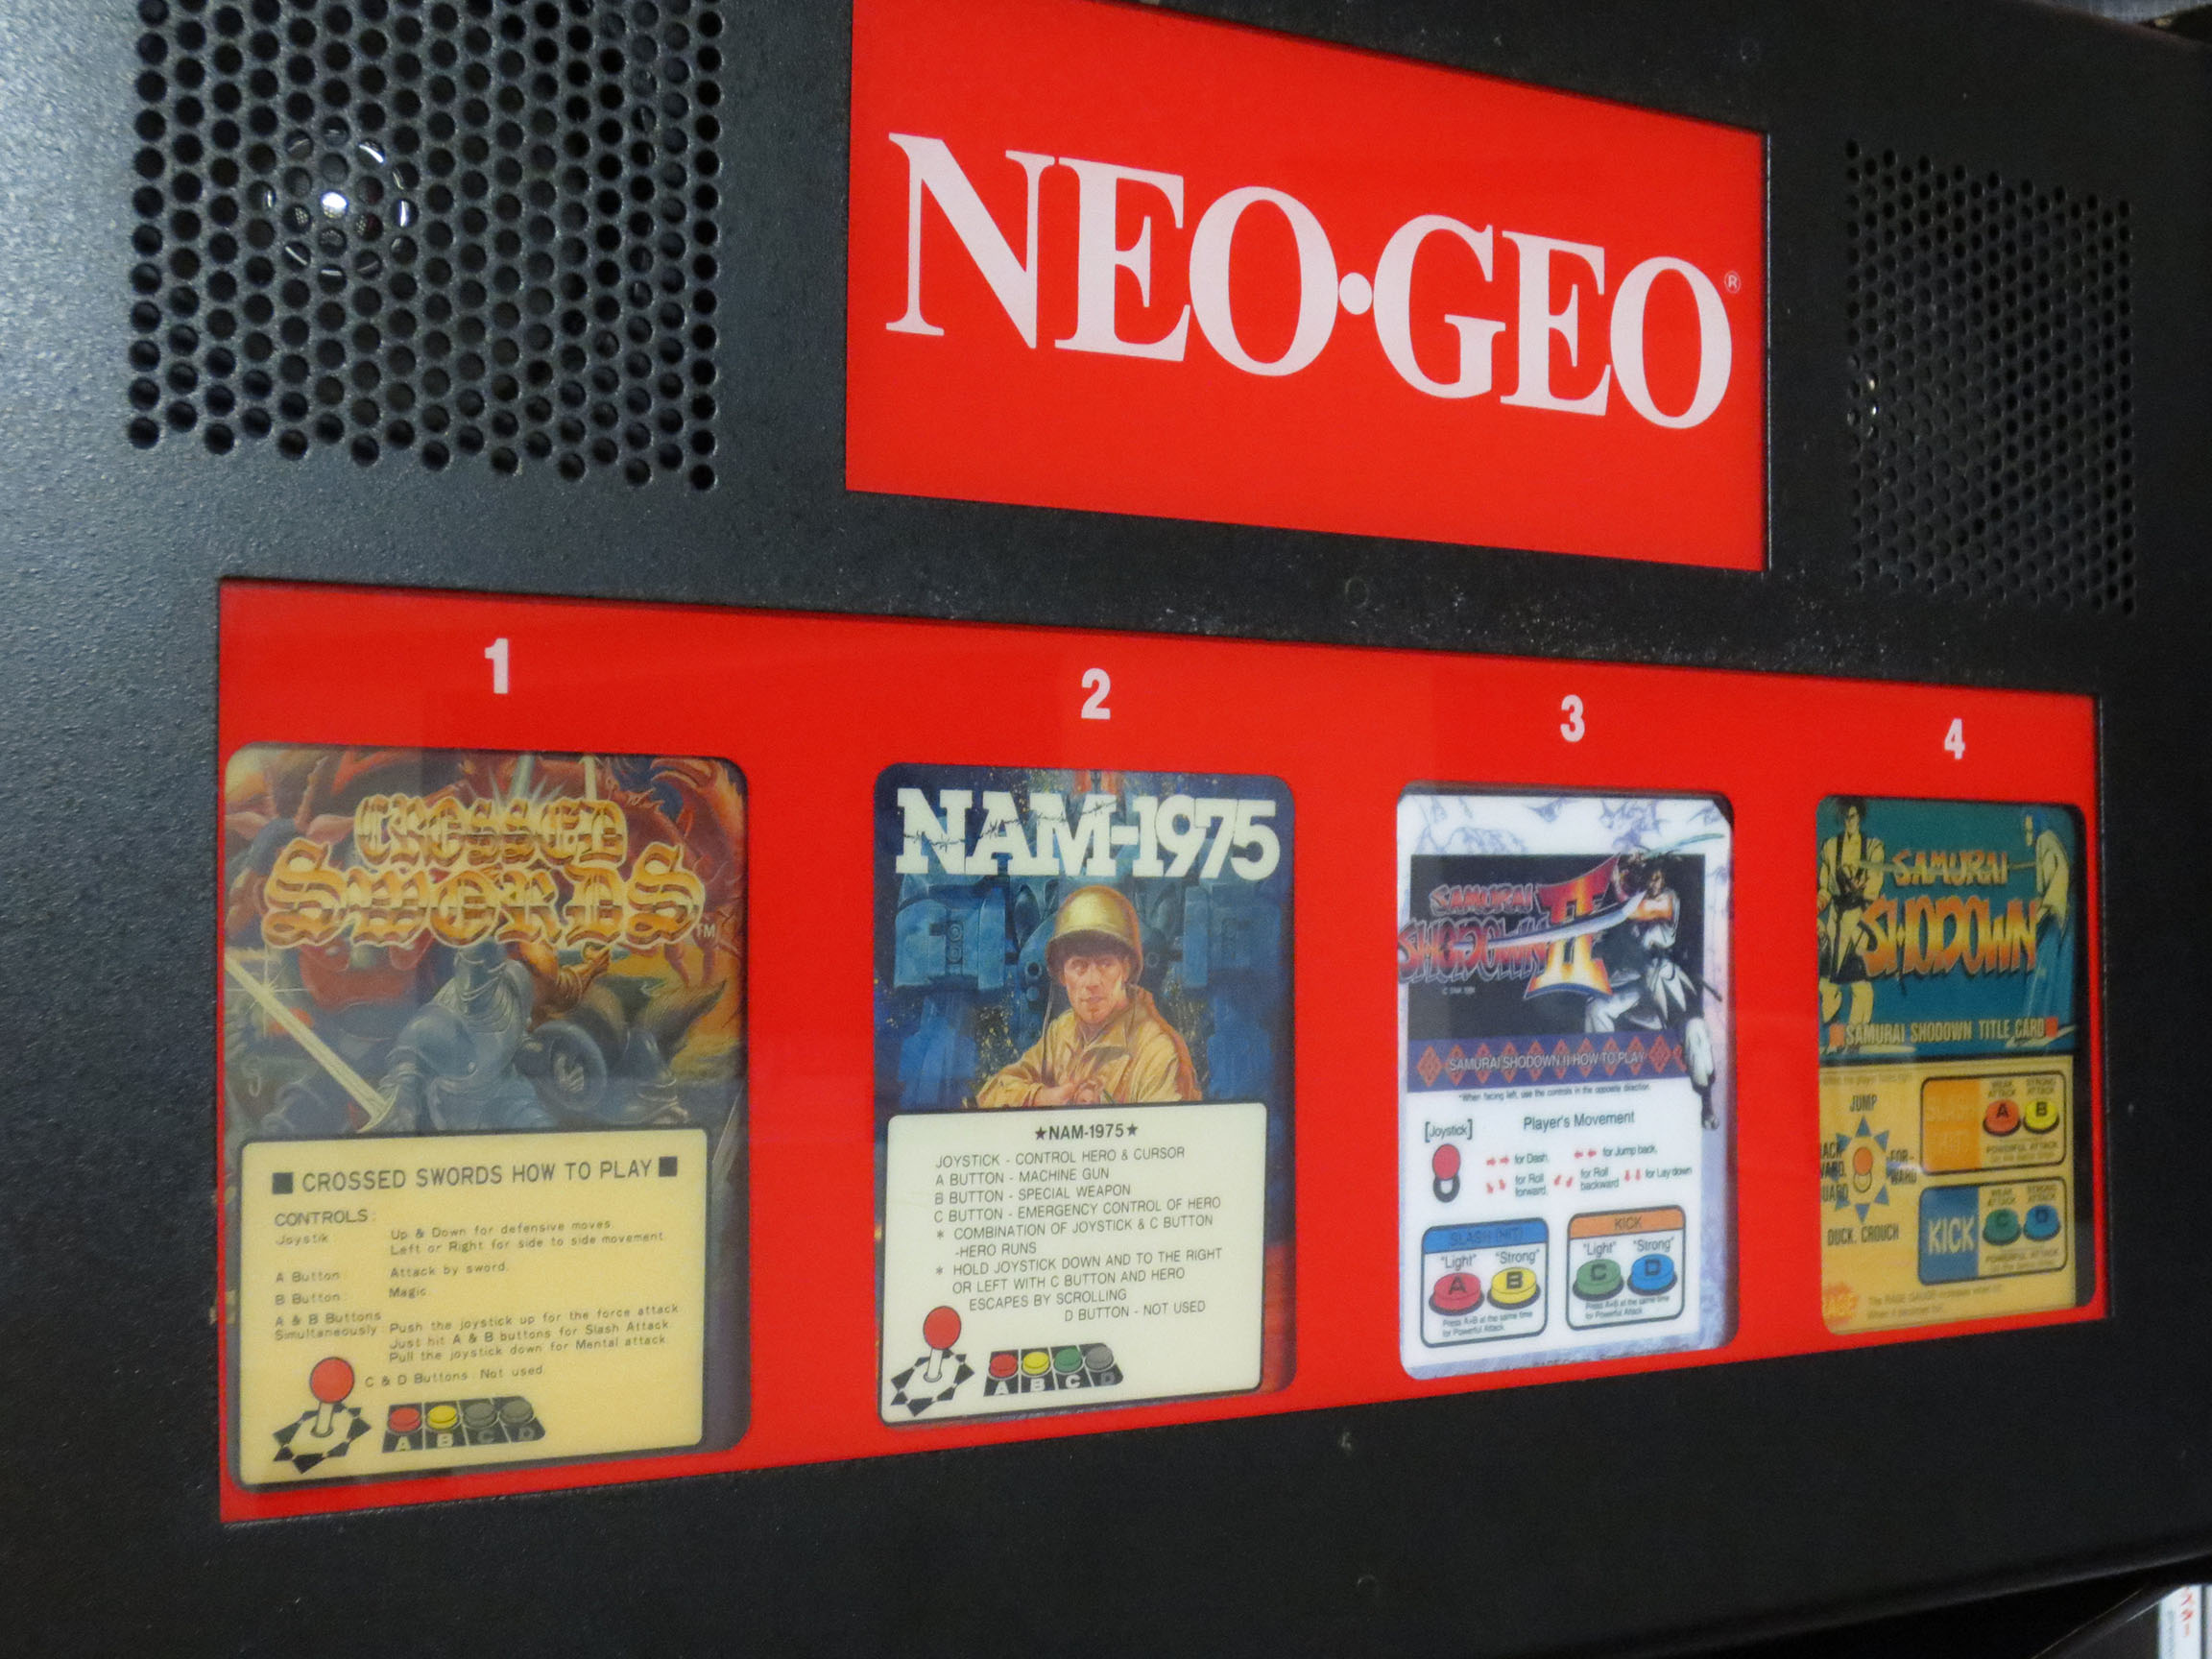
Original Neo Geo Mini Marquees.
Above are what original MVS Mini Marquees look like. In addition to the name of the game and some artwork you would also find instructions on how to play the game. I like the cleaner look of the custom Mini Marquees that I’ve made. However, I understand that some people will always prefer more authentic reproductions.
I tried recording each marquee getting lit-up but video also has the same trouble as pictures. In this short video below each Mini Marquee looks washed out when it’s lit. But in person this is not the case. They keep their vibrance and detail while been illuminated.
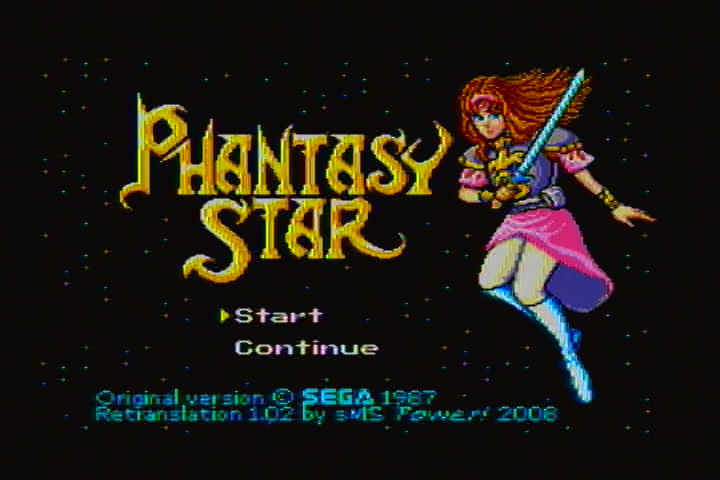
If I had a top 10 list of favorite games for the Sega Master System Phantasy Star would be #1. And despite the English version still being the amazing game that it is I know for a fact that it’s not everything that the Japanese version is.
After discovering a fan translated version of Phantasy Star by SMS Power I knew right away I wanted a dedicated cartridge of this creation for my Sega Master System.
What exactly is the SMS Power Phantasy Star?
It’s still Phantasy Star that you know and love for the Sega Master System. The graphics and engine are identical. But many names/labels have been lengthened now that character limit restrictions have been removed and some names have been changed to their original version or renamed to something that fits better into the Algo Universe. But when it comes right down to it this SMS Power re-imaging of Phantasy Star offers two primary changes that I could not resist.
1) FM (Frequency Modulation) Sound hardware was only installed in Japanese Sega Master System consoles and as a result the English Phantasy Star had it’s FM software code removed from the cartridge. So even if you have a modified Sega Master System console capable of playing FM sound there was still no English version of Phantasy that supported FM. ** The PowerBase Mini FM is also a great way to get FM Sound without modding. **
2) There is nothing wrong with the original English version of Phantasy Star. It is awesome as it is. What SMS Power have done to breath a bit of new life into the game is fill out the story and dialog. With the SMS Power re-imagining of Phantasy Star we get what I personally feel is a fuller richer telling of the story. By expanding on what we already know this SMS Power version makes the characters and NPC’s feel more alive and engaged with each other.
** Before you read any further know that purchasing a Flash Cart for your Sega Master System or Sega Genesis (or using Emulation) will make all the crazy work below entirely unrequired. Search http://www.aliexpress.com for inexpensive Flash Carts or http://www.stoneagegamer.com if you’re willing to spend more. **
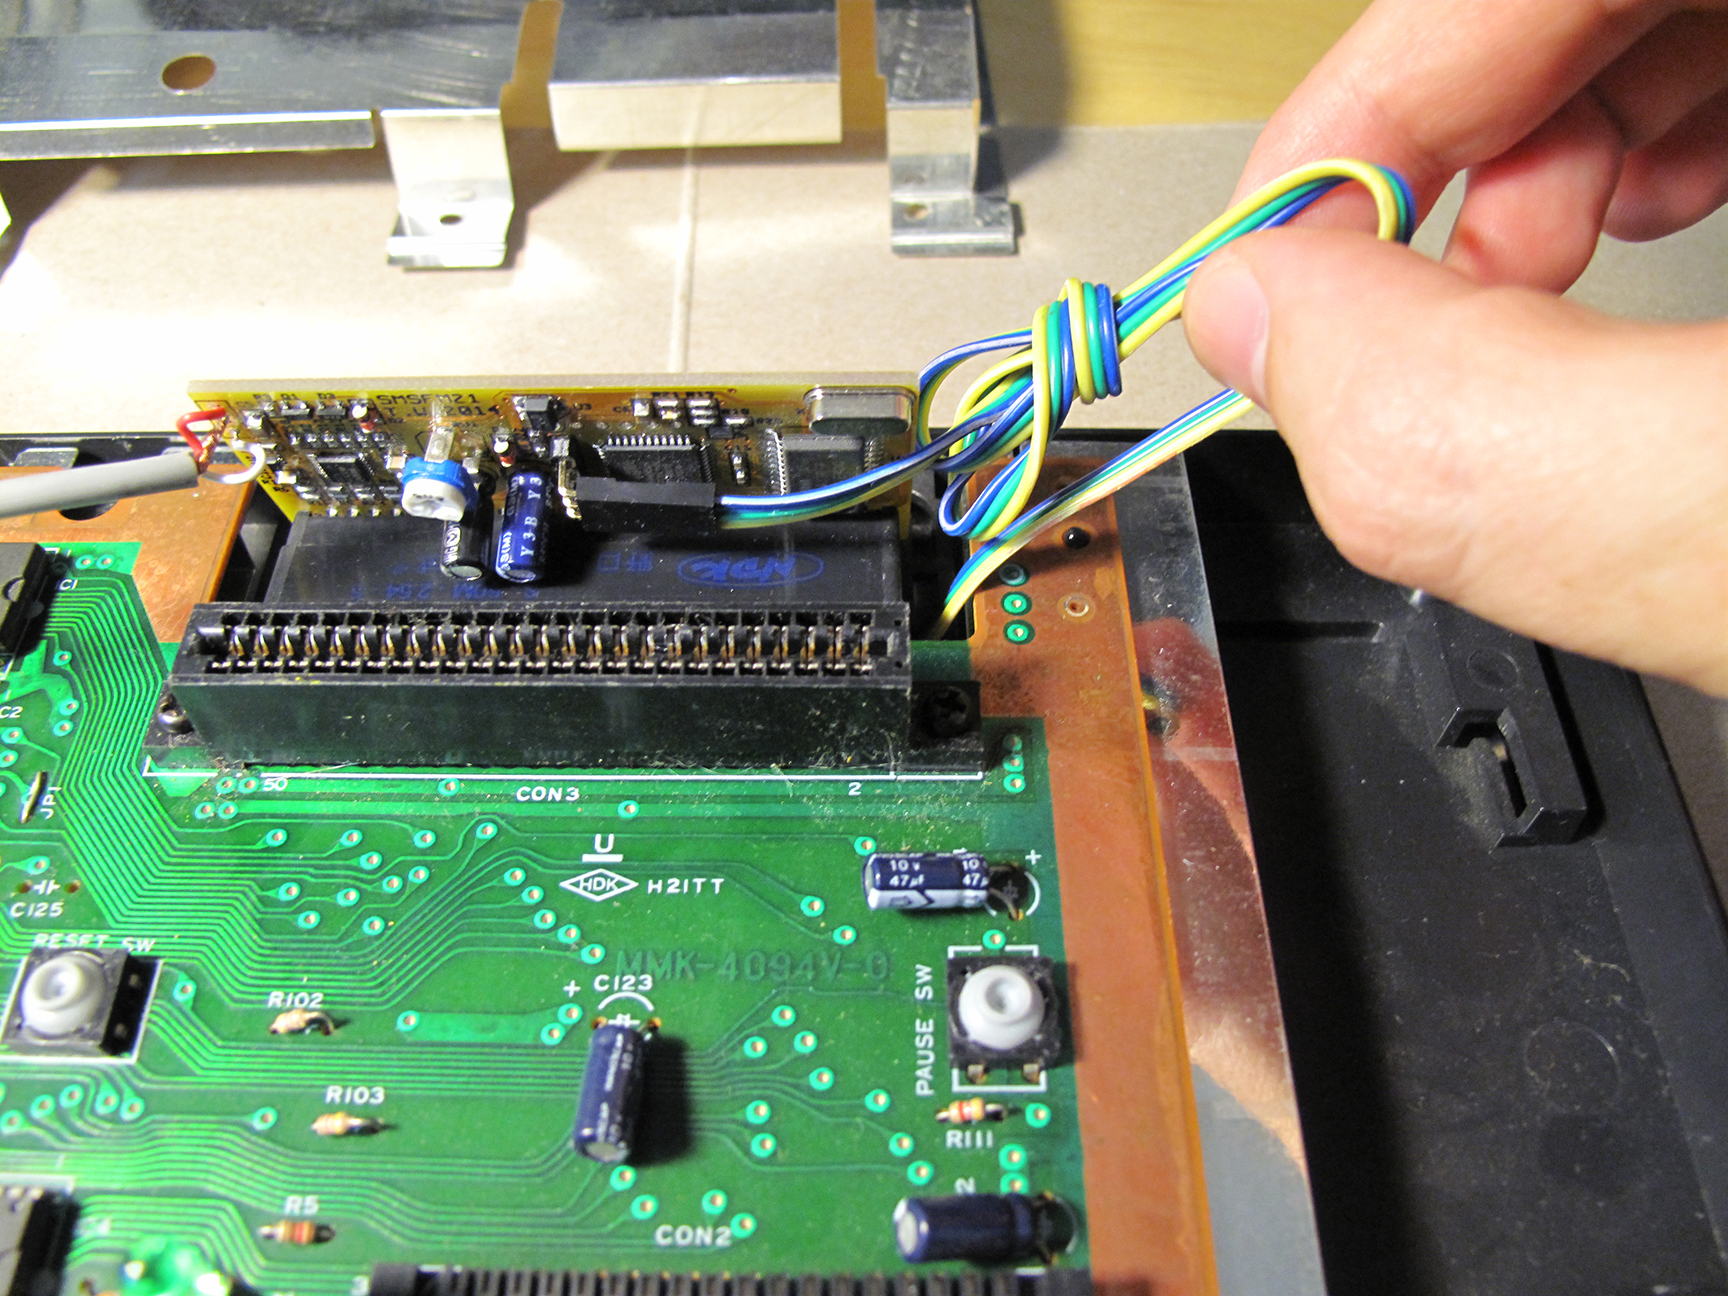
The first thing I did was to admit to myself that I had no idea how to replace the original Phantasy Star software on an original Sega Master System cartridge with this SMS Power version. So I went to the experts and asked for some help. Below is a link to a thread I started at smspower.org about this little project:
The people over at the smspower.org forums are excellent. They knew I didn’t have a clue and they kept on helping and in the end I got my little victory 🙂 Thank you!!
SMS Power Phantasy Star
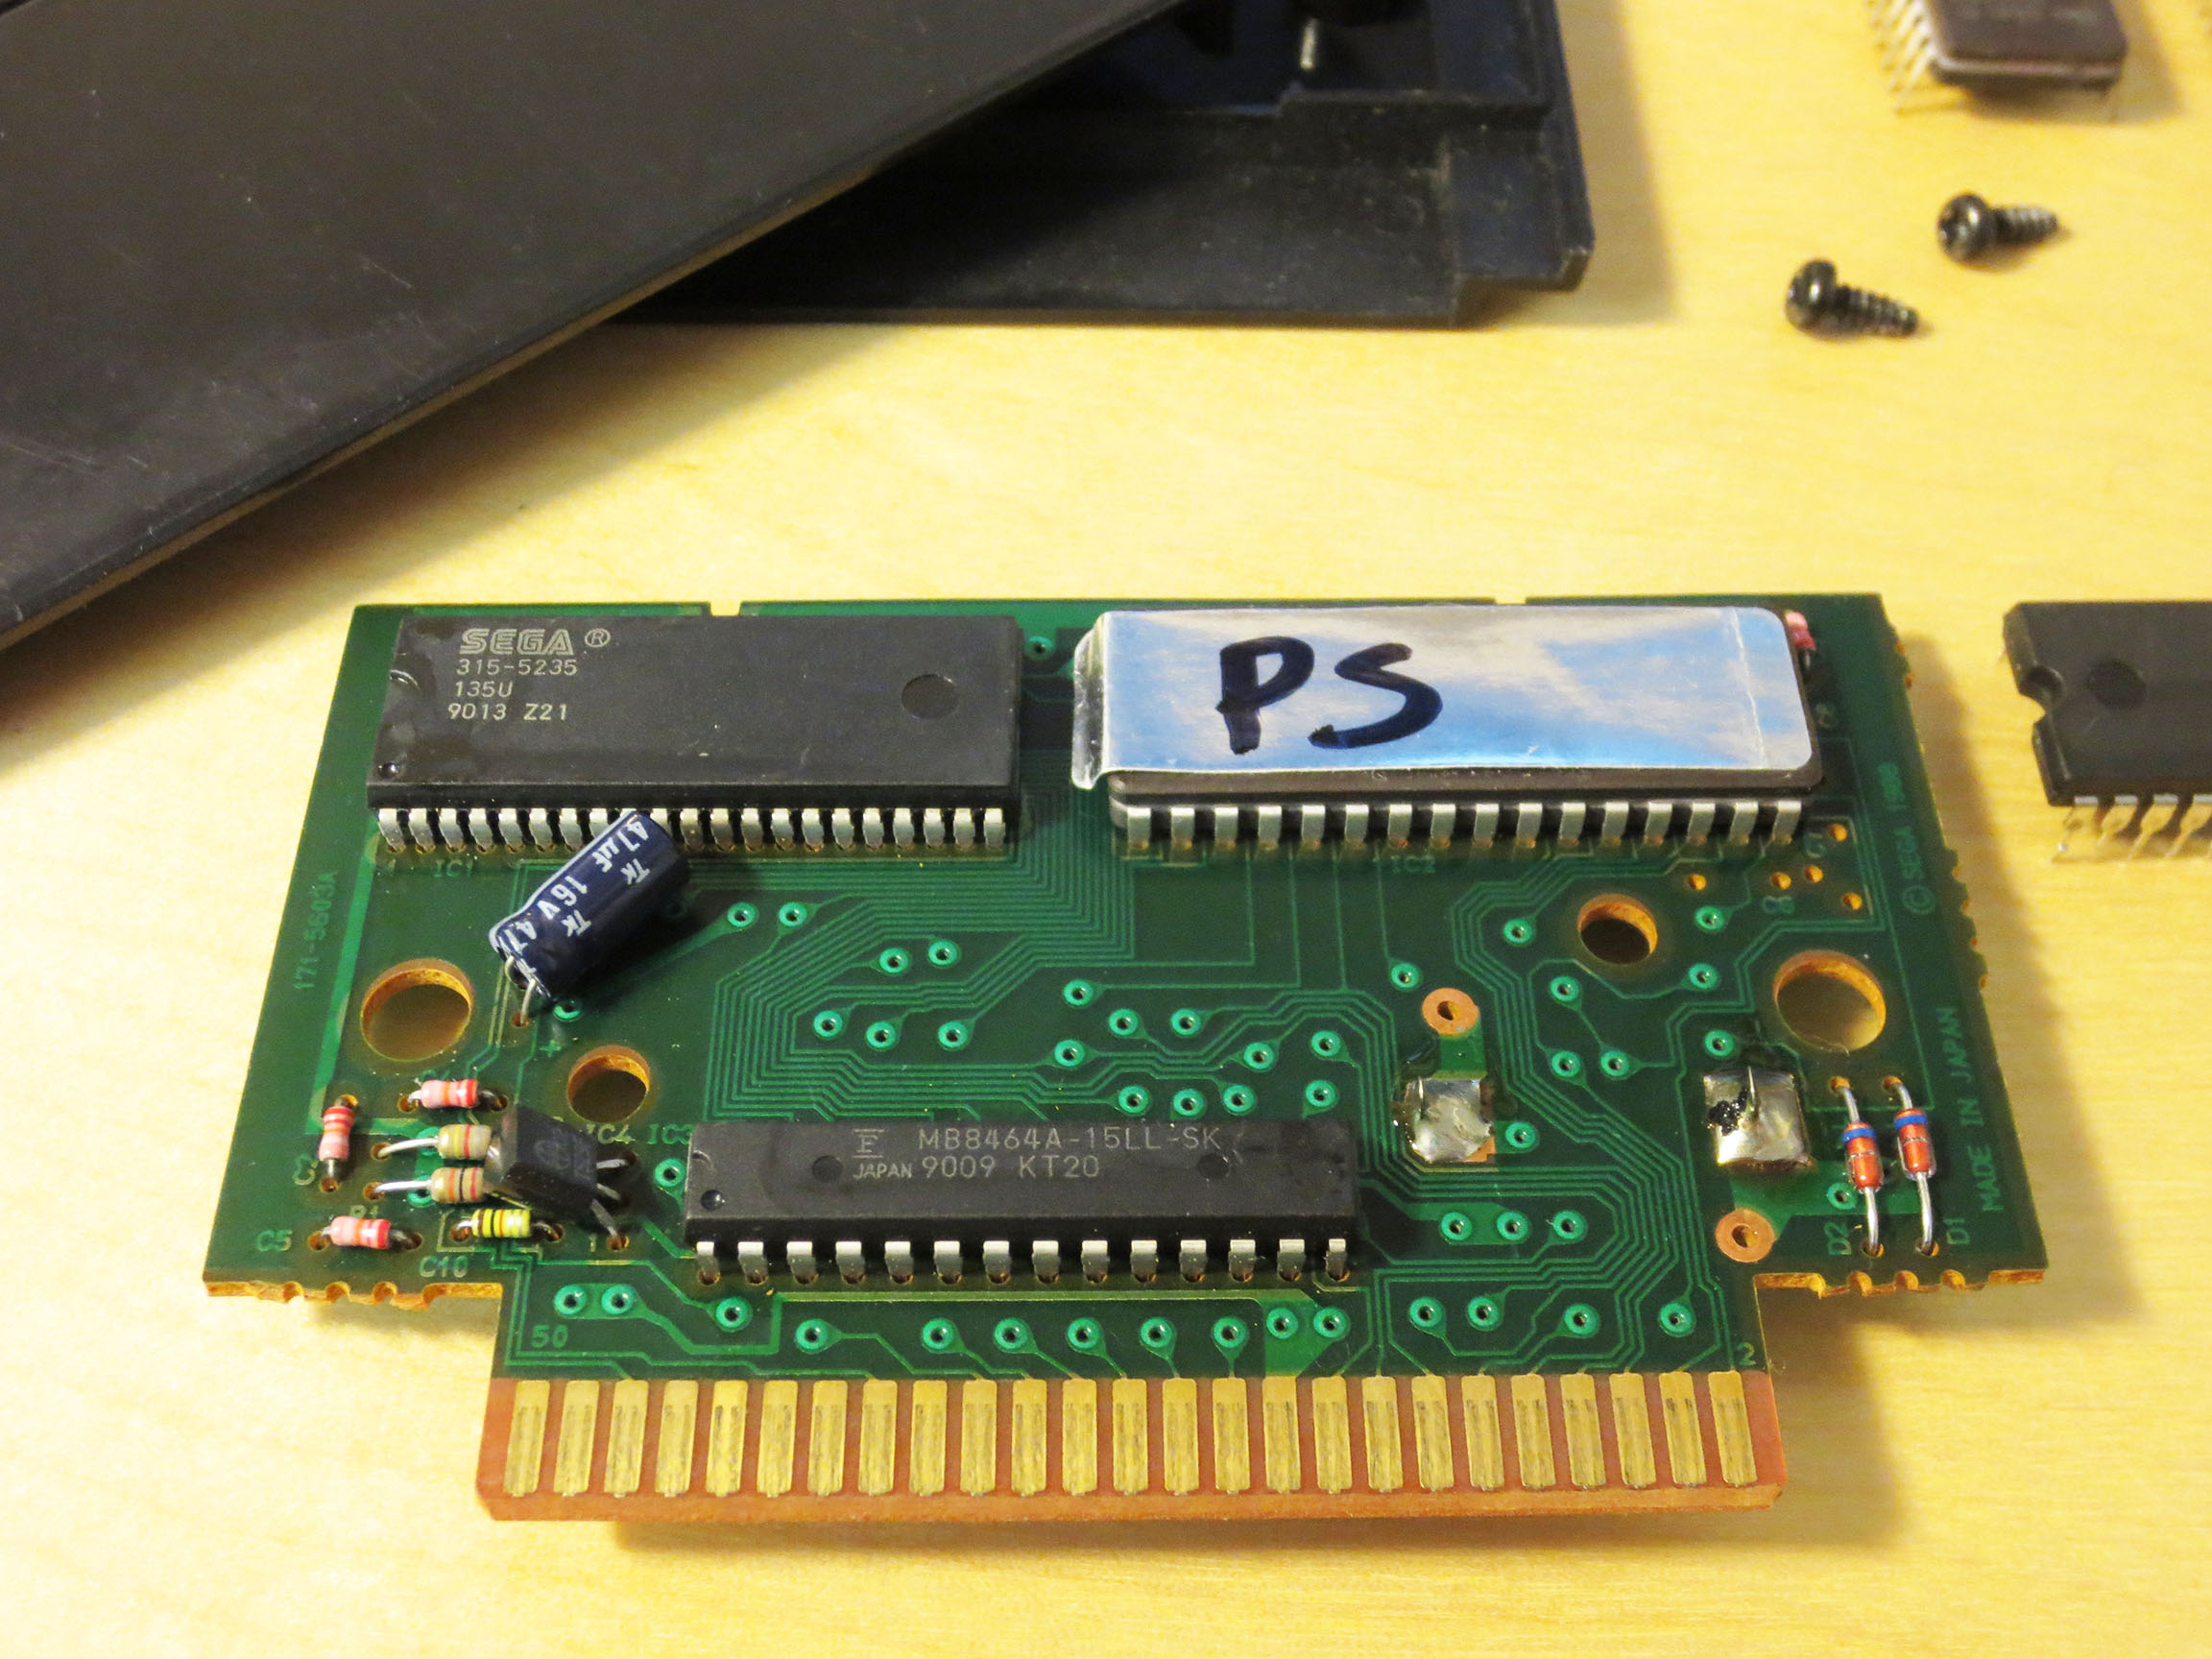
SMS Power Phantasy Star Installed
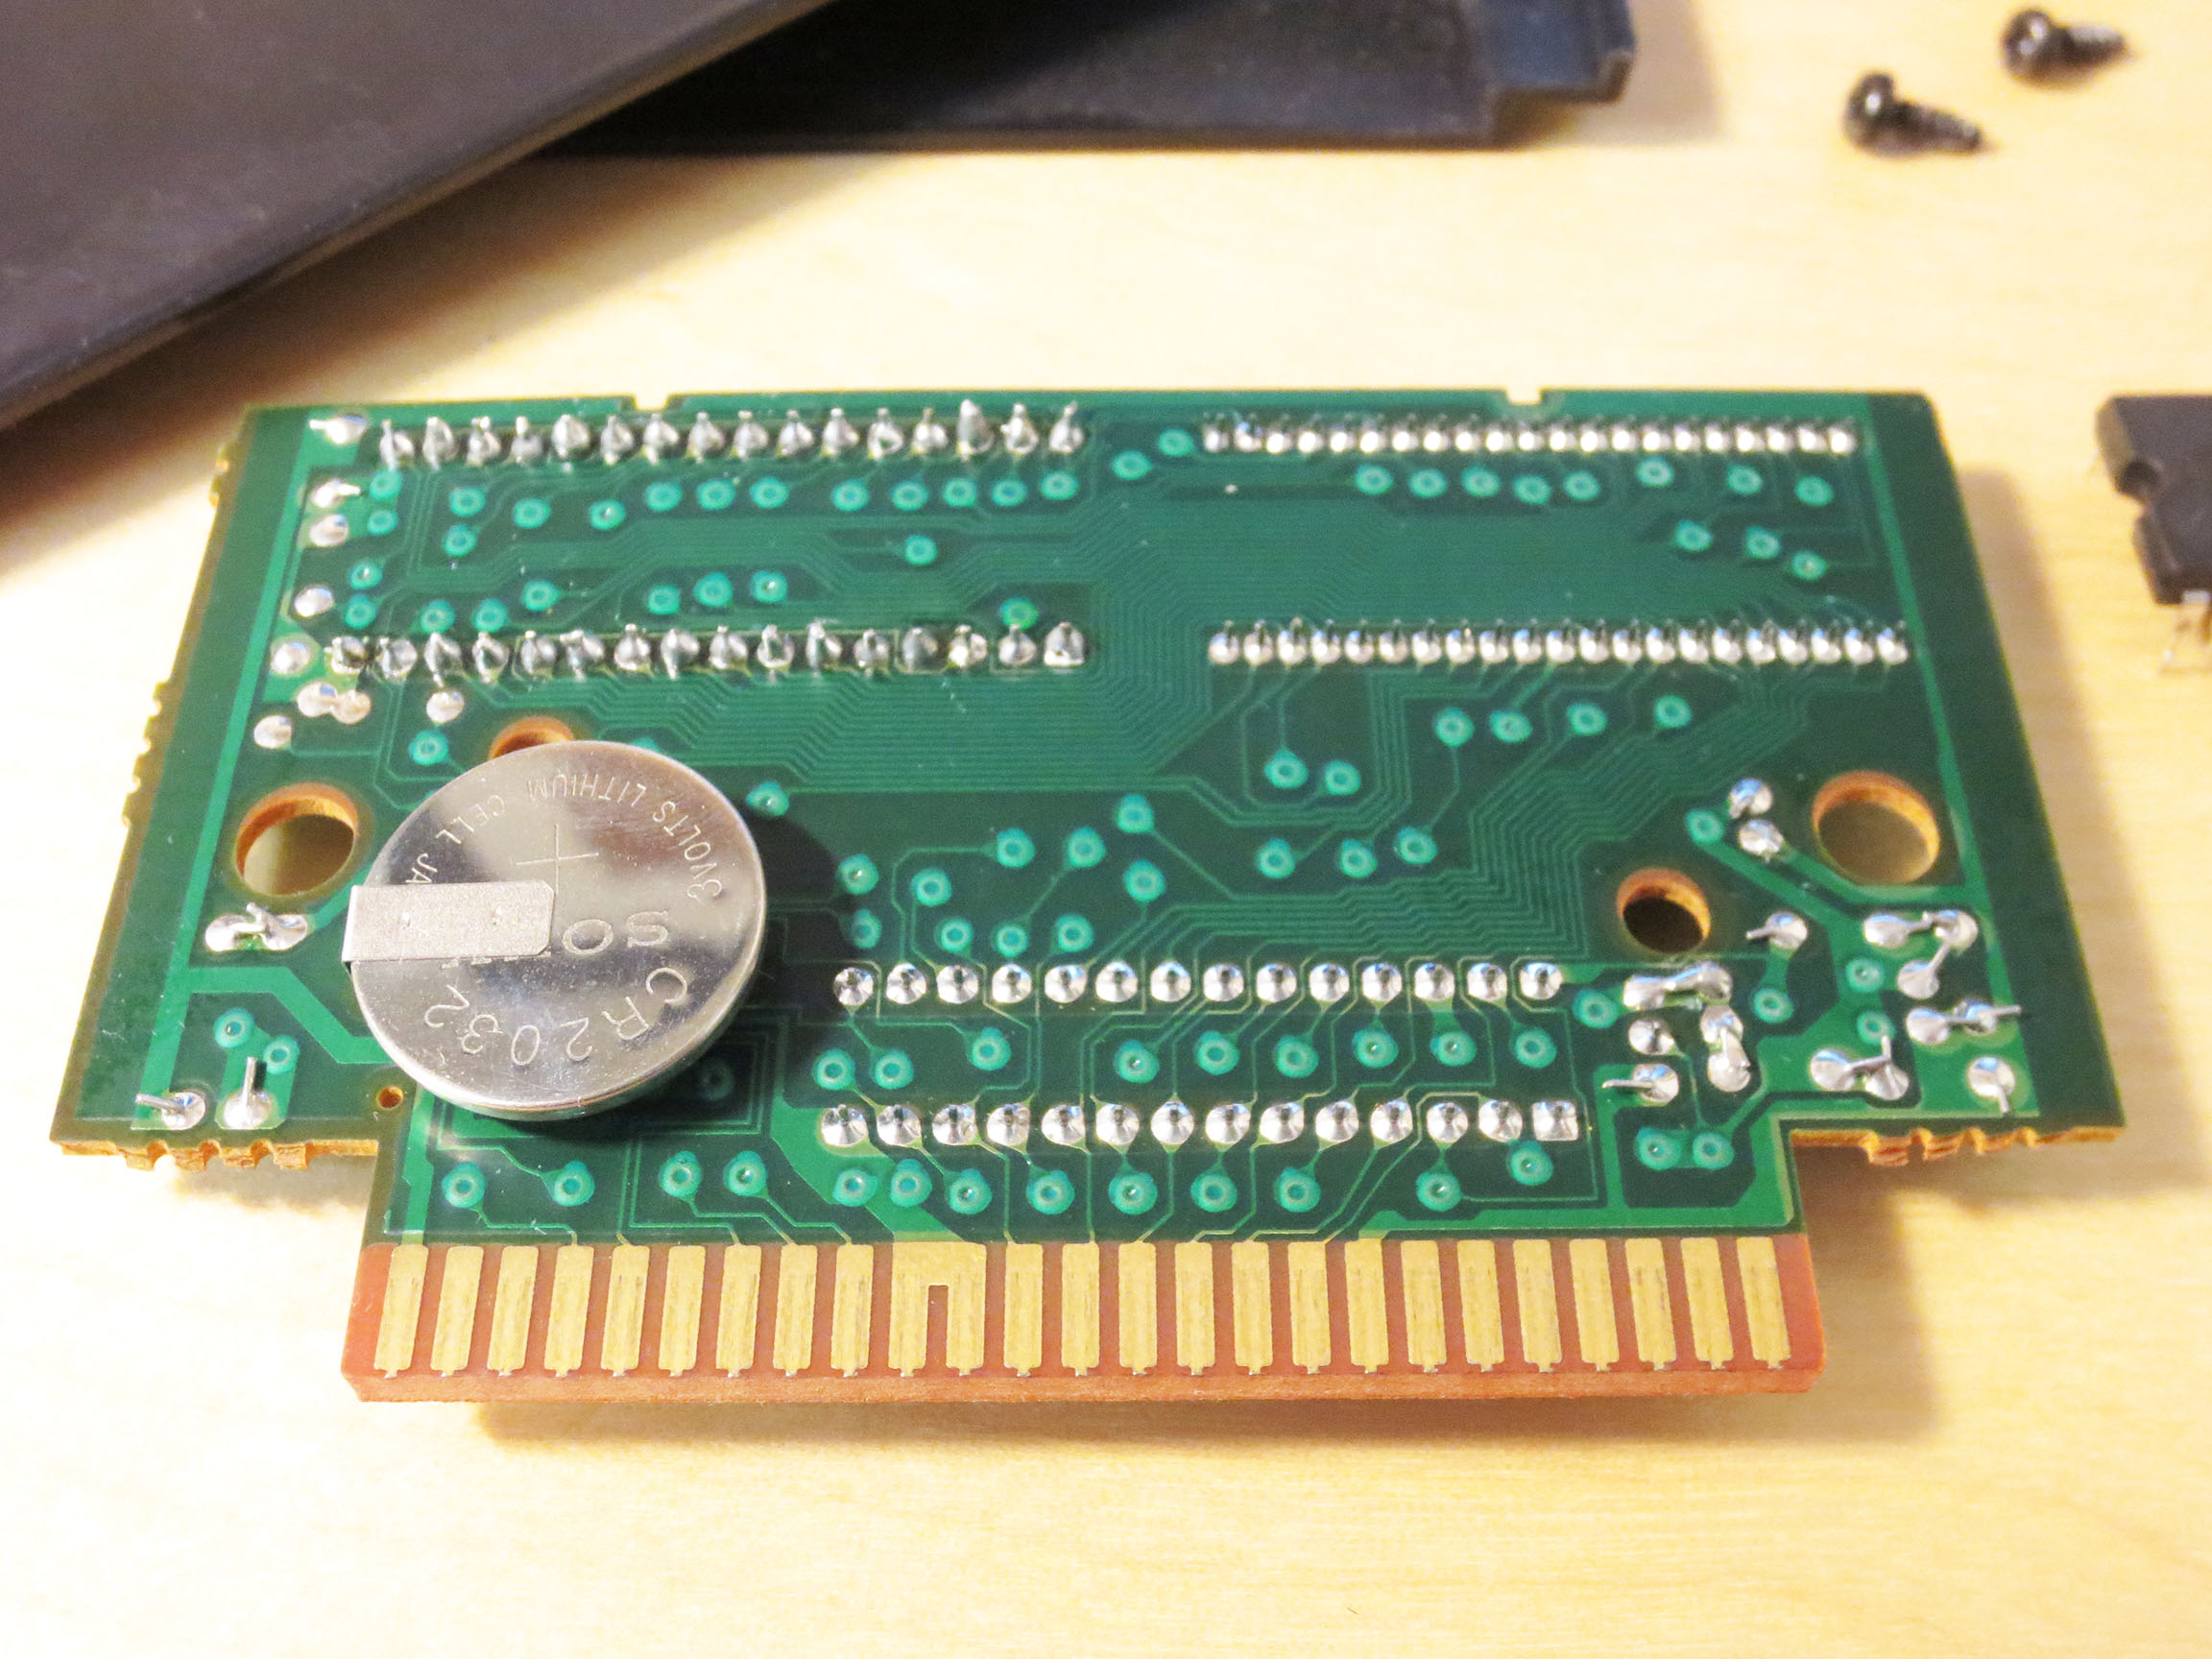
Above is the finished project. The IC (integrated Circuit) with the silver label with ‘PS’ written on it is an EPROM with the SMS Power Phantasy Star written to it. The IC just to the right is the original Phantasy Star ROM that I had to remove. I will keep it and cherish it always.
Close-Up Front
Close-Up Back
Above is a close-up of my work. It doesn’t look like much but it was a long road getting here. I had to learn a lot of new tricks to get this done. And anyone who solders I’m sure will agree that the job I did is pretty messy. I believe both my Soldering Iron and Solder were too large for the job. Next time I think I can do better.
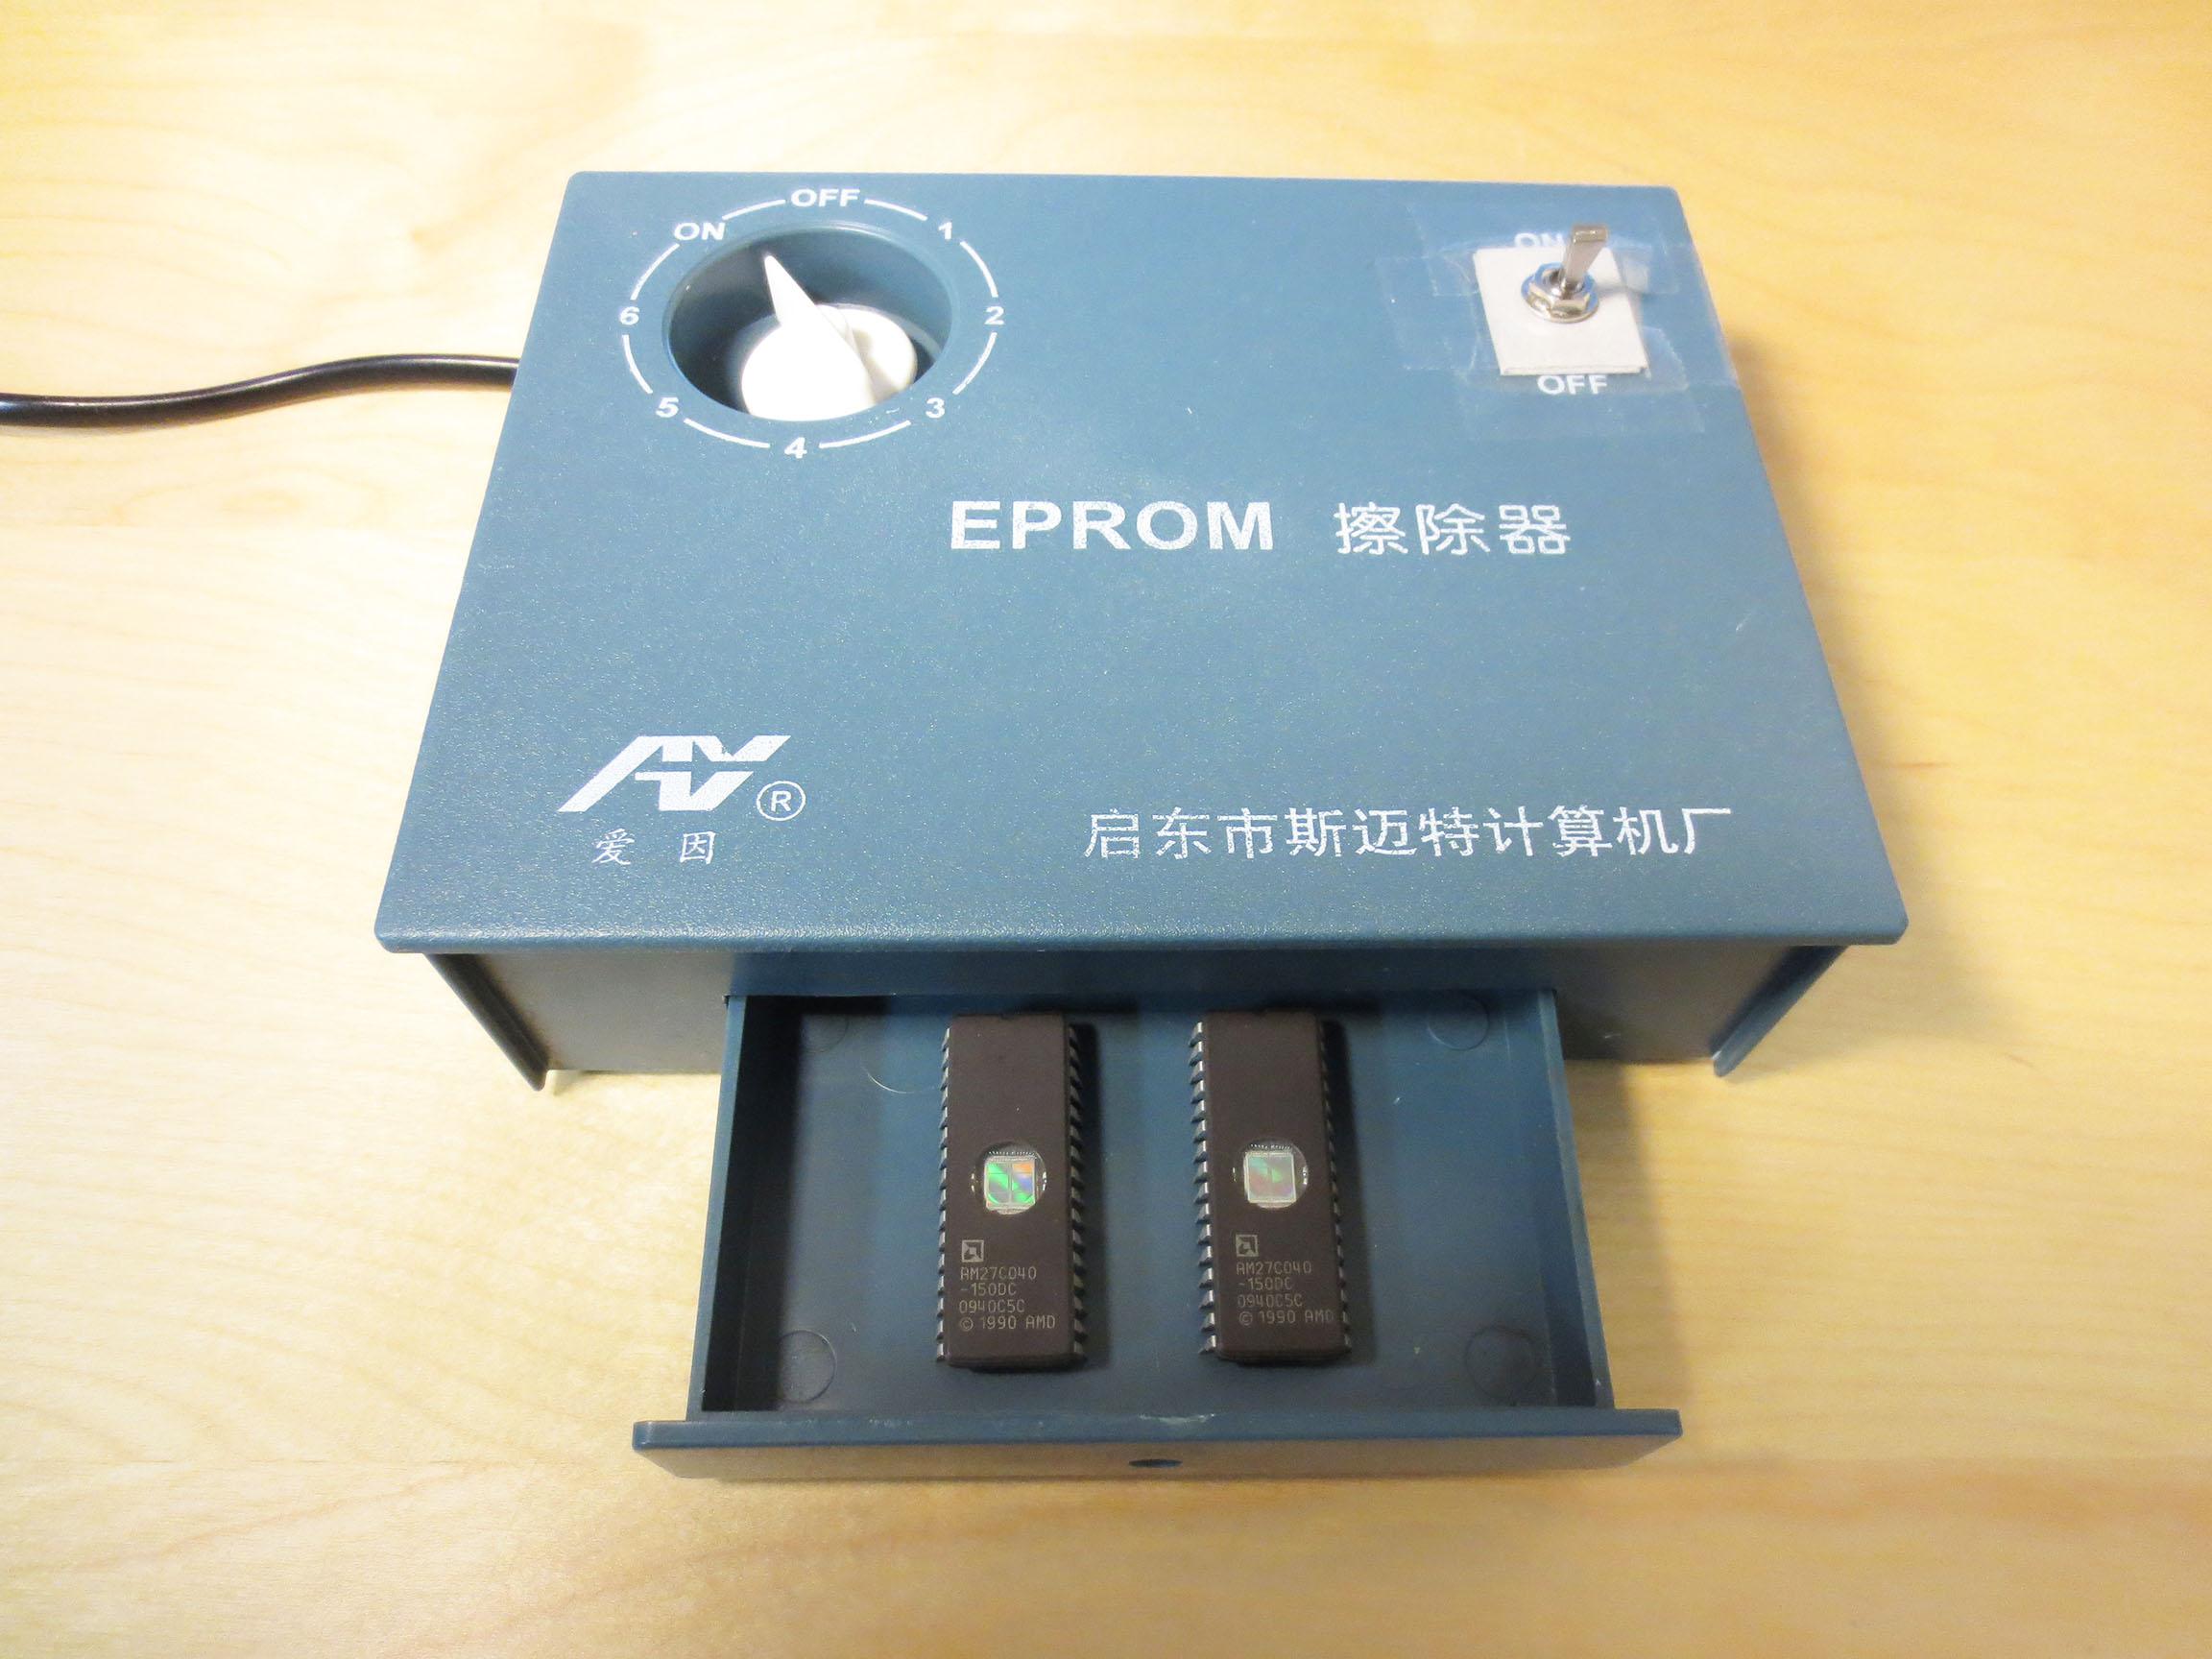
UV EPROM Eraser
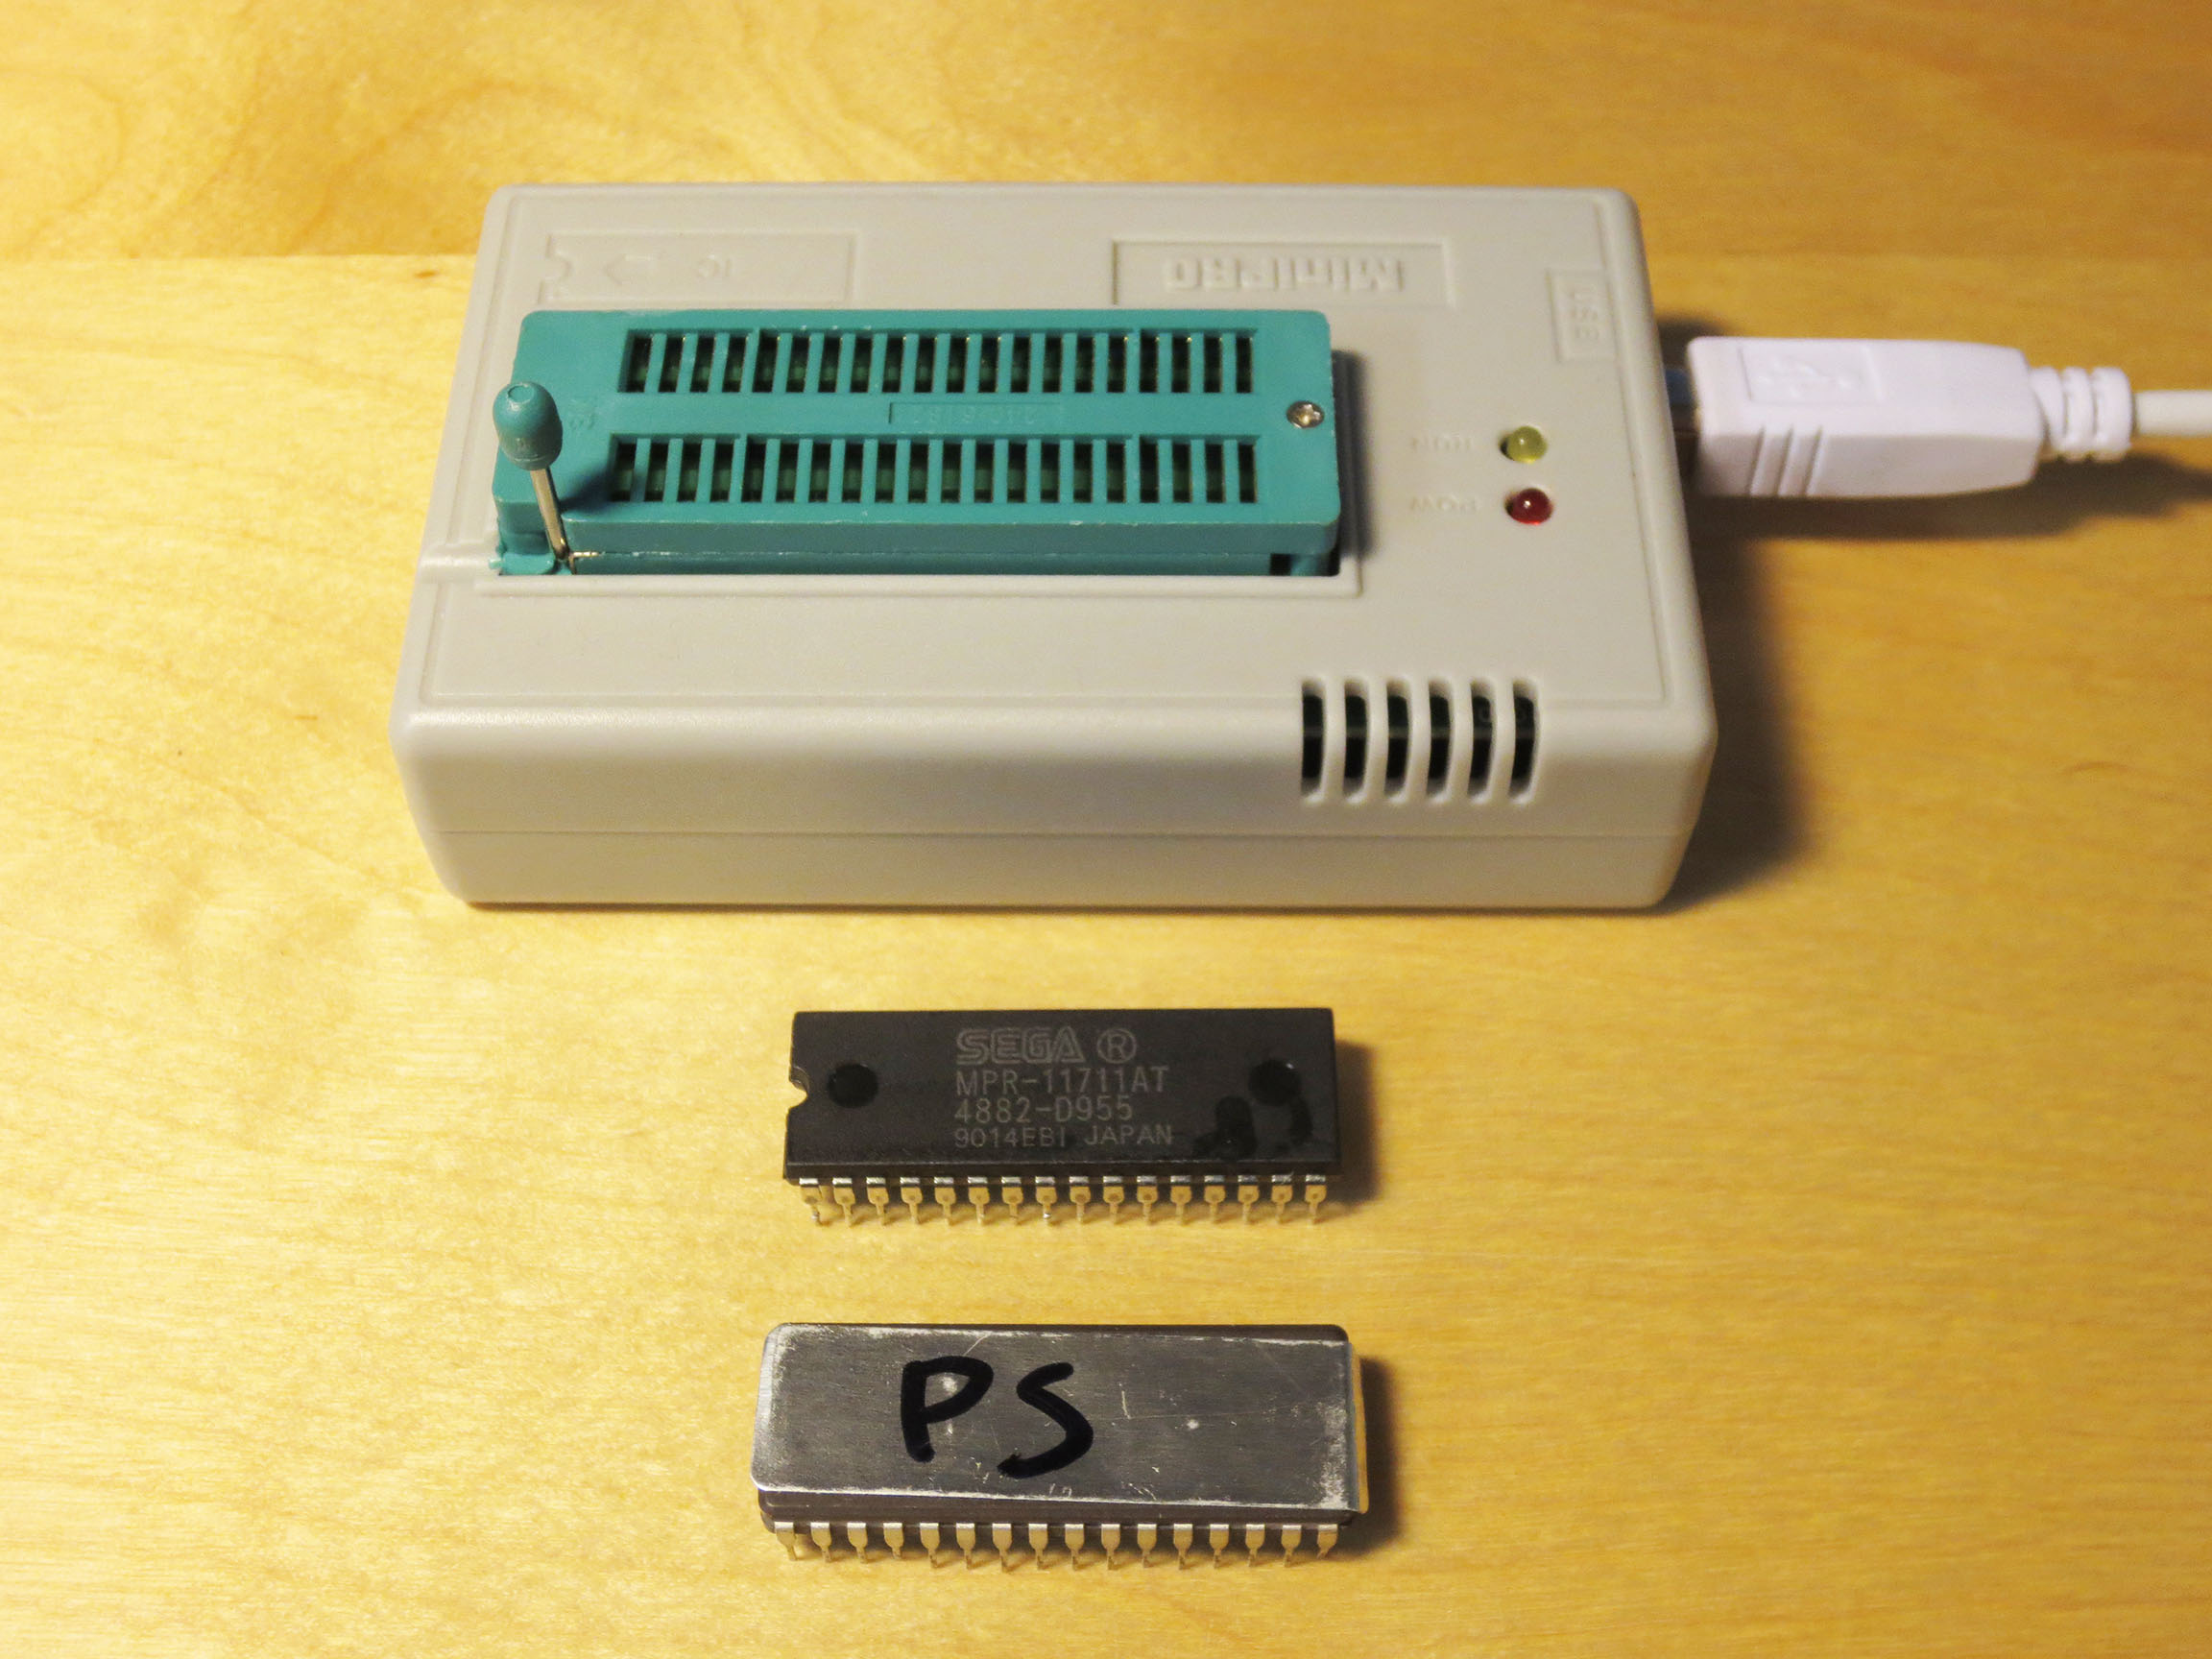
MiniPro IC Programmer
Preparing the EPROM is where I had a lot of trouble. The two tools I needed to purchase were an EPROM Ultra Violet Eraser and an IC programer. I also bought two IC’s (chips) to write the SMS Power Phantasy Star ROM to (I wanted a backup in case I broke one). Both of these ICs could not be read by my MiniPro IC Programmer (and some others I had could be read). I suspect that there is something wrong with my MiniPro IC Programmer but there are so many variables for a novice like myself that I just can’t be sure where I was going wrong:
Are the EPROMs I purcahsed OK?
Did I erase the EPROMs correctly?
Was I using the the programmer correctly?
The solution I came up with was to have someone else write the software (the game) to the ERPOM for me. I found Fox1 over at the neo-geo.com forums who for a very small fee burned the SMS Power Phantasy Star onto an appropriate EPROM for me.
When I received the EPROM I soldered it into the Phantasy Star circuit board and it worked and played perfectly in my Sega Master System.
Even though I took the long way around I am really happy to have the SMS Power Phantasy Star on a dedicated Cartridge. It’s a quality fan project that was entirely worth the effort!
Below is a recording of the first 1 hour 29 minutes of me playing my new Phantasy Star on actual hardware. I loved every minute and I’m still going strong 🙂
You can jump around the video to see some of the new dialog and hear the music and sound effects in FM. The longer I played more I started to prefer the FM music over the default PSG music.
You will hear Phantasy Star in full FM sound because previously I installed the FM Sound Board into my Sega Master System.
This is my Sega Master System. There are many like it, but this one is mine.
…and it’s about to become unlike most.
It was actually a long time ago when I first discovered etim.net.au and this excellent aftermarket product made by Tim Worthington for the Sega Master System (SMS).
The FM (Frequency Modulation) Sound Unit is something that came stock with every Japanese Sega Master System but not in any other SMS model. What it did was simple; it greatly enhanced the audio quality of the Sega Master System.
The Japanese Sega Master System included a Yamaha YM2413 FM synthesis chip along with the standard PSG sound. Many games, some of which were never even released in Japan, contain extra FM sound and music. Installing this board will add FM sound capability to any Master System, Mark III, Game Gear*, or Mega Drive* game console. Source
If you have a non-Japanese Sega Master System you’ve been listening to ‘Programmable Sound Generator’ (PSG) music and sound. The difference between PSG and FM sound is very noticeable and for several notable games I find the FM sound to be much better.
You can see (in the images below) by looking at my brand new and still in the package Soldering Iron that I’m new to soldering. This is the biggest reason why it has taken me so long to get around to this mod. Fear.
I have a good condition Sega Master System that works perfectly. There is nothing wrong with it and was so afraid of killing it. There is a distinct point of no return when applying this mod…
This is my Sega Master System
This is my SMS on the Operating Table
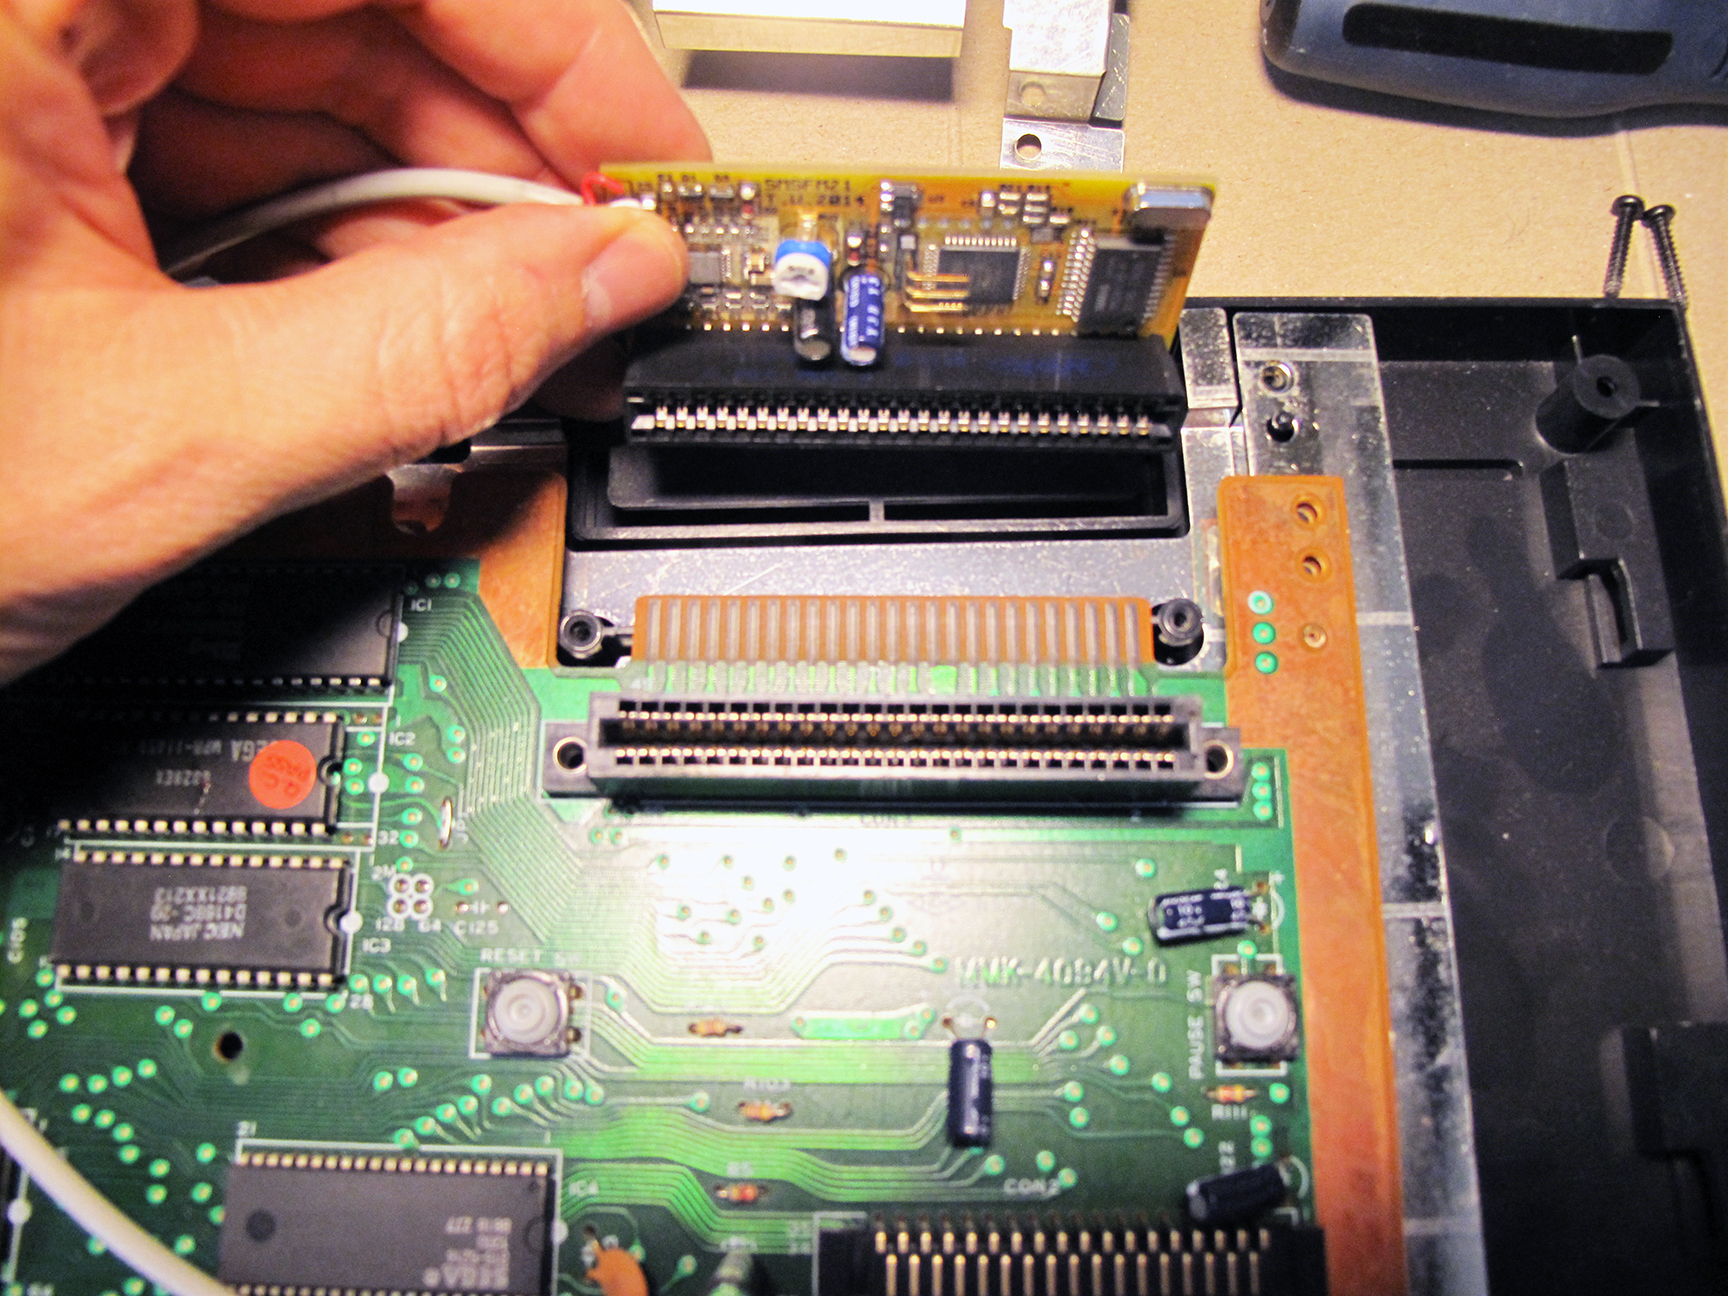
The easy part was purchasing this custom made FM Sound unit from etim. For $71 (after shipping) I acquired this small bit of hardware that would transform my NTSC Sega Master System into what it should have always been. And finally making it an equal to it’s Japanese sibling.
From etim I also found instructions for installing the FM Sound Unit. My FM Unit is version 2.1 and my SMS is NSTC so I knew which instructional diagram to reference.
What I didn’t notice was the appended note that stated:
“Note that the diagram below is incorrect, the white/red indicators are swapped around.”
My Sony chip actually showed a different number. But I was still confident that I was in the right area of the Mother Board.
Yeah, you guessed it. I did it wrong the first time around! But as hard as soldering can be for a novice it’s also forgiving and you can undo many mistakes.
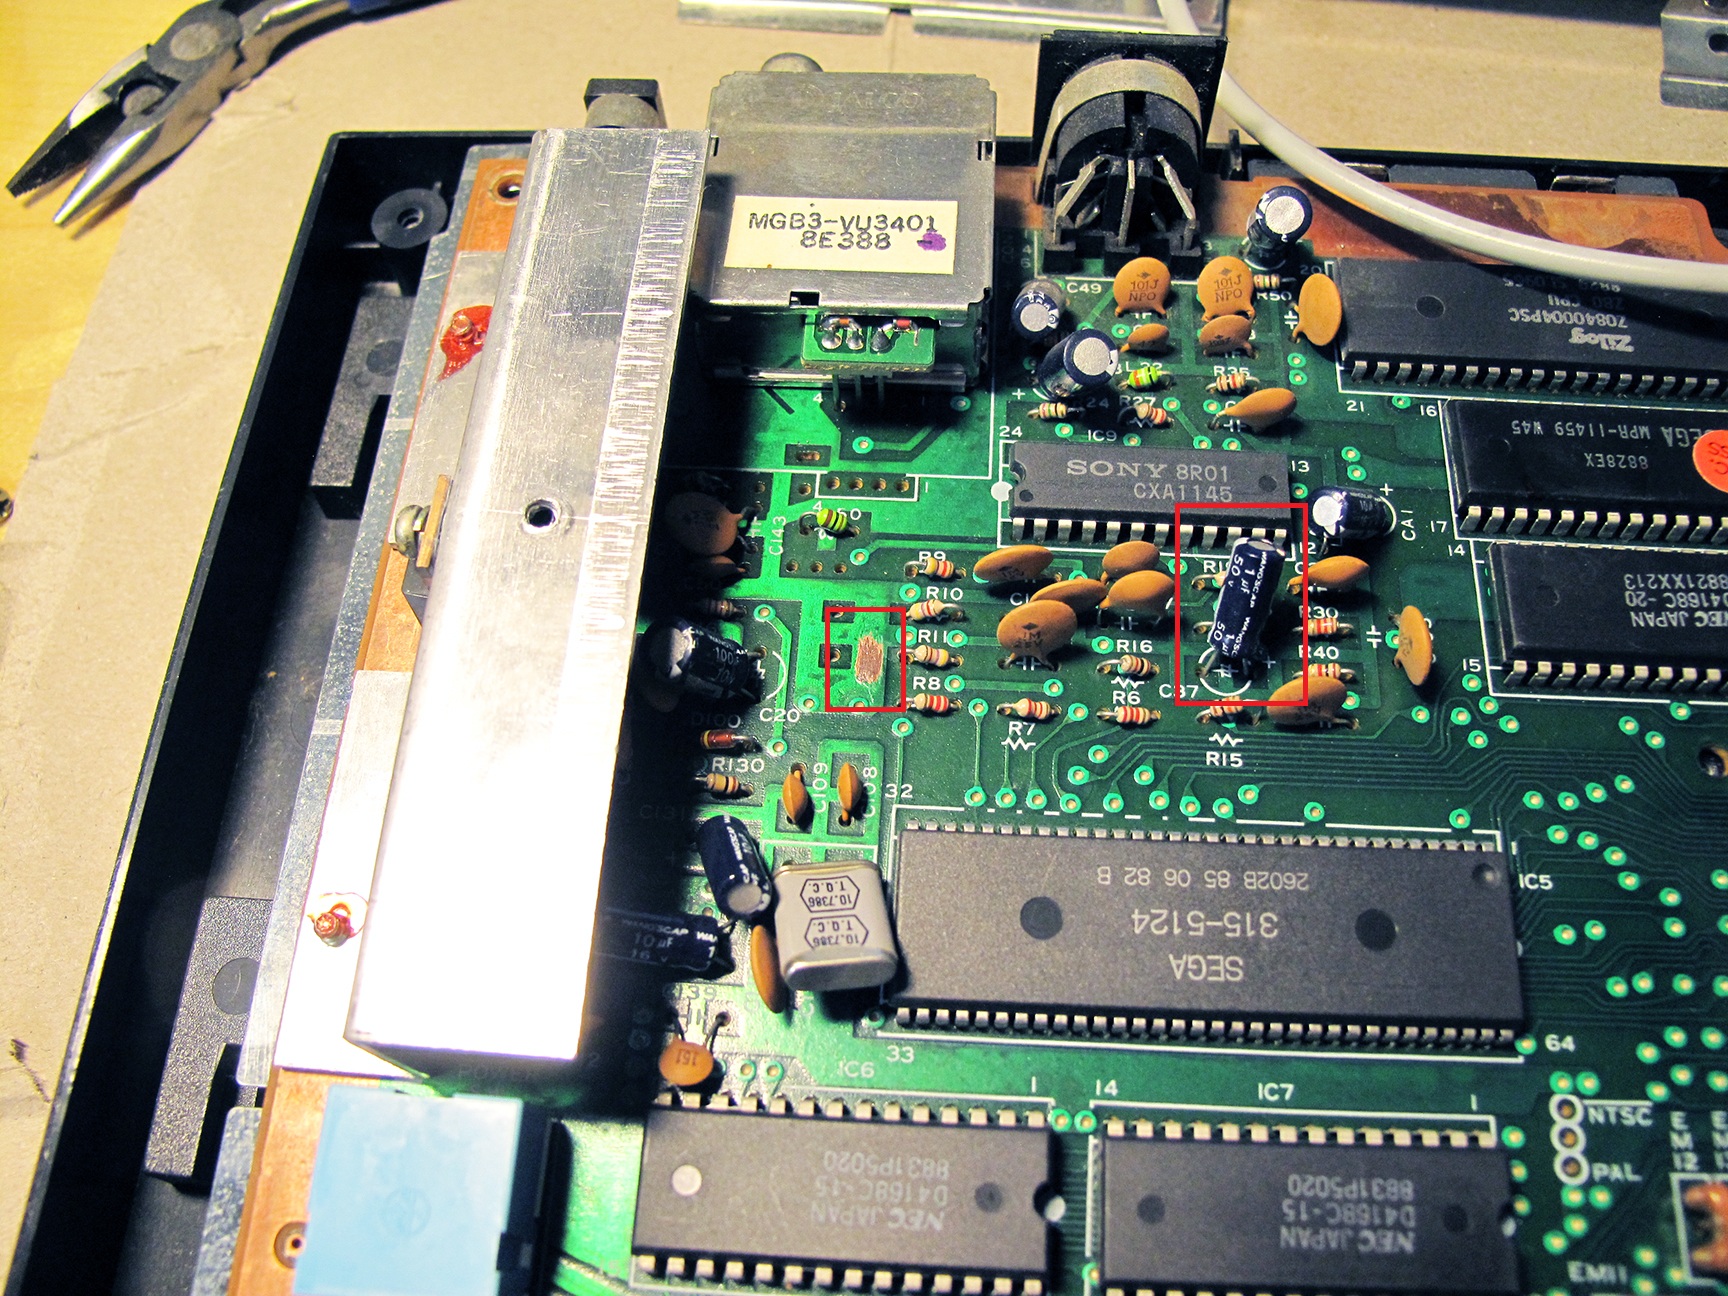
Here’s a close up of my SMS mother board highlighting (in Red) the three areas where the work will be done:
My SMS before the point of no return.
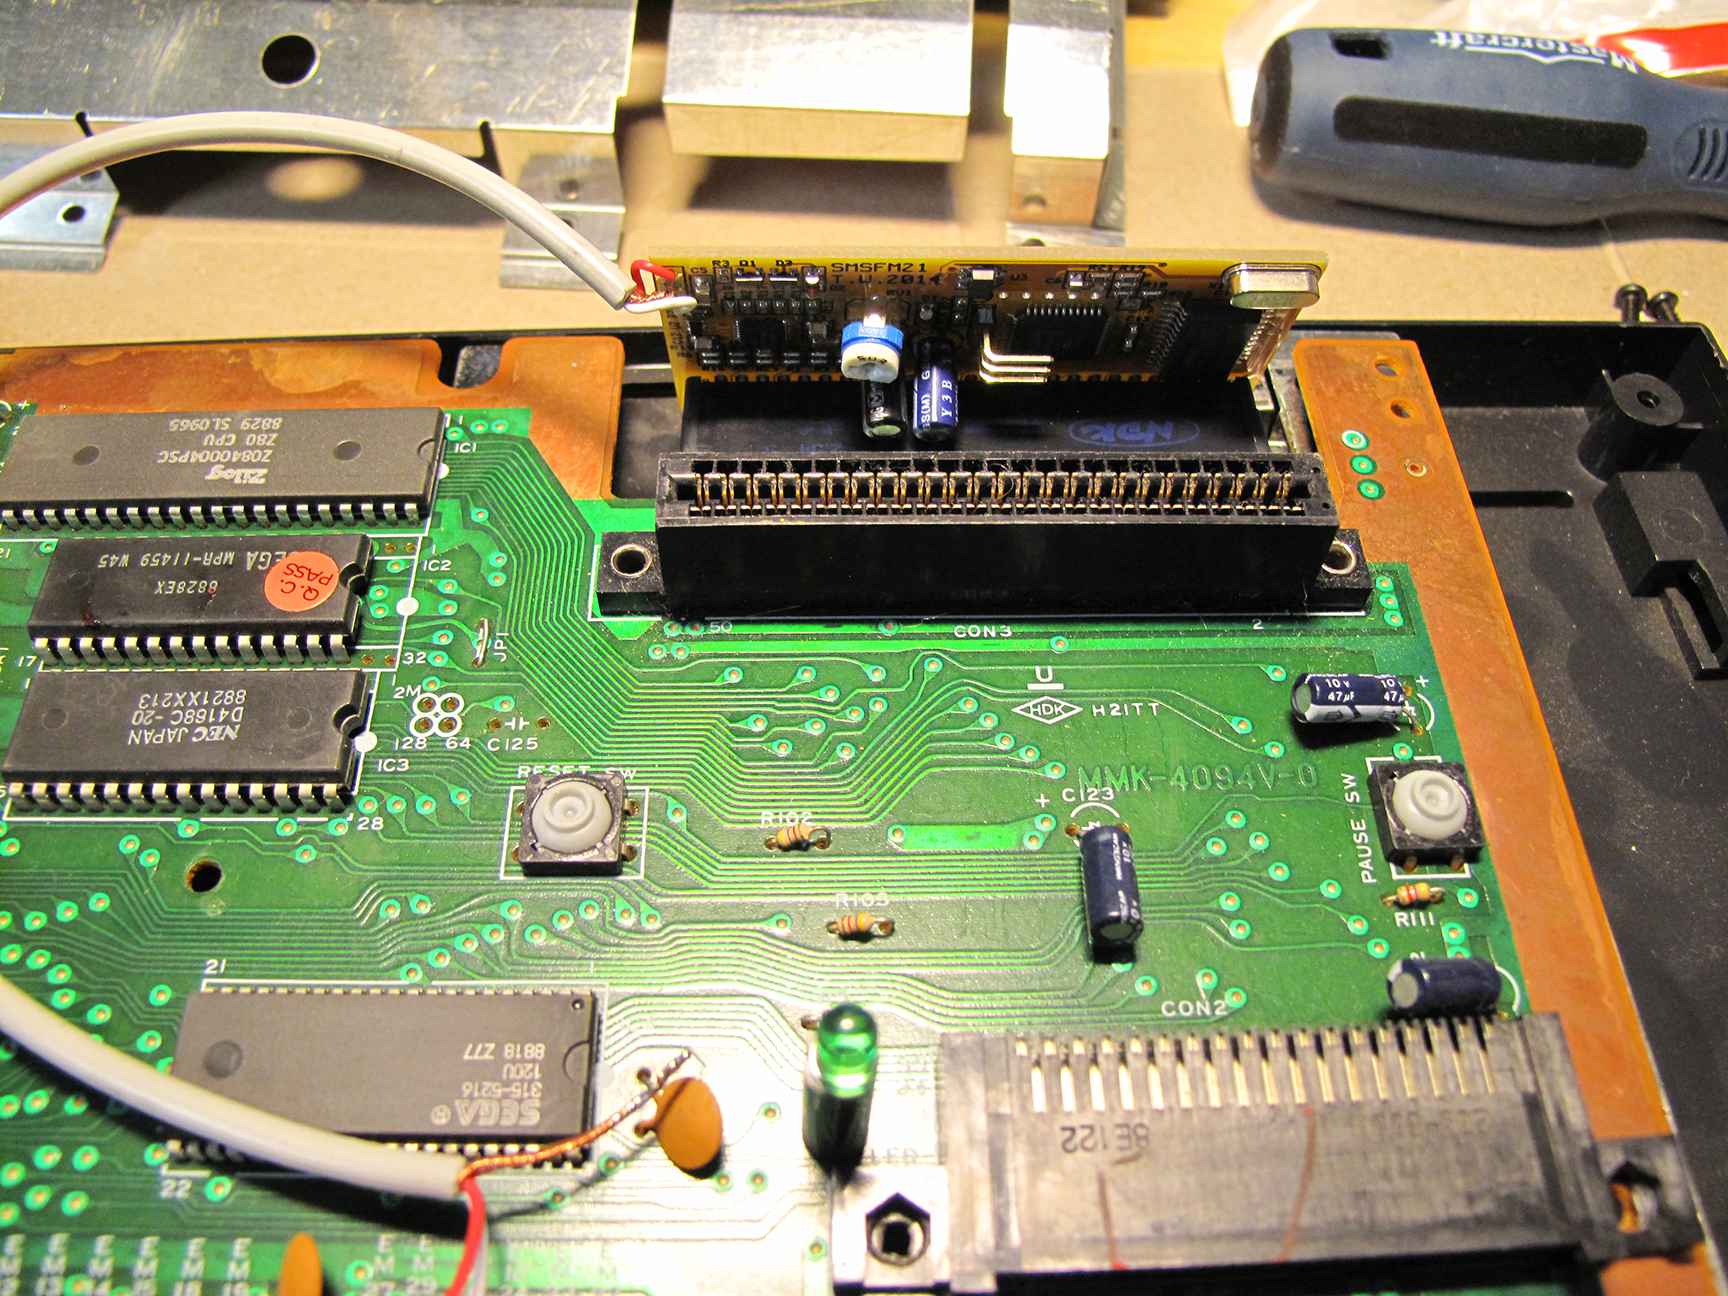
The first step was to install the FM board on the expansion port on the back of the SMS, just behind the cartridge slot. It’s stiff but popped into place very nicely. So far so good!
On the count of 1,2…3!
Installed! …the easy part.
Next I had to prepare three areas on the motherboard for soldering. This involved scratching away some of the green coating on the PCB (Printed Circuit Board) to expose an area to solder the copper ground from the FM unit.
I also had to remove a capacitor. Cutting off the capacitor at C37 was really the scariest moment of this mod. It really felt like the point of no return. Without this capacitor the SMS would still work but there would be no sound. I discovered this when I had my Red and White wires reversed when testing after my first attempt.
Exposed area for Ground. (Left Square)
Cut off capacitor. Replaced with 2 wires.
I really didn’t feel confident about cutting off the blue capacitor that you see in the image above (left). The capacitor stands on two legs and I cut it off leaving both legs behind. I though doing this would make it easier to solder the two FM wires to remaining legs. After reading a bit more about soldering I think I should have removed the legs and soldered my wires directly into the wholes that would have been left behind had I completely removed the legs. I might revisit this someday.
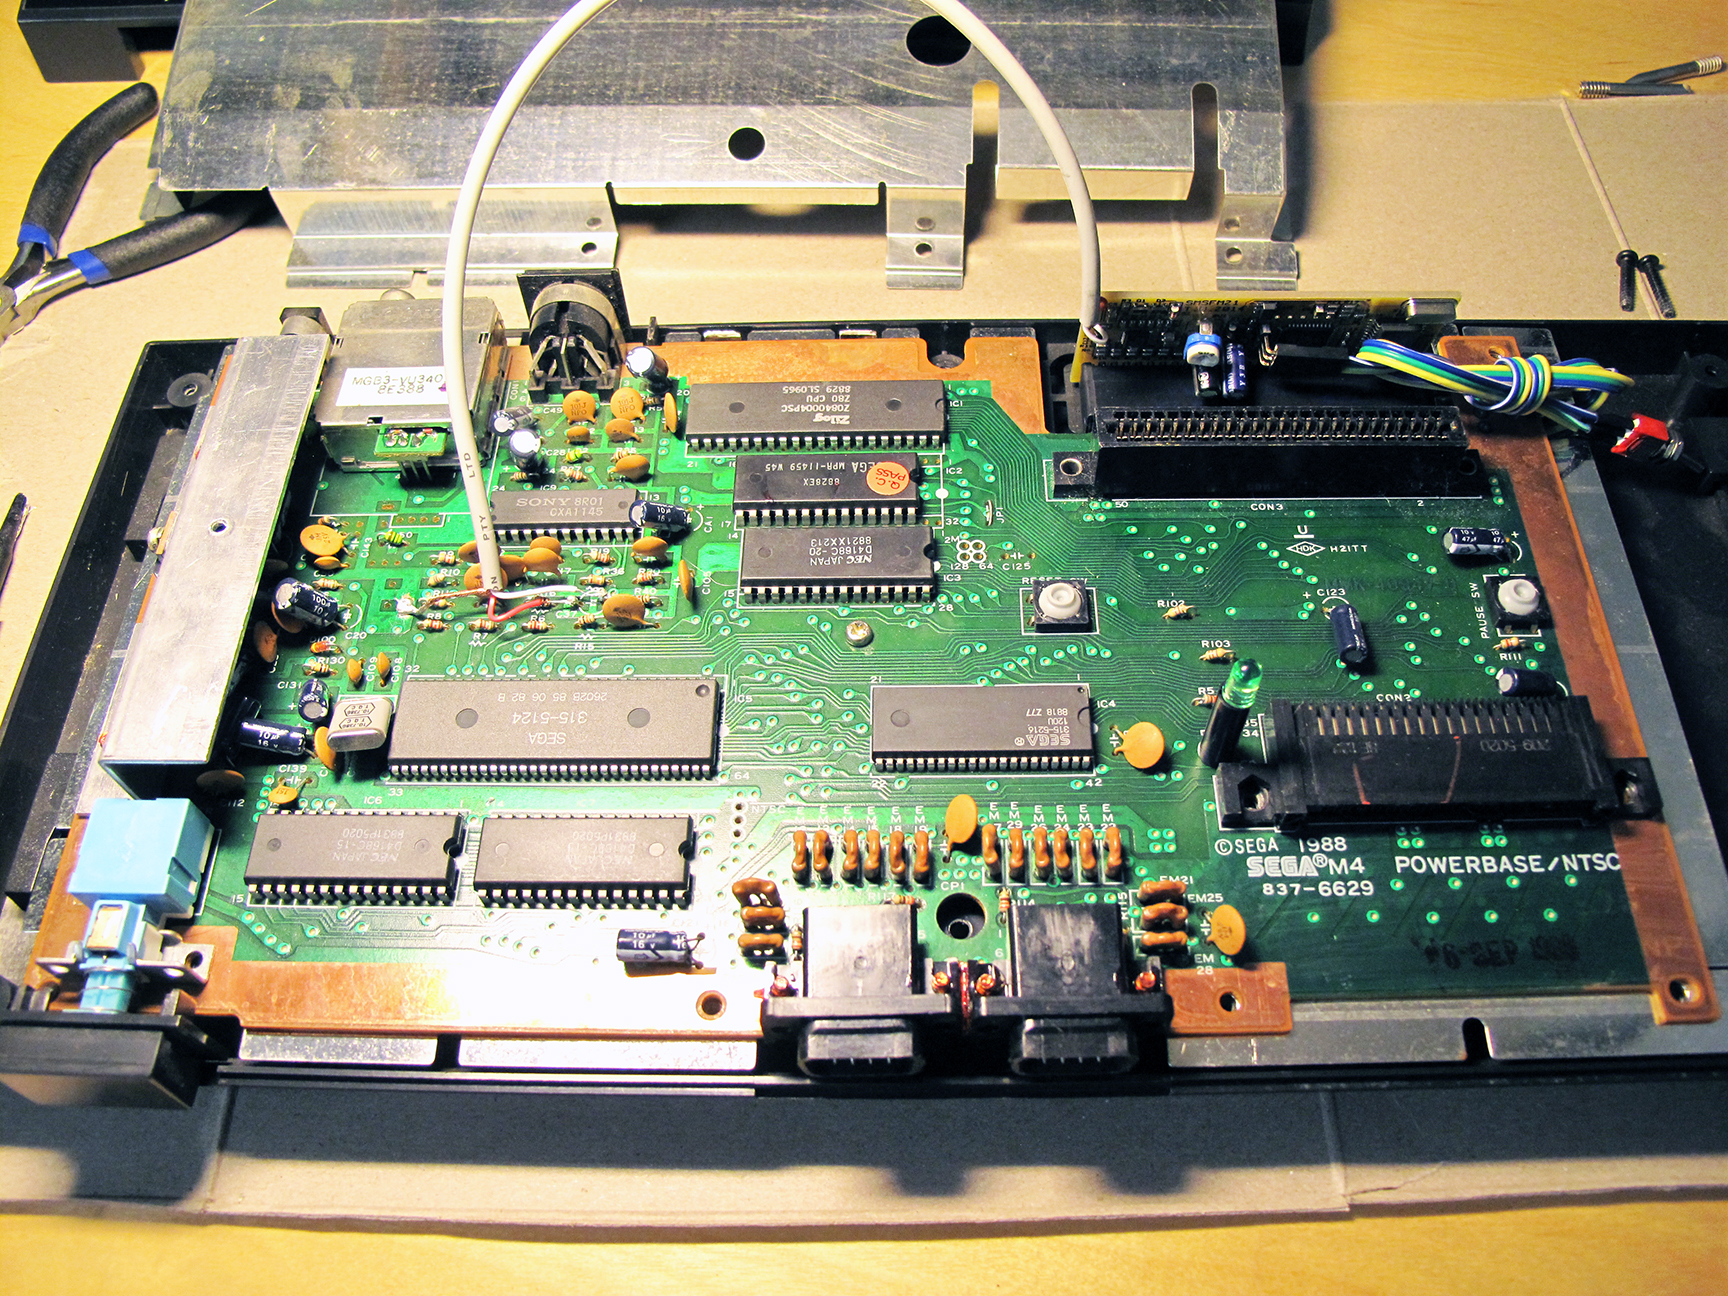
Here’s a zoomed out image of the finished job:
My newly install FM Sound Unit.
The mod comes with a 3-way switch which easily connects to the FM unit. This switch allows you to toggle the FM unit into 3 modes. Original PSG sound, FM Sound and Japanese FM Sound.
Some Master System games (such as Monster World III: The Dragon’s Trap) would only play the games FM sound on Japanese region systems. This switch allows for all options to ensure you’ll get to hear the magic of FM sound for any game that has it.
Note: My NTSC Monster World III did not play FM sound. Some versions of games had their FM sound code removed. I’m going to guess that Monster World III would play FM sound if I used the Japanese cart (with an adapter to make it fit my NTFS SMS). I don’t have an adapter to test this theory.
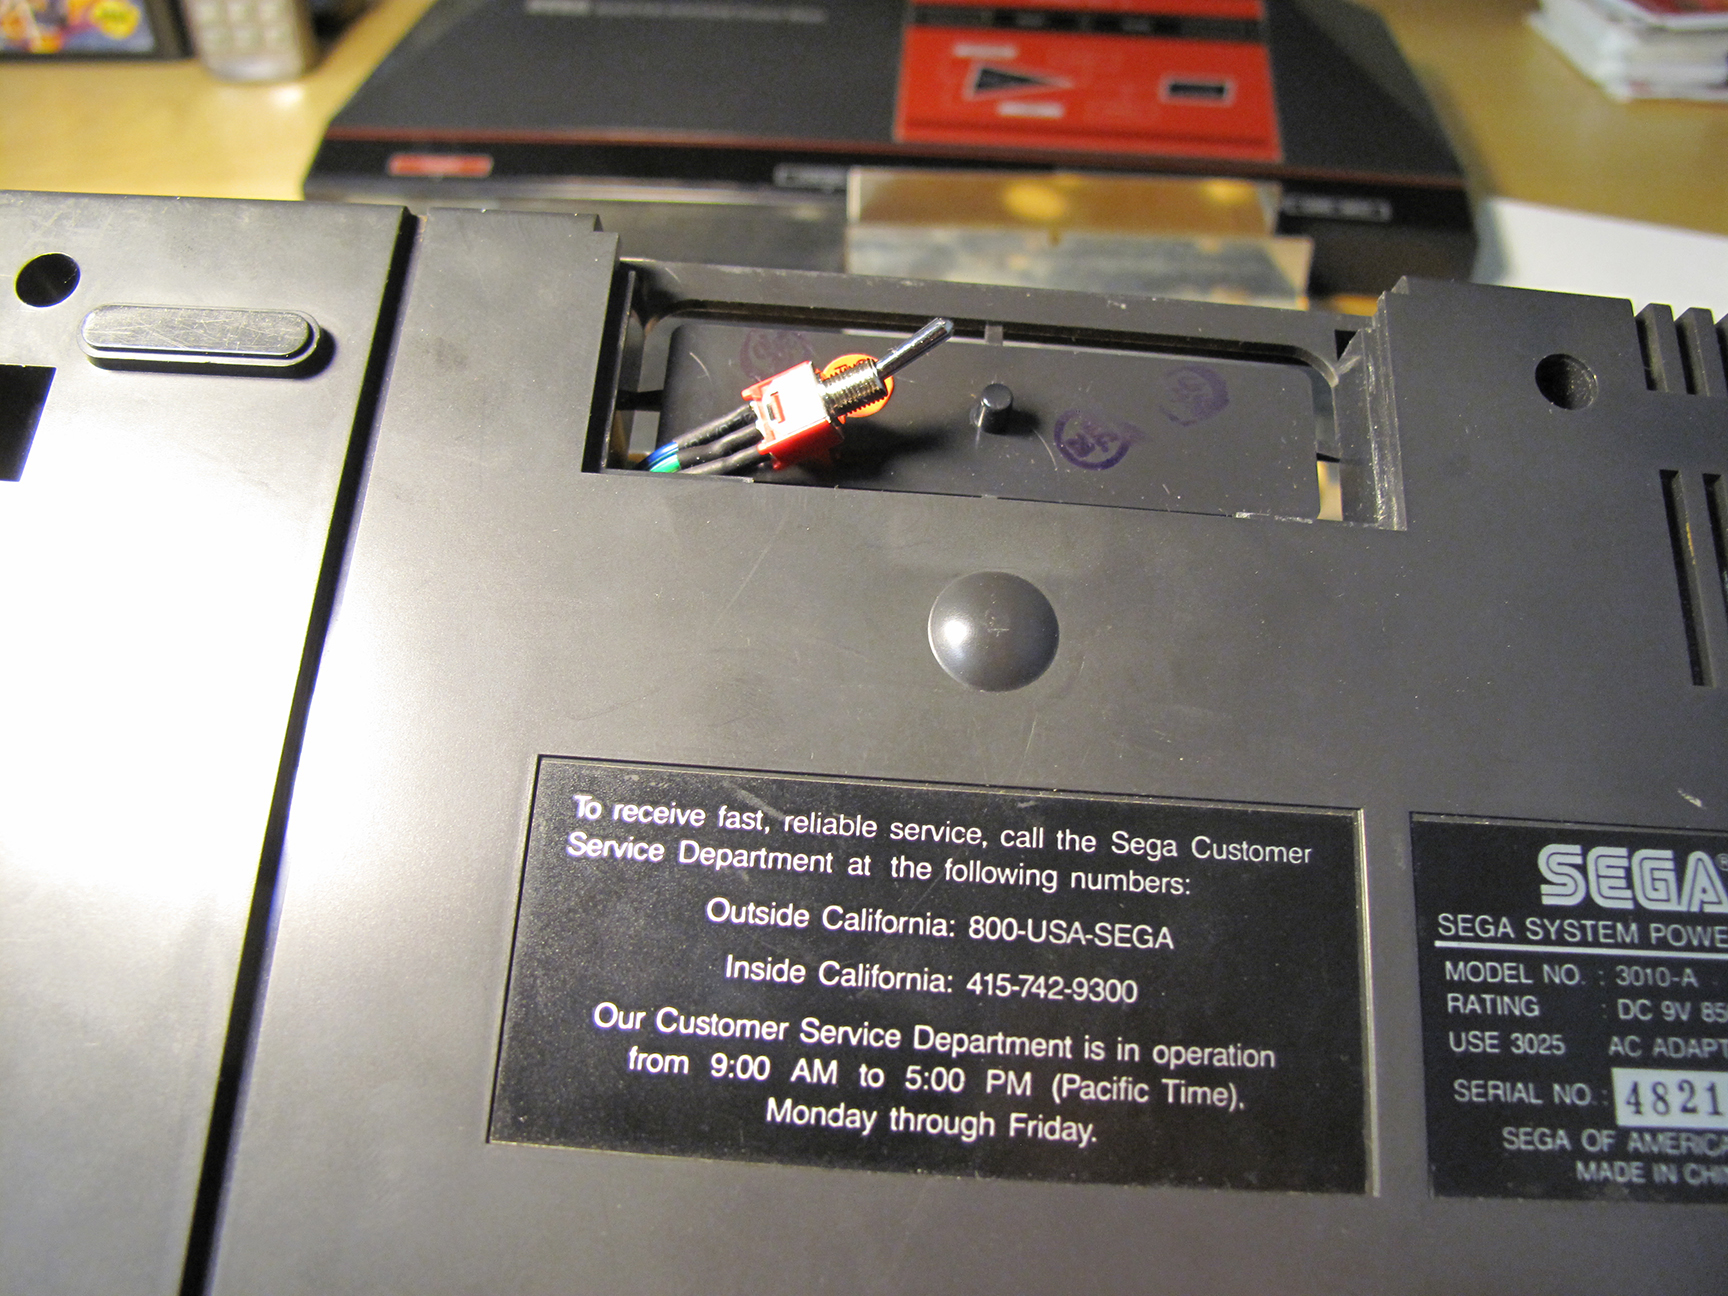
I was concerned about the wire for the 3-way switch getting in the way of a cartridge so I wanted to get it completely out of the way. I wrapped up some of the extra length and left enough to snake the switch down past the mother board and through a hole in the plastic of the case that leads to a small compartment on the bottom side of the Sega Master System. This compartment has a removable cover and it was there to support some add-on that Sega never ended up using. For me this was the perfect place to put the switch. It’s hidden but still accessible without having to take the whole case off the SMS. And I didn’t have to further modify my SMS by cutting holes into it.
The idea was that once I got the cover back on the SMS would look pure and unmodified. I’m not opposed to drilling a clean hole to mount the switch but for now I’m happy with this solution.
Snaked the wire under the Board and through the plastic casing.
The original cover will still easy fit into place; completely hiding the switch.
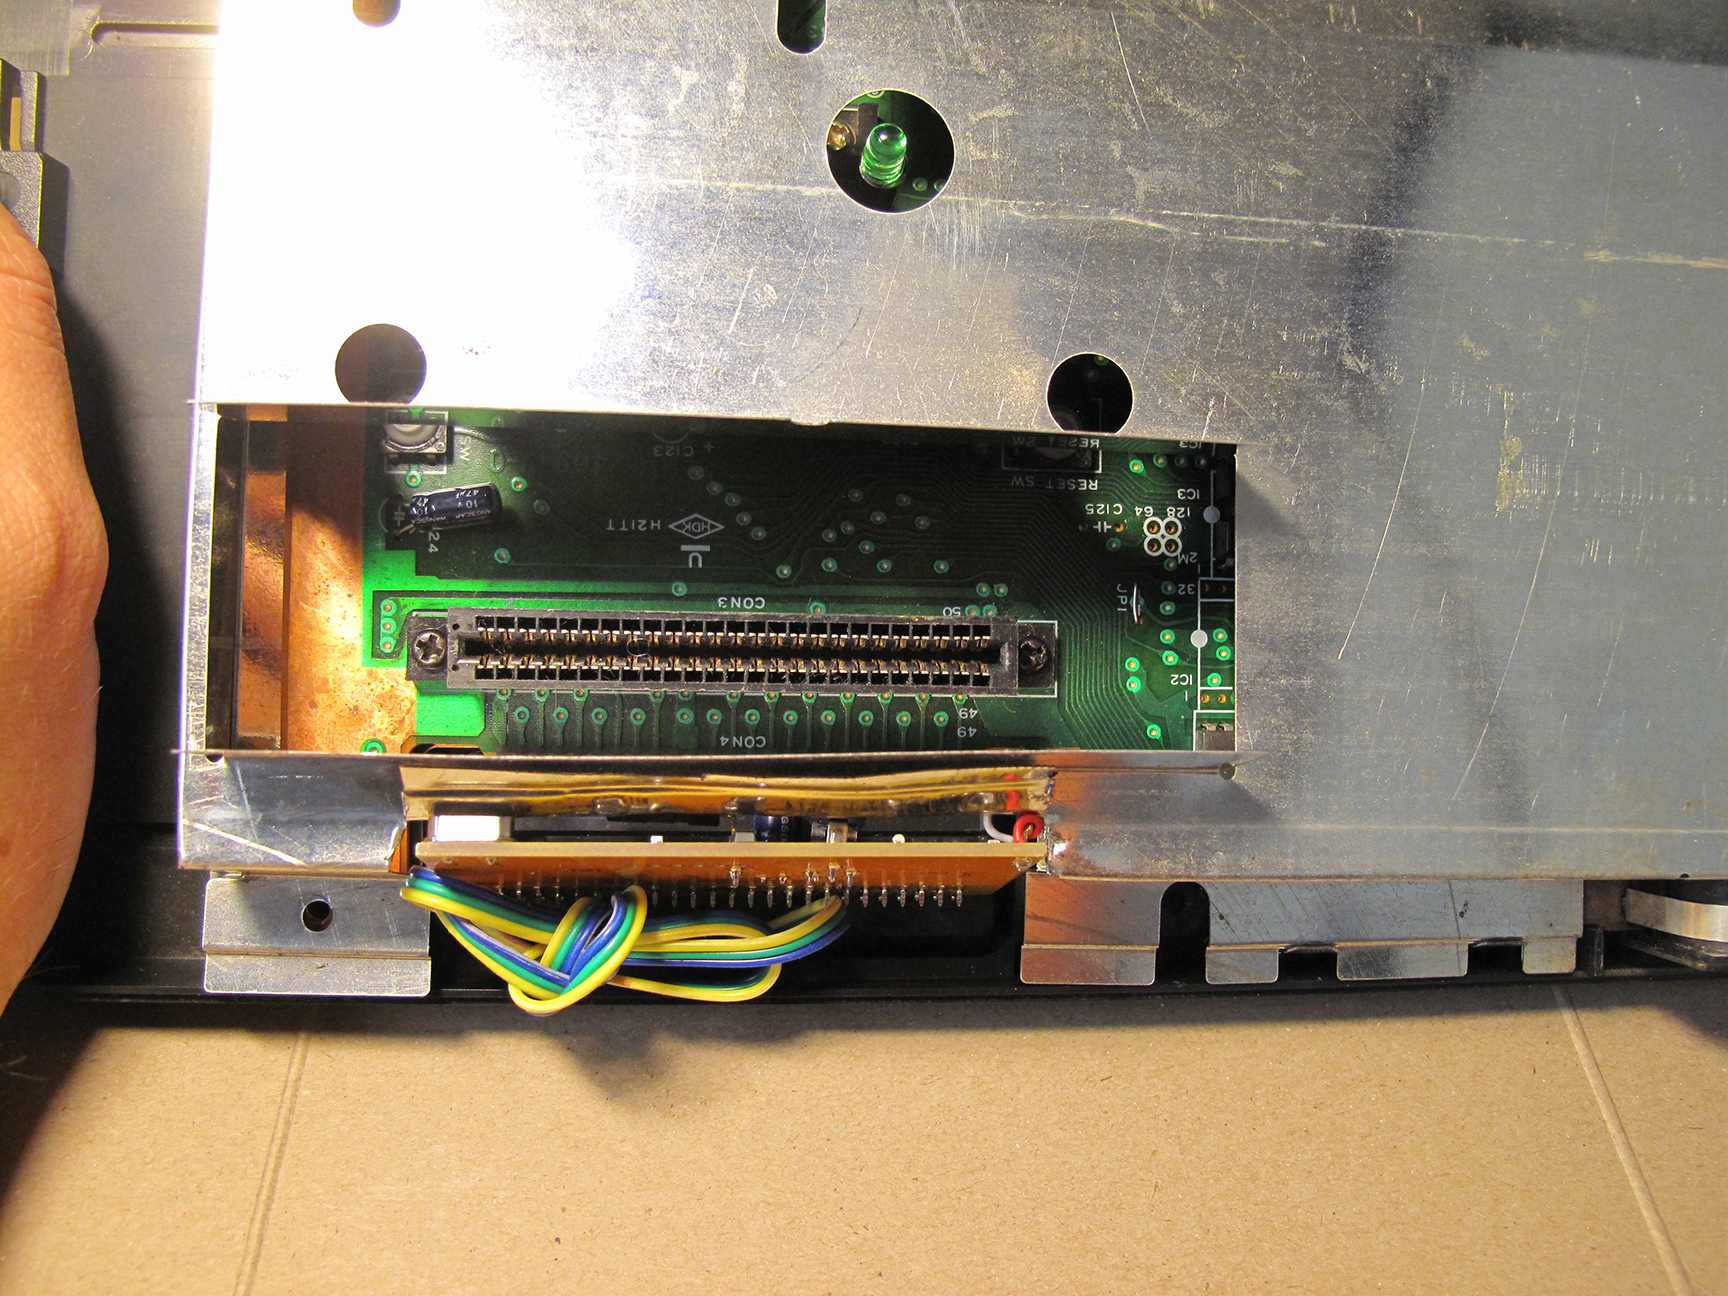
Now it’s time to re-assemble! First put the shield back on… It won’t fit anymore. OK, so my SMS has to endure some more permanent modifications. I cut off all of those metal flaps you see below (left) and folded up the remaining piece so that it was out of the way. The wire cutters you see pictured didn’t work out. I had to switch to full blown tin snips to get the job done.
It wont close!
Time to cut again!
Now the shield fits! And everything is looking pretty clean and tidy.
It fits!
Top down view.
And what do I get for all of this effort?
The two video clips below I made from recording the games Miracle Warriors and Golvellius. For each I let the recording run for a full cycle of each selected tune; stopping the recording before the song looped and started again. I then edited the recordings so that the same tune in FM sound would play right after the PSG version. Making it easy to hear the difference.
For Miracle Warriors I chose to compare the PSG and FM version of: the Title Screen, the Travel/Map Screen, the Castle and Combat/Encounter tunes.
I did pretty much the same thing for Golvellius. Comparing the Title Screen, the Story Intro, Old Lady, Dungeon and Above Groundtunes.
For those of you don’t want to commit to listening to close to 14 minutes of comparisons feel free to skip forward through the videos, sampling as much or as little as you like 🙂
I haven’t yet heard the FM versions of all the games that support FM sound but I’ve heard many and to me Miracle Warriors is one that really stands out. I love the FM version for this game.
And while there is also a distinct difference when listening to Golvellius I found that both the PSG and FM sound were good. I can’t say for certain that I like the FM more than the PSG in this particular example. So as much as I am enjoying the FM sounds the default PSG is also pretty good.
Miracle Warriors PSG vs. FM Sound
Golvellius PSG vs. FM Sound
In the video below you can sample FM sound from several different games that support the feature. I’ve noticed that the good SMS games really benefit from the extra polish of the FM sound track. Giving an extra incentive to revisit some old favorites. But for weaker games (like Rampage, Altered Beast and Afterburner) the FM sound isn’t enough to make them more appealing.
I love the change the FM Sound Unit has brought to my Sega Master System.
The games that I think get the most out of FM Sound are Miracle Warriors, Fantasy Zone 2 and Double Dragon.
Note: I actually really like Phantasy Star with FM sound but the English version does not support FM so I’m not able to try it out first hand. There is a translated version with the FM code but it would take some work to get it on a cartridge.
What do you think? Is FM Sound superior, better, different but equal or worse than PSG?
I have to say after making just three solder joints and having this thing work as expected I felt like a GOD!!
Sure, I didn’t design or make the board and I don’t have a clue as to how it works but I applied heat. And that has to count for something.


 My Sony chip actually showed a different number. But I was still confident that I was in the right area of the Mother Board.